Touch Doesn't Work On My ColorSource 20 or 40
- Last updated
- Save as PDF
Issue
The LCD screen on my Colorsource Console will not register any touch. The factory menu's touch screen test did not fix this issue.
Opening the console
Before you begin
Setup a clean, well-lit work area and take appropriate ESD (Electro-Static Discharge) precautions.
Tools Needed
• Tweezers
• Phillips #1 Screwdriver
Steps
- Disconnect all cables and USB peripherals from the rear panel. Place the ColorSource console
upside down on a flat surface with the DMX connector(s) pointing away from
you. With connector(s) pointing away from you.

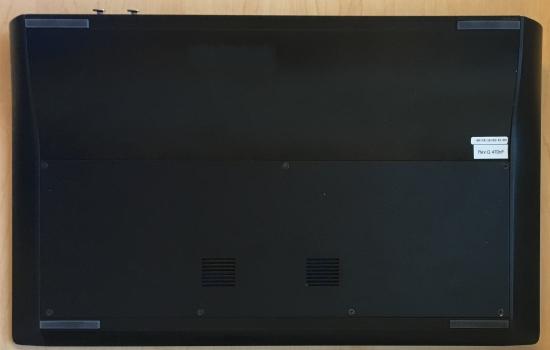
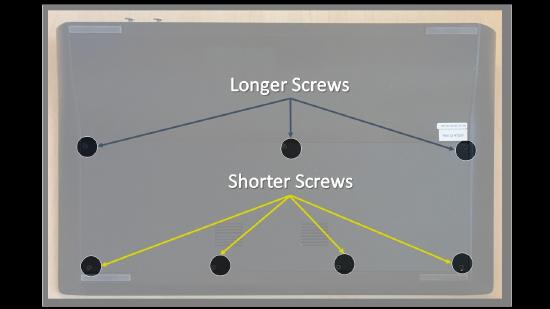
- Remove the #1 Phillips screws of the flat bottom panel as shown below. For a console with
20 faders, there will be (7) screws; for a console with 40 faders, there will be (8) screws. Note
that the screws in the middle of the console are longer than those on the outside. Separate
the screws and set aside the bottom panel.

- FOR BETTER ACCESS: Remove the #1 Phillips screws from the rear panel as shown below. There will be (8) or (10)
depending on the size of the console. These screws are the same as the short screws on the underside of the console.
Remove the curved back panel / extrusion and set aside.
If you need replacement screws, the ETC part numbers are:
Long: HWM2108
Short: HWM1169
Reseating the ribbon cable

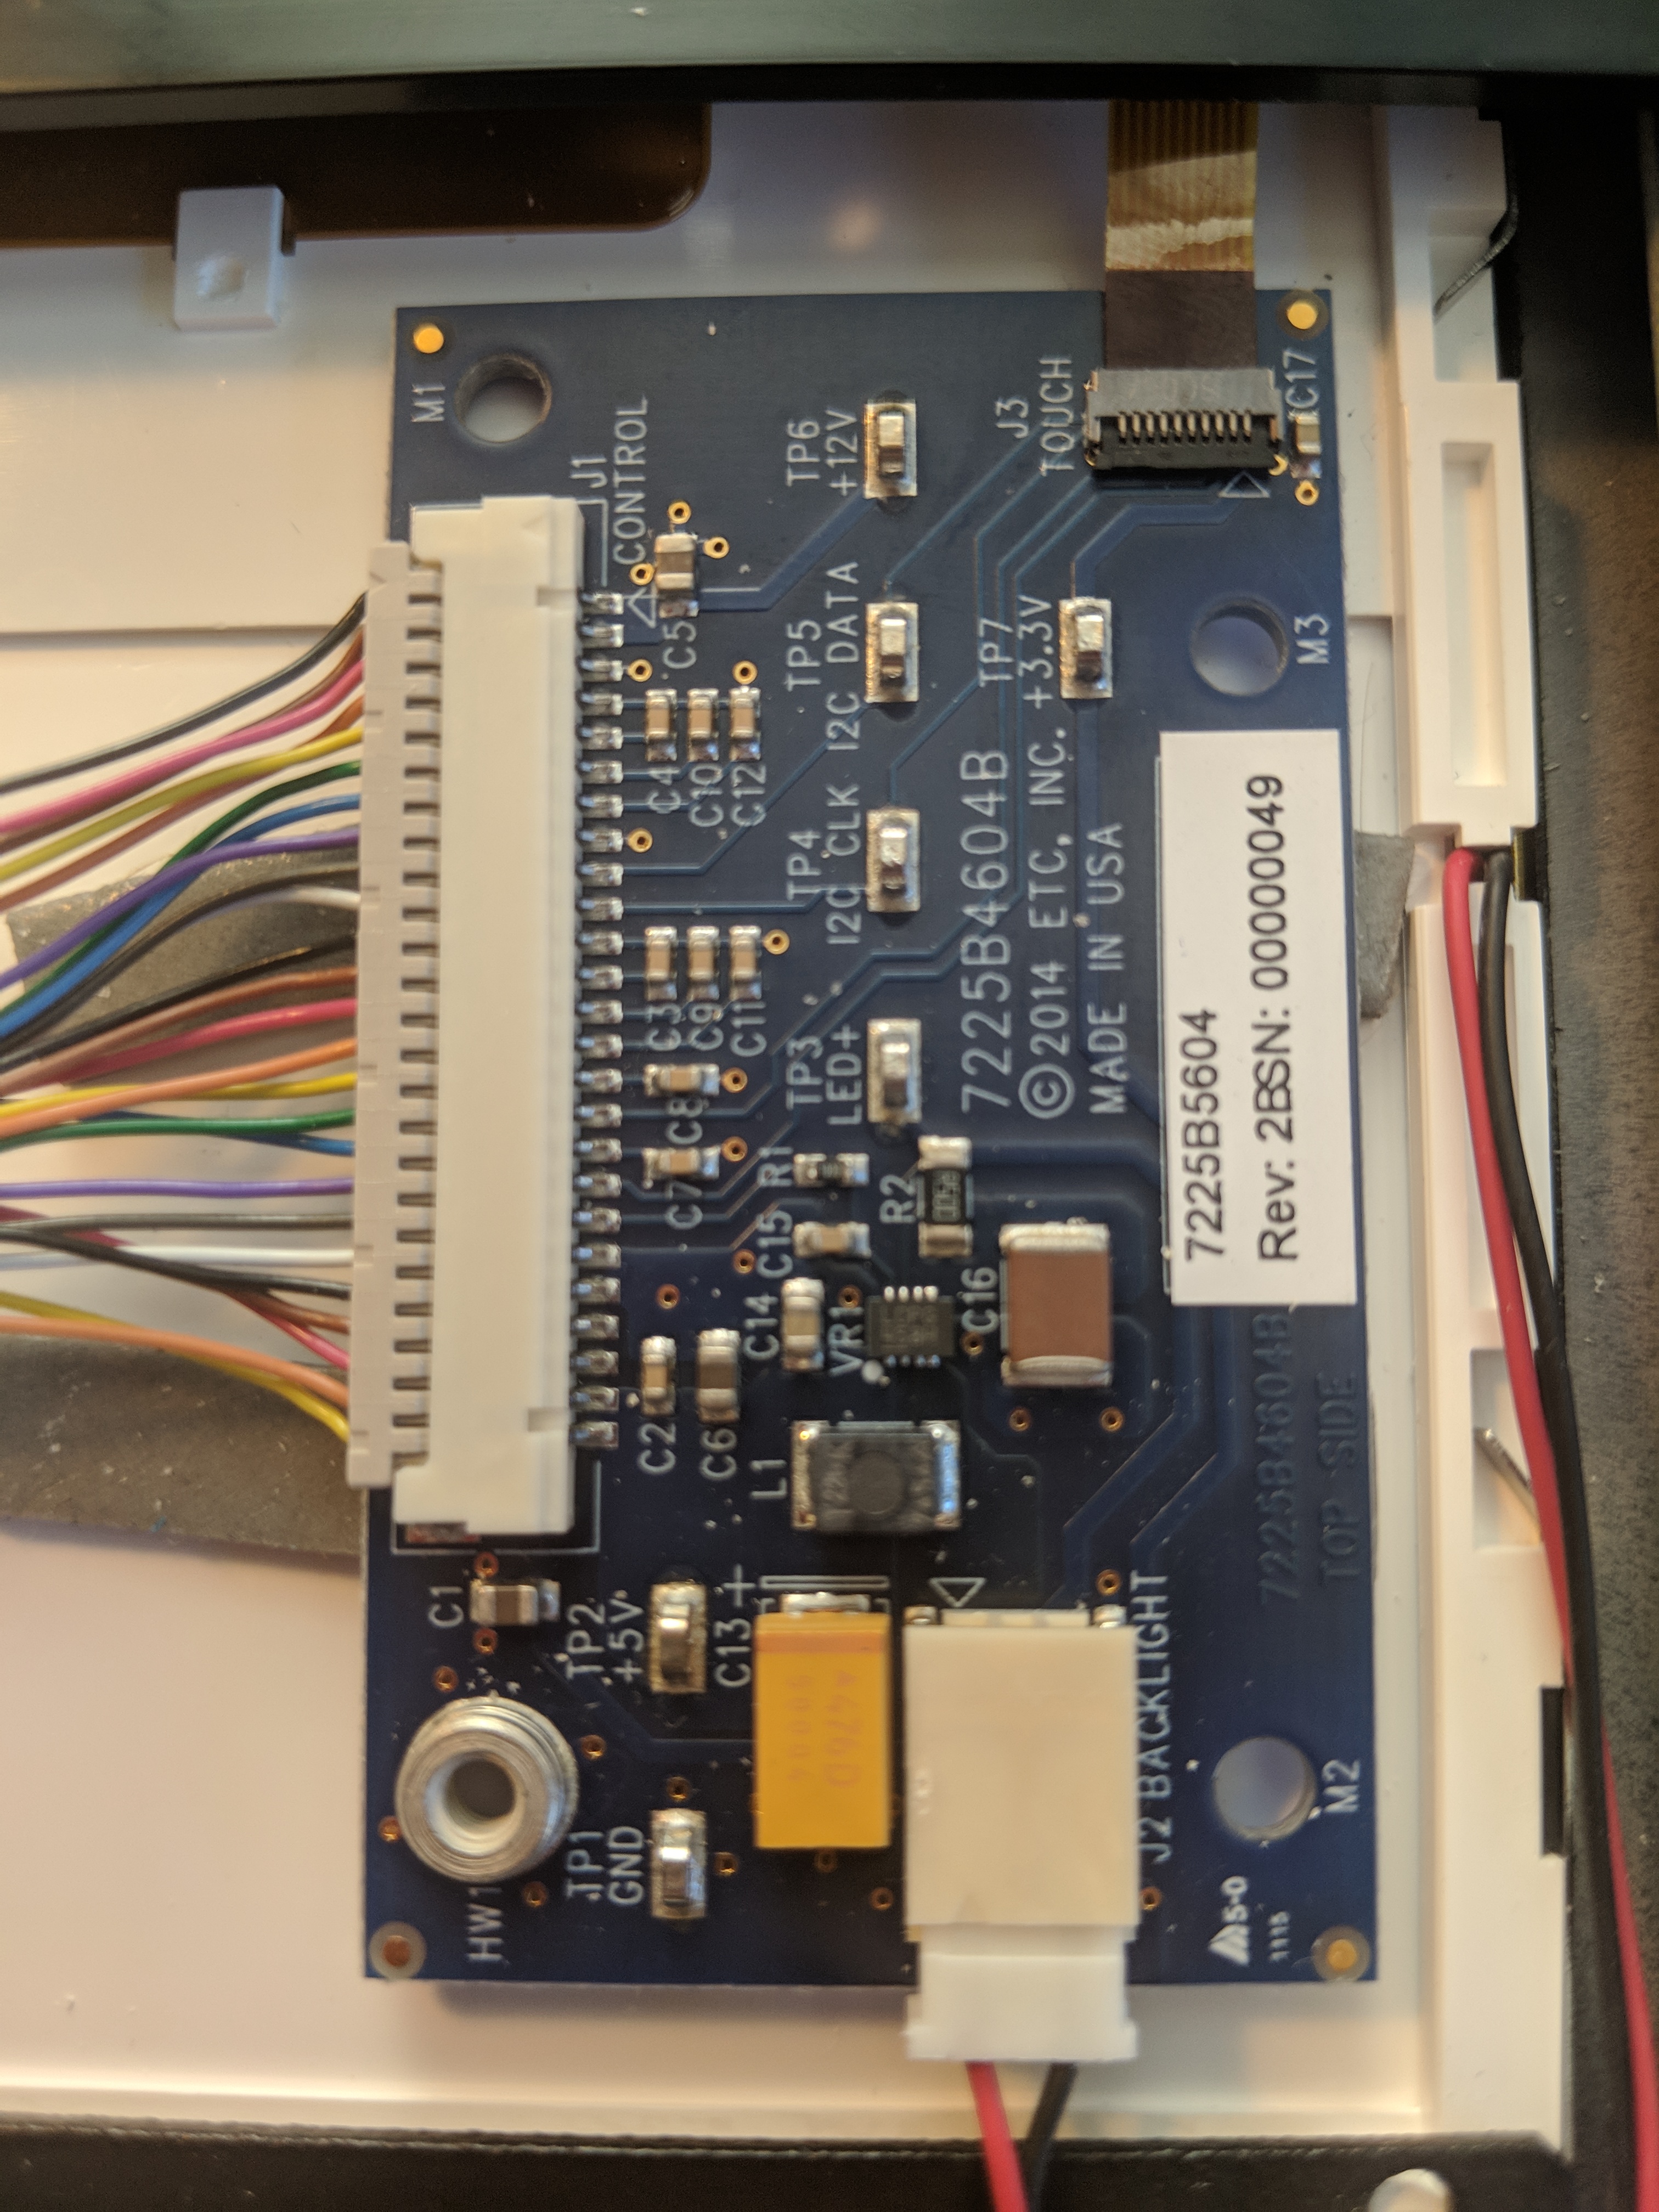
- Locate the control card
- Find the connector at J3 labeled "Touch"
- see top right corner of the above picture
- Using tweezers, flip the black plastic piece opposite the ribbon cable up
- this will loosen the connector and allow the ribbon cable to move freely
- Reseat the ribbon cable into the connector at J3
- Press the black plastic piece down to secure the ribbon cable in its spot.
Closing the console
Once you have performed the above process, simply follow the steps of opening the console in reverse to reassemble it.
