Setting up ETCnomad and Capture on the Same Computer (Windows)
Disclaimer
Note ETC does not actively recommend running ETCNomad (Eos) and captures on the same machine, but it can be used for offline work or educational purposes.
Physical Setup
 For this to work, you need to have one and only one physical network interface enabled and connected. In theory, this will work on wireless interfaces, but we do not recommend or support it.
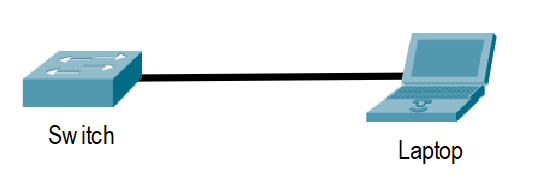
The diagram shows the setup we recommend. This laptop (or desktop) is connected to a simple switch, however, this could be a home router too.
Step 1 - Setting up your PC.
To start with, right-click your start menu and click on “Network Connections” this will then open up the network settings window. Then click on “Change adapter options”.
In here, disable any connections that are not the one you want to use. For example, disable WiFi and any virtual adaptors you might have.
.png?revision=1) The screenprint shows the adaptor window. In this example, we will want to disable “Cisco AnyConnect” as the others are already disabled. The adaptor “Corp” is the physical Ethernet adaptor on this computer.
The screenprint shows the adaptor window. In this example, we will want to disable “Cisco AnyConnect” as the others are already disabled. The adaptor “Corp” is the physical Ethernet adaptor on this computer.
Step 2 – Setting up ETCNomad (Eos)
 Once you have set up your adaptors, you can now open Eos. Your interfaces must be already set up before opening Eos. If it is not, it will not grab the correct network settings. If you already had it open, you will need to close it and re-open.
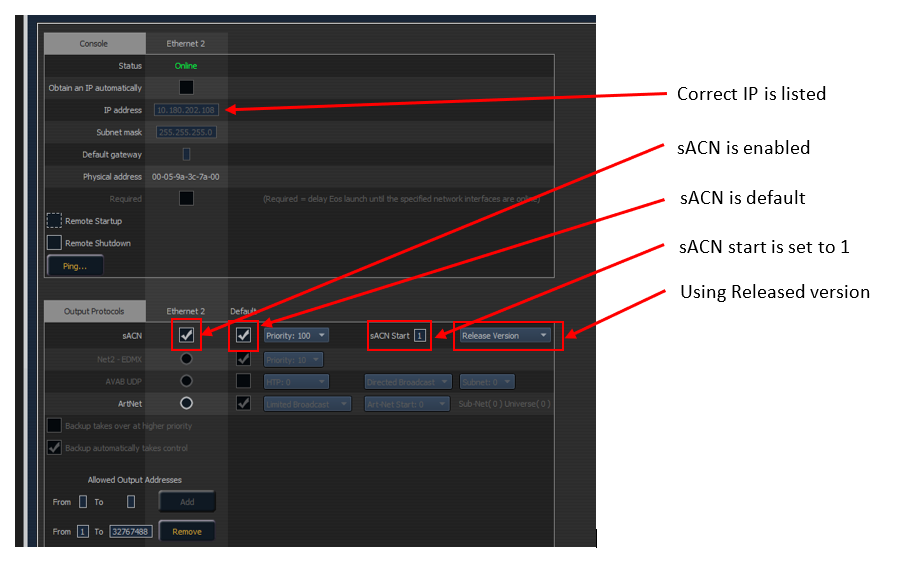
In the Eos shell click on “settings”. In here, Navigate to the Network tab.
Now that you have set up your settings, you can click accept and then start eos in “Offline w/Vis” mode or “Primary” if you have an ETCNomad Dongle connected.
Note: In Eos, you must make sure that you have channels patched. Eos will only output the universes that have something patched to it.
Step 3 – Setting up Capture
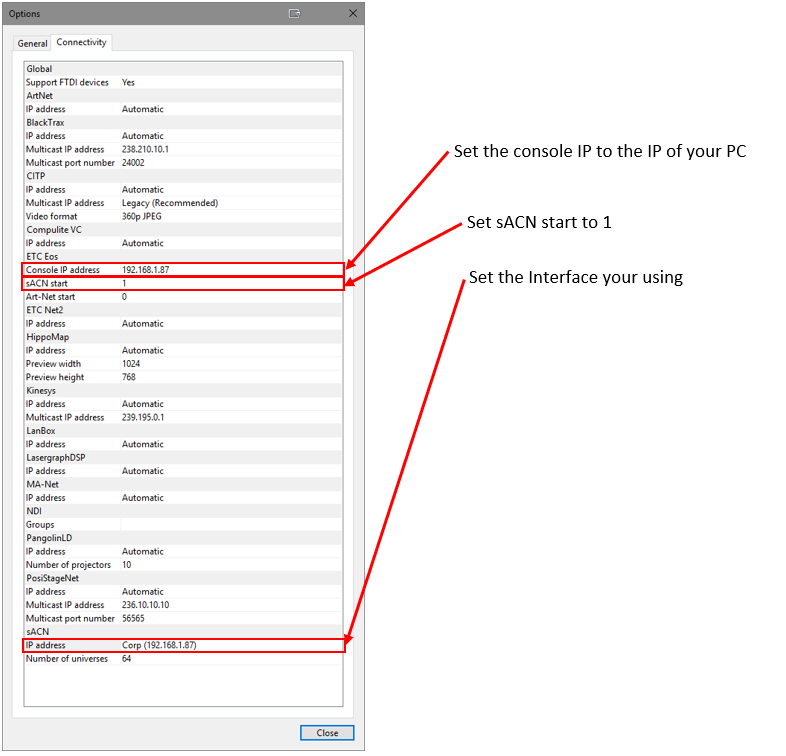 Open capture navigate to Tools > Options. In the Options windows to go the “Connectivity” tab.
The screenprint shows the Connectivity tab in the options in Capture 2020. If you are using an older version of Capture 2020. You will need to disregard the section on “ETC Eos” and just use the “sACN” settings.
Now that you have set these options, you can now click “Close”. Capture will now prompt you to restart Capture.
Step 4 – Mapping universes in Capture
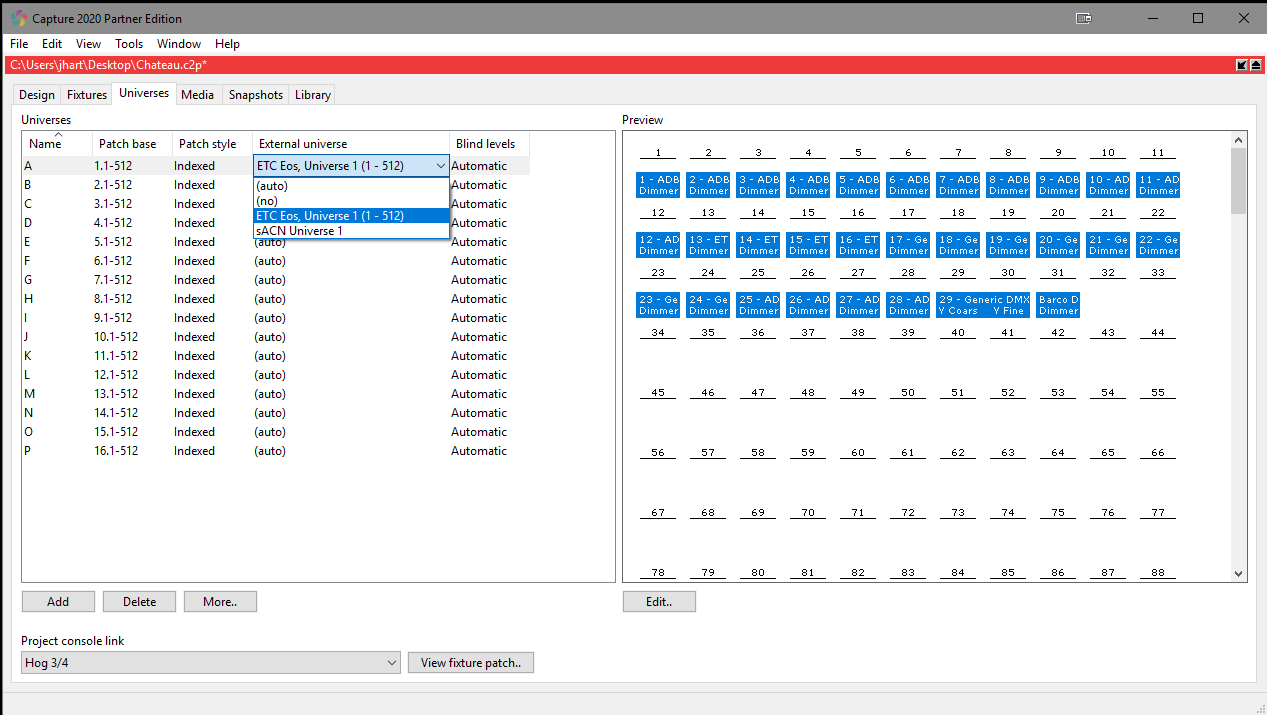
The screen print shows the project window in Capture 2020. For universe A, click on the drop-down list and map it to the Eos Universe.
If the “ETC Eos” Universes are listed then it is recommended to use these as these allow for more features.
Older versions of Capture will not have this feature, so you will need to use the sACN Universes.
Obtaining Support
If you have any problems with this setup, then please do get in contact with ETC Technical Services. The details can be found at: https://www.etcconnect.com/Contact/Europe.aspx