Eos Family Local Relay Out and Contact Closure Inputs
Eos Ti, Gio, Ion, Element, and Ion RPU all have local I/O ports that include a DB15 connector with four contact closures and a single relay out. For additional closures or relays, a Net3 I/O Gateway would be needed.
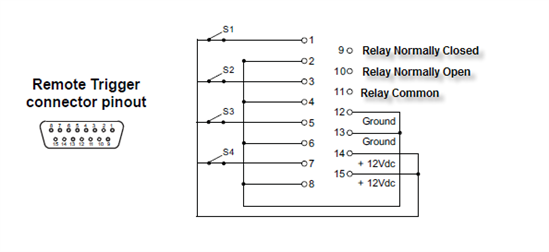
Additional Wiring Notes:
The contact input is looking for a 12Vdc connection. If your contact input is a dry contact, then the console can be used to source this 12Vdc. For example, let's say we have a dry contact for input number 1. The wiring would be as follows:
Switch side 1 to pin 14 or 15 for 12Vdc.
Switch side 2 to pin 1.
Jumper from pin 2 to pin 12 or 13 on console for ground reference.
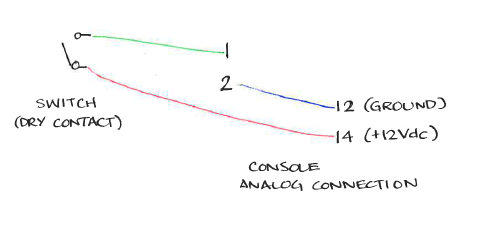
Note: The +12VDC pins are meant only to provide voltage when using a dry contact to trigger contact inputs. They are not rated to provide current for any external device.
To use the Relay Out
Example:
[Cue][1]{Execute}{Relay}[1][/][1]{On}[Enter] --- This will turn relay 1 in "Relay Out Group 1" on when cue 1 is fired.
[Cue][2]{Execute}{Relay}[1][/][1]{Off}[Enter] --- This will turn Relay 1 in "Relay Out Group 1" off when cue 2 is fired.
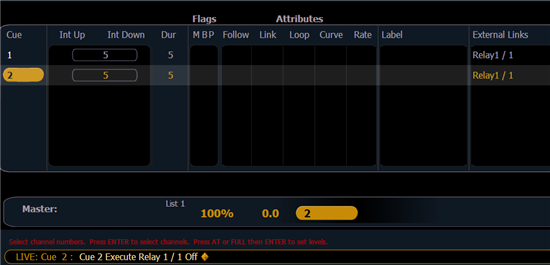
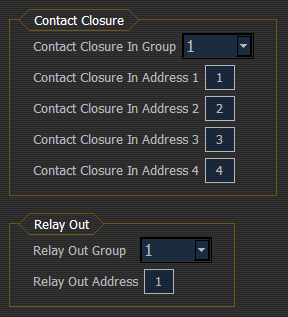
Relay setup is located in the shell. (See photo below)
To use the Contact Closure Inputs:
Use the "Show Control Display" to setup the functionality of the inputs.

"Type" is Analog
"Source" is the Contact Closure Group #
"Address" is the Contact Closure Address within that group.
To setup the Local Relay and Contact Closure inputs:
In version 3.0 and higher
Settings can be found in Setup>System Settings>Show Control. Choose {Contacts}
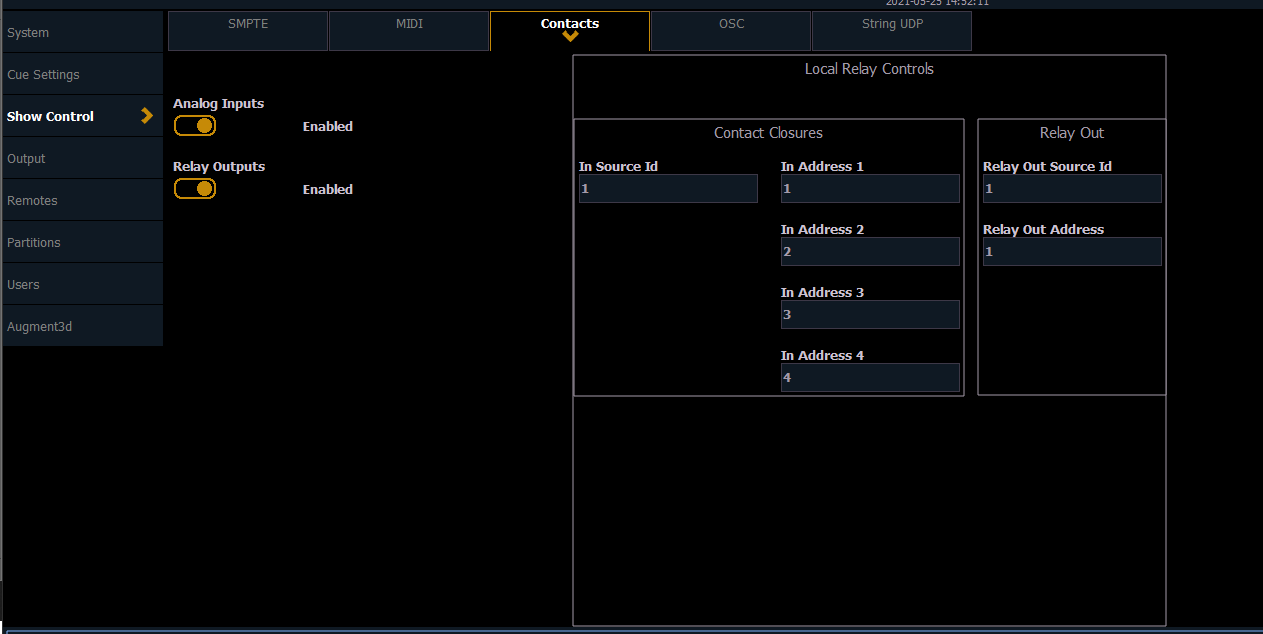
In versions 2.7.0 through 2.9.
Settings can be found in Setup>System Settings>Show Control. Choose {Contacts}

In versions prior to v2.7.0
Exit the console to the shell. Choose Settings > Local I/O
For more information on using Analog with Eos Family, please see the Eos Operations Manual|Analog Inputs.
