How to open an Obsession 2 processor
What you'll need
- #1 & #2 phillips screwdrivers
- Bow staff skills
- Nunchuck skills
- Throwing star skills
- Vote for Pedro
Why might you need to do this
- A screw broke off and there is something rattling around inside. DO NOT TURN IT ON IF SO.
- Replacing the CMOS battery. There is a warning about CMOS being bad that comes up in every message log, but it is Y2K bug and is normal. If your processor is losing time and the ISA card is failing (nothing showing on facepanel screen/s at boot), then you may need a new battery.
- Checking internal voltages (to be performed only by qualified technicians)
- Reseating internal cables or expansion cards
- Replacing the hard or floppy drive. ONLY replace the hard drive with one ordered from ETC. Store bought hard drives may not function properly, and there is no publicly available files or process for imaging a blank hard drive.
- If instructed to do so when troubleshooting with your dealer or ETC technical services
Otherwise...
- DON'T DO IT!

- Please contact your dealer or ETC technical support before performing any maintenance. It may be a simple issue that can be resolved over the phone.
Instructions
Removing the processor from the rack
- Make sure to have a cart or desk to set the processor on upon removal. It is heavy and unwieldy so it may be necessary to have a helping hand as well.

There are many dangerously sharp edges, corners, and sheet metal on the processor. We recommend wearing gloves if you are concerned. Be especially careful of the rear bottom edge as the motherboard backing plate is exposed there and extremely sharp (ask me how I know).
- Shut the processor down by pressing the power button. This action should not immediately power off the console but should initiate a shutdown sequence. If it shuts off immediately, your processor may need a new power supply - call technical support or your preferred dealer for further assistance.
- Once the power button light turns off, remove all connections from the rear of the processor.
- Loosen the 4x #2 screws from the rear tabs as shown so that the processor can slide out. DO NOT remove these as doing so may bend the faceplate or cause the processor to fall inside the rack.
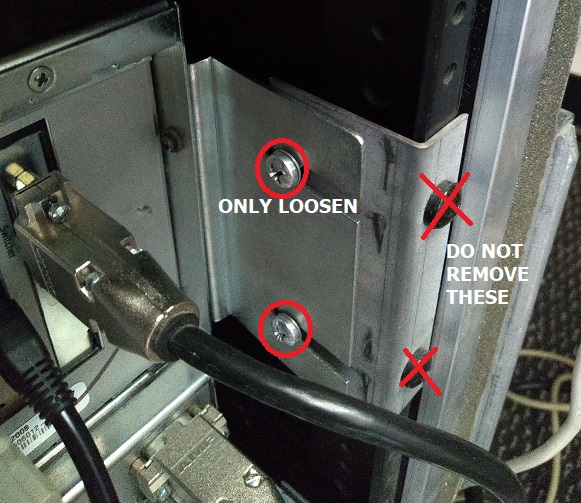
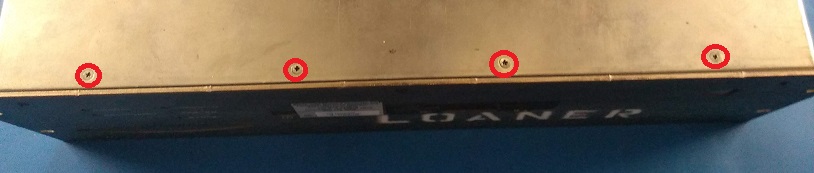
- Remove the 4x #2 rack mounting screws from the front panel as shown, being sure that the processor is supported front and back before complete removal. Again, it may be necessary to have a helping hand here.
- Carefully slide the processor out of the rack and set it on a nearby cart, table, or bench.
Opening the processor
- Set the processor on your bench with the rear ports facing you.
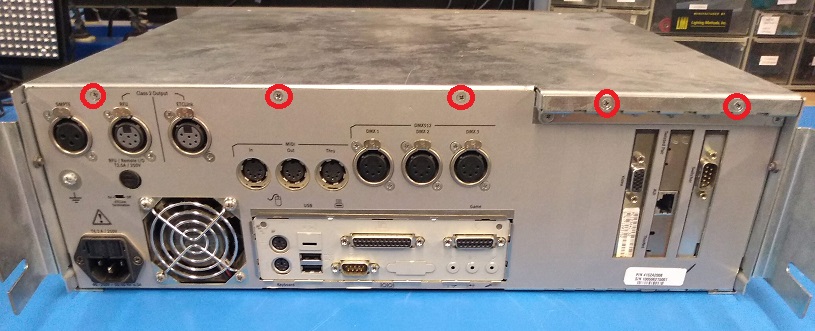
- Remove the 5x #1 screws from the top, rear facing edge.
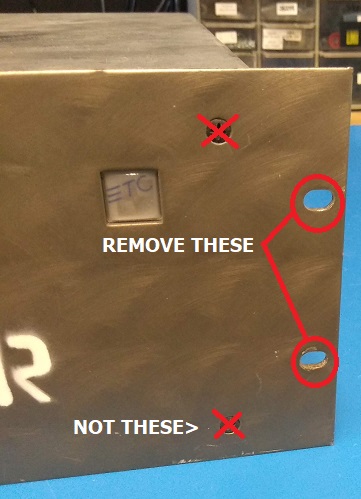
- Remove the 2x #1 screws from the rear rack tabs and bottom edge on each side (4x total).
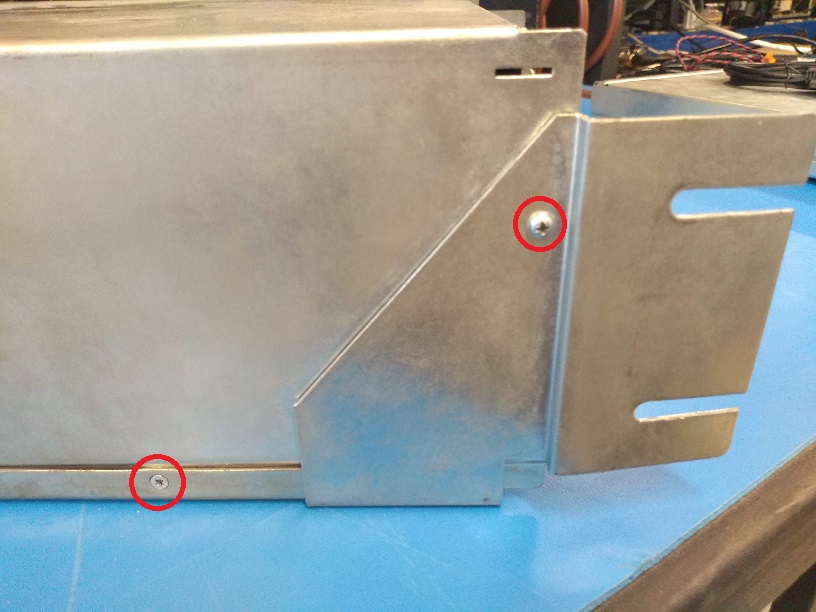
- Remove the 4x #1 screws from the front, upwards facing edge.
- Remove the metal cover by grasping the sides and lifting forcefully. It may be necessary to use some force and/or jiggling in order to get it loose.
Congratulations! You've won the talent contest!