How to service a Source Four Jr
Tools needed
- #2 screwdriver
- crescent wrench
- needle nose pliers
- ETC branded stress ball

It is very important that you use this specific, branded tool, otherwise your stress levels may rise to levels that are dangerous for the fixture.
Disassembly
- Remove any filters and/or accessories, gobos (and the holder), etc.
- Remove the bulb assembly from the rear of the fixture. Be careful not to touch or damage the bulb.
- Remove the fixture from the yoke by removing the rotation clamps and bolts from the side of the fixture and prying the yoke apart to release it. Now you should have isolated the main barrel of the fixture such that you can work on it safely on your workbench.
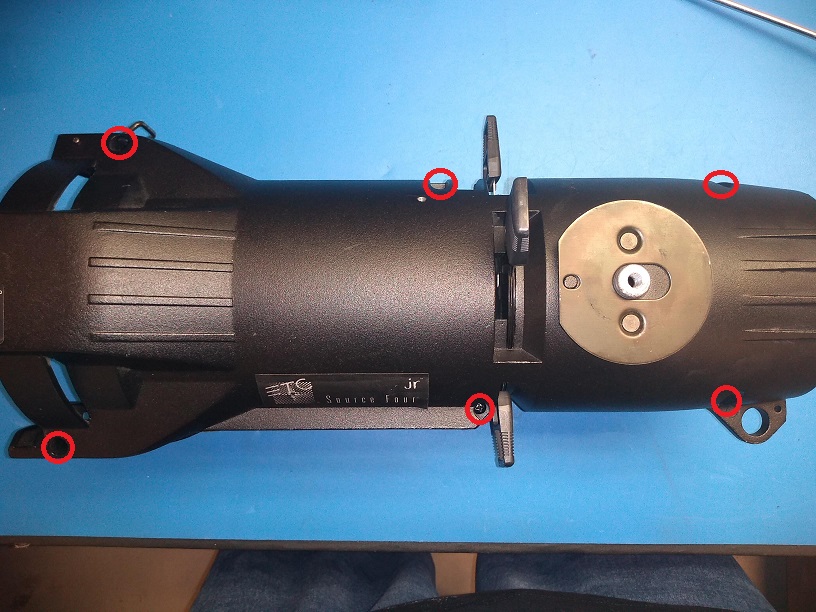
- Locate the 6 screws holding the fixture together but do not remove them yet. We will henceforth refer to this side as the top. Set the fixture top side up. It is best to find an inside corner of a table or a gap between two such that the shutter handle doesn't keep the fixture from laying flat. You may want to brace it so that it doesn't roll while working on it.

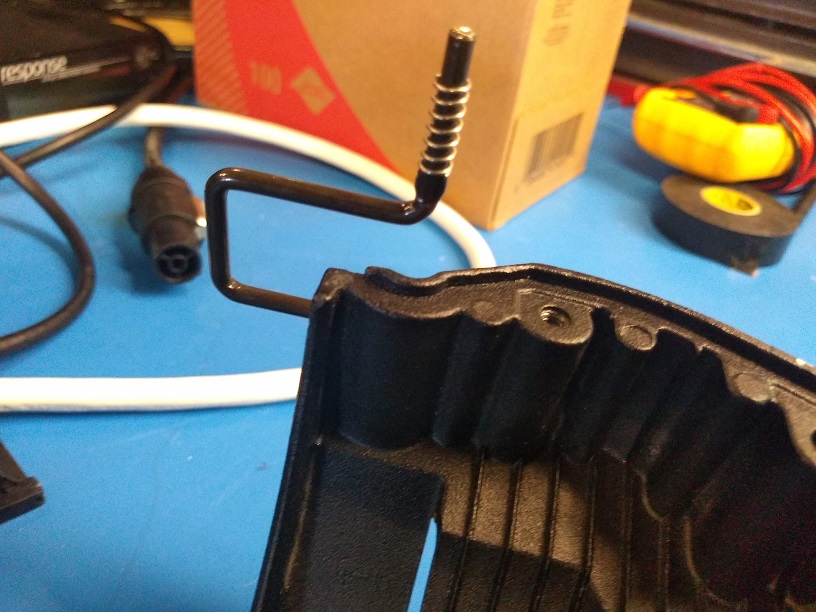
- Remove the gobo/iris cover.
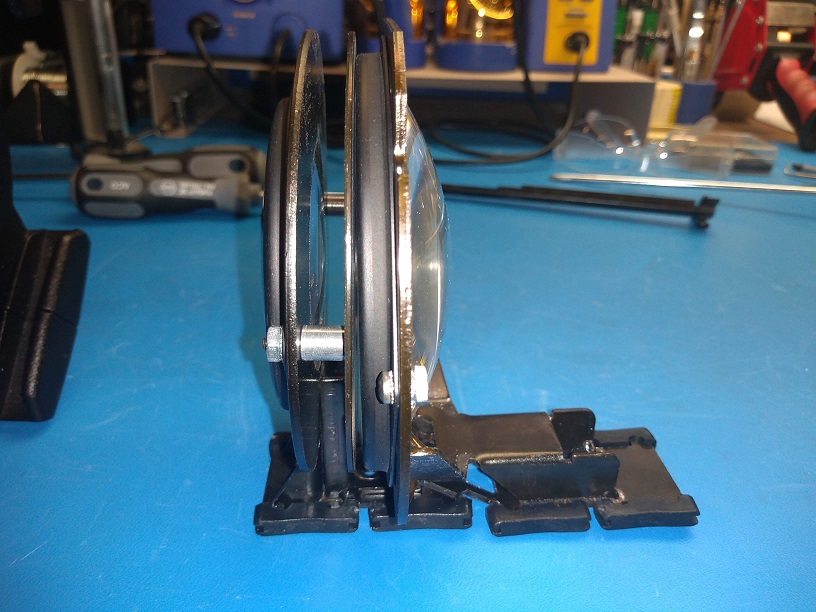
- Remove the focusing knob/s along with the springs and washers.
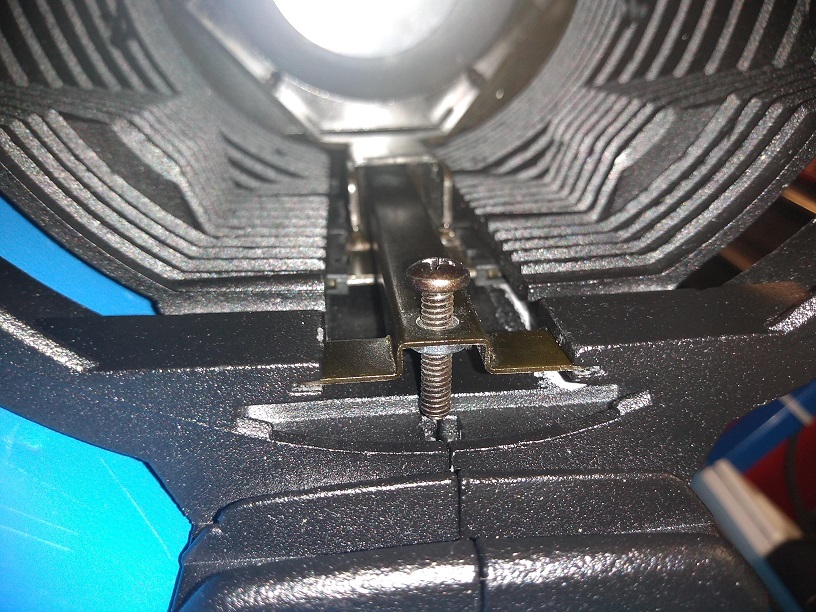
- Look inside the front barrel and locate the focusing rail. Loosen or remove the screw holding it down until it pulls out.

Be careful not to tip the fixture towards the front at this point because there is now nothing holding the lens in, and it can easily fall out and break. - Carefully slide the lens or lenses out of the fixture being mindful of orientation. At this point, you should have the following pieces:
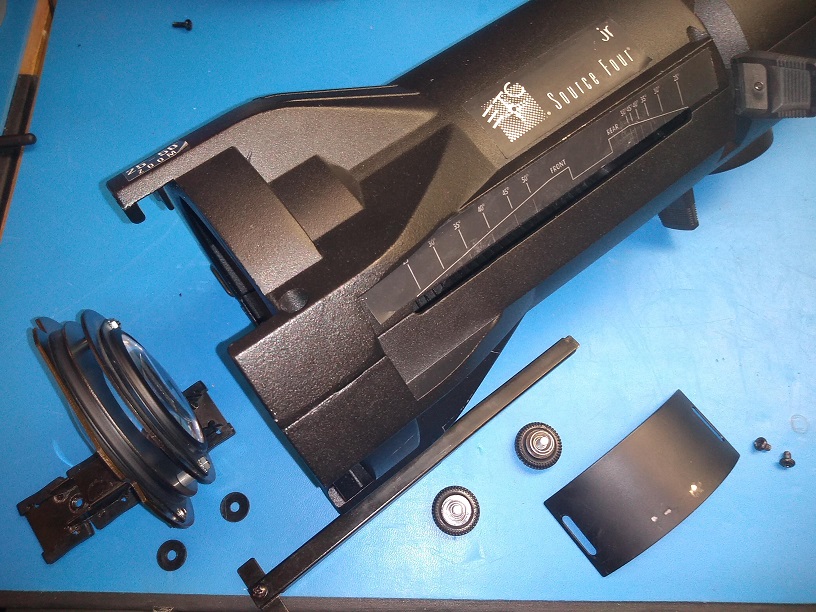
- Now remove the 6 screws holding the 2 halves of the fixture together.
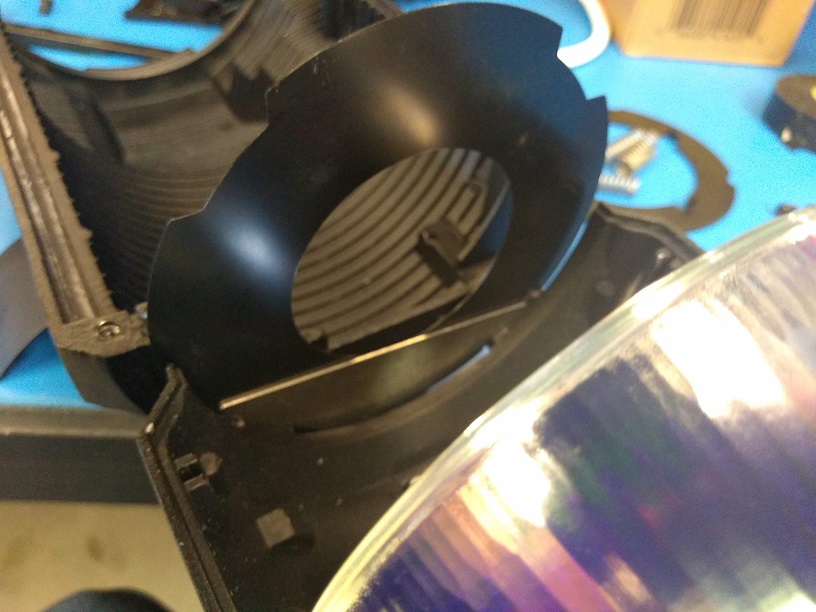
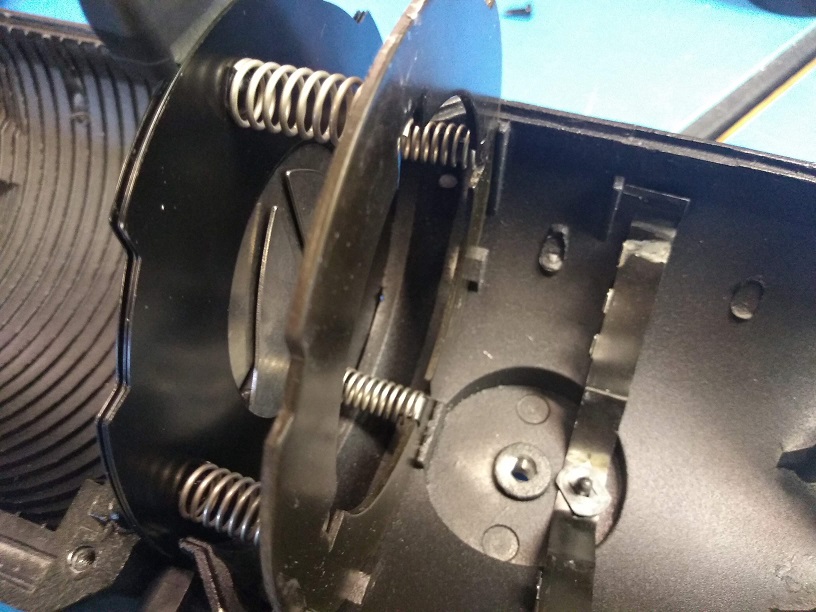
- Carefully and slowly remove the top of the fixture paying close attention to the reflector so that it doesn't fall out and break.
If springs and parts flew off at this point, be sure to take your frustrations out on the stress ball NOT the fixture. This is normal. Just be sure not to lose the 4 springs.BE VERY CAREFUL WITH THE GLASS REFLECTOR!!! It may stick to the top, so remove it slowly and carefully. Set it aside somewhere it will not get damaged.
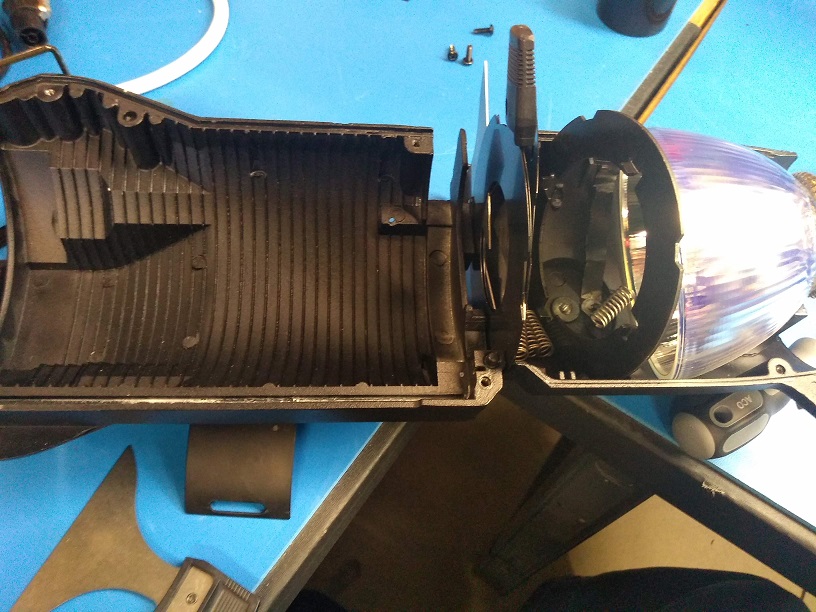
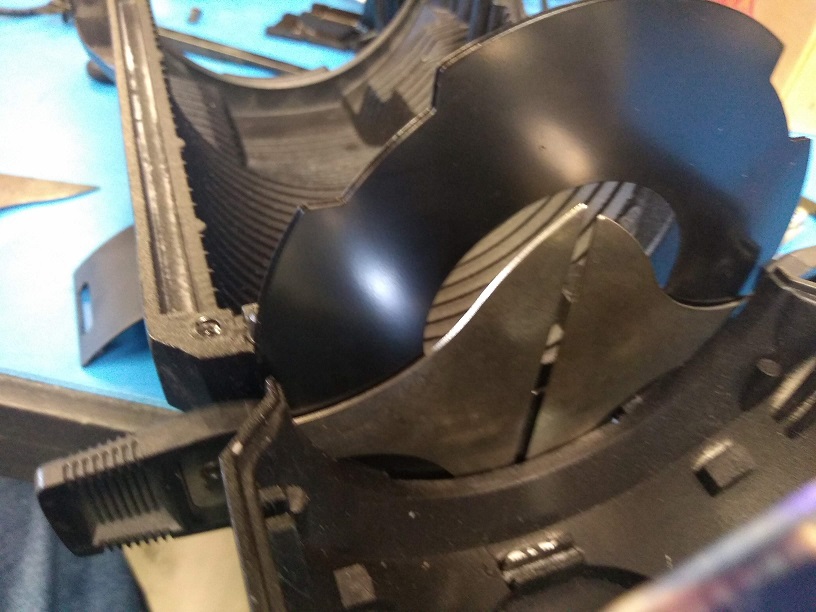
If you were lucky and careful, it should look like this:
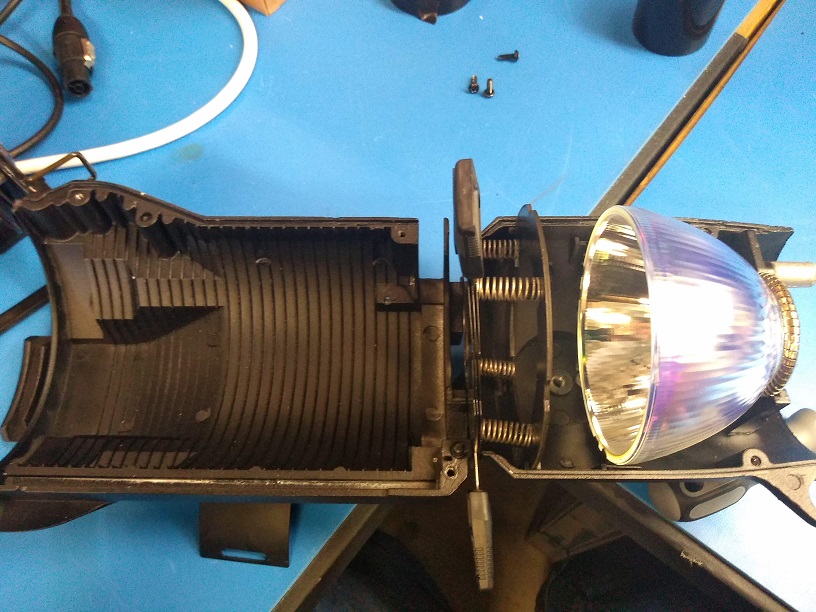
If you were unlucky, it will look like this. Please activate stress ball.
Reassembly
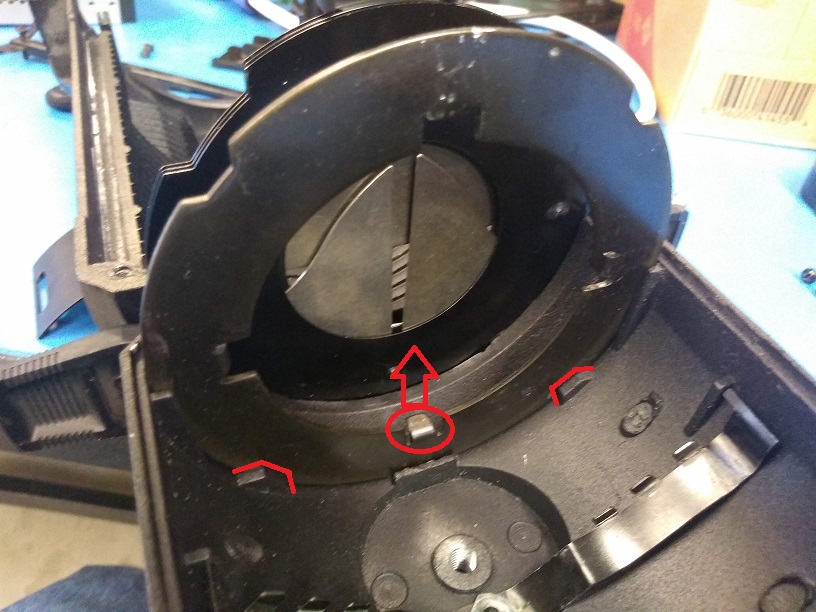
- If the shutter assembly stayed together, skip to step 4 or step 7 if the springs didn't come out either. Otherwise, with the stress ball nearby, place one of the flat rings in the front of the shutter slot as shown below in front of one of the shutters sitting in the bottom. Two of the notches should locate into the casting on either side.
- Then place the second flat ring with 2 side shutters as shown below followed by the dimpled ring facing the reflector. The dimples should stick out towards the reflector.
- Slide the last shutter into the front slot between the front and middle rings. You should now see this:
- Place the spring retainer ring in the slot about 1" behind the shutter with the tabs pointing to the shutter. These tabs will hold the springs against the shutter dimples. The notches in the ring should locate onto matching tabs on the casting.
- While holding the rings down with one hand, place each spring in its place from inside the ring. Place the spring on the tab first, then push it over the dimple. You can now let go and it should stay in place.
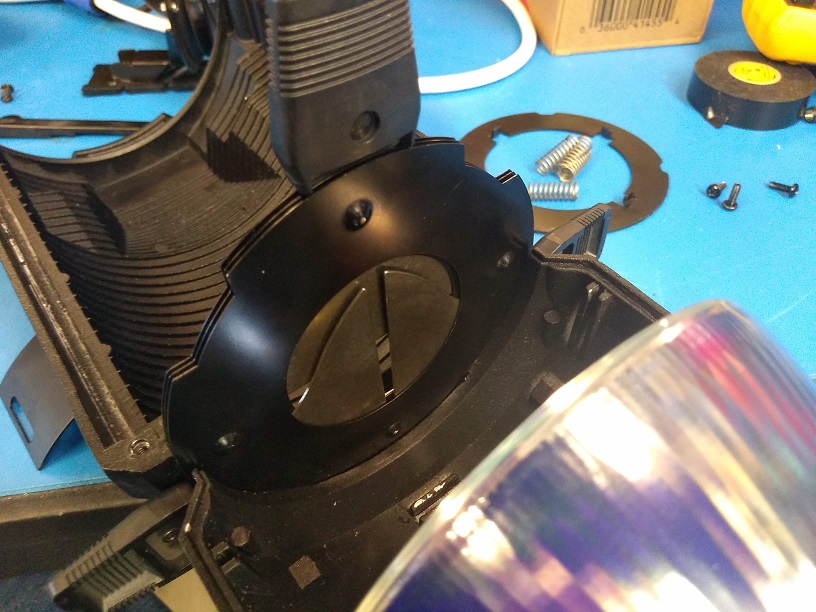
- Reassemble the accessory retainer and place it onto the fixture as shown:
- Carefully lower the top housing onto the lower half. You will have to wiggle it a bit and even a bit of pressure to get it to go down onto the rings, but it should snap down nicely once it gets past all the locator notches.
- Screw the fixture together with the six screws removed in step 9 above.
- Slide the lens/es into the slot inside the barrel in the orientation shown below. The orientation is also labeled on the lens stamped into the steel holders.
- Insert the rail into the space between the lens and its rail adapter and screw it down at the front of the barrel making sure that the tabs are located in the slot at the front of the barrel.
- Place the washer, spring, and focusing knob respectively (with the smaller end of the spring facing the knob) through the side of the fixture into each lens.
- Reinstall the fixture into the yoke with its bulb assembly and any accessories as necessary.