CR2032 Battery Holder for replacing BT161
For further information, see CMOS (BIOS) Battery Information.
This CMOS battery holder replaces the stock CMOS battery found in several ETC products, including:
- Some Eos family consoles and devices
- Paradigm Central Control Server
- Paradigm Touchscreen Interface
- Net3 Conductor
The battery holder requires a standard CR2032 coin cell battery. These batteries can be purchased almost anywhere batteries are sold, or from ETC using the part number BT130.
There are two variants of this battery holder for use with different products. One variant has "standard" polarity, meaning the positive and negative wires are arranged in the typical order. The other variant has "reversed" polarity, meaning the positive and negative wires are switched relative to the standard polarity variant.
Check the part number of your battery holder (found on your packing slip) against the chart below to confirm which variant you have.
Installing a battery holder with the incorrect polarity for your device may cause minor damage to the motherboard. Double-check the polarity of your device before replacing a battery.
Variants
| Polarity | Part Numbers | Images | Used In |
|---|---|---|---|
Standard When viewed with connector facing you, key upward: +3V (red) on the right, common (black) on the left. |
4250K1049 (battery holder kit) 4250B7049 (battery holder) |
  |
see ETCnomad Puck Hardware Revisions
see Conductor, P-CCS, and P-TSI Hardware Revisions
|
| Reversed
|
4250K1051 (battery holder kit) 4250B7050 (battery holder) |
 |
see ETCnomad Puck Hardware Revisions
|

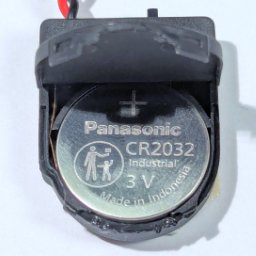
Insert the battery
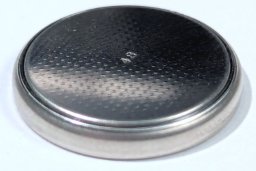
Before installation, open the battery holder and insert a CR2032 coin cell battery with the positive terminal (marked "+") facing up.
| Correct | Incorrect |
|---|---|
 |
 |
 |
 |
Turn on the battery holder
Make sure to move the plastic switch on the top of the battery holder to the "ON" position.

Install and mount the battery holder
Power off your device, disconnect all cables, and open it. Instructions for opening most ETC devices can be found by searching this site.
Locate the drained CMOS battery inside your device and disconnect the lead from the motherboard. If the battery is mounted to a surface, carefully peel away the adhesive and remove the battery.
Connect the lead of the replacement battery holder to the socket on the motherboard. The connector has a key on one side that fits into a notch on the socket. Press the connector down to seat it. If the connector does not seat with a little pressure, make sure the it is in the correct orientation so the key lines up with the notch.
Next, remove the adhesive backing from the battery holder and stick it to a suitable surface inside the device. Good options are structural panels (the outer shell of the device) or connector shrouds (as pictured below). Make sure to avoid any surfaces used for cooling (i.e. heat sinks), any moving parts (i.e. fans or keyboard drawers), or any location that would interfere with closing the device.
| Poor mounting location | Better mounting location |
|---|---|
| The battery holder is mounted directly to a heat sink, which may melt its adhesive over time and interfere with cooling inside the console. | The battery holder is mounted to a connector shroud, which is an example of an internal surface not used for cooling. |
 |
 |
Complete the installation
Close the device, reconnect all cables, and power the device on.
Set the date and time on the device. Then power the device off and back on. If the date and time are still set correctly, then the replacement was successful.
If the date and time reset to midnight on January 1 of a previous year, the new battery is not installed correctly. Check the following:
- Is the battery holder you have the correct polarity for your device? (see table above)
- Is the battery installed in the holder with the positive terminal facing up?
- Is the battery fresh? It should meter around 3V between the top and bottom.
- Is the switch set to ON?
- Is the connector fully seated in the socket on the motherboard?
- Is the connector installed with the key facing the notch on the socket?
If issues persist, contact ETC Technical Services.