Mosaic Designer 2 and UDP String Interaction
What is UDP ?
User datagram protocol, or UDP, as it is more commonly known, is a network based communications protocol that is used to establish a low-latency connection between to devices.
In Mosaic Designer 2, UDP triggers can provide quick and easy way to setup 3rd party integration.
Setting up UDP Triggers
UDP interaction can be setup in one of two ways in a Mosaic project.
Option 1: Ethernet Input Trigger
Using the "Ethernet Input Trigger" Mosaic will watch for an incoming UDP string and then complete an associated action once the string is received.
To create an Ethernet Input trigger, navigate to the trigger tab, click "New" and choose "Ethernet Input" from the drop down list.
Next you'll need to configure the parameters of the trigger, which is done in the right hand Trigger pane.
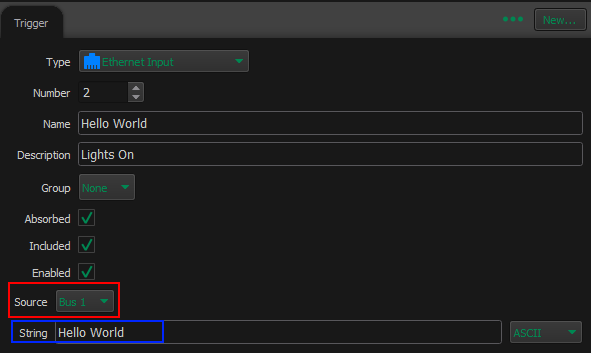
You'll need to specify the source bus that incoming message will be sent on. If you are unsure of which bus to choose, check the sending devices configuration.
Next you'll need to tell Mosaic what the expected string is. This string does not need to follow a format and can be expressed as ASCII, Hex, or Decimal. It is important that the sent string and the string within the Trigger pane match so that associate action of the trigger will fire.
Option 2: Output Ethernet
Mosaic can also output a UDP string using the "Output Ethernet" action.
This is done by adding an action to an existing trigger and choosing the "Output Ethernet" action.
For this action to properly execute you must specify the receiving devices IP address.
This IP should be placed in the IP/Hostname box within the Action pane.
Next, you'll need to enter the receiving device's port number within the action pane.
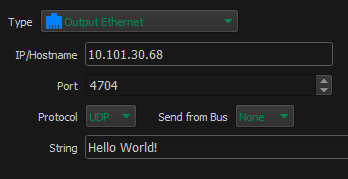
As with inbound Ethernet triggers, these strings do not need to follow a particular format and can be sent as either UDP or TCP.
Configuring and Understanding Mosaic Controller Bus Settings
In addition to configuring triggers, you may also need to configure the Mosaic controller's UDP bus settings.
This is done in the Triggers tab and the Network tab.
Triggers Tab
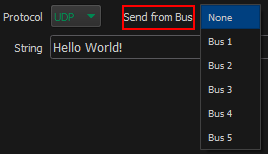
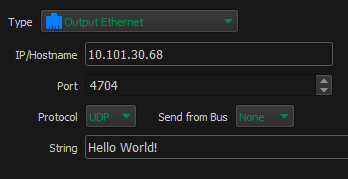
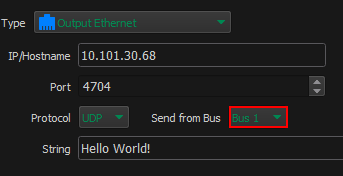
Set the bus in the Output Ethernet trigger bus by selecting the appropriate "Send from Bus" from the drop down in the trigger pane.
In this example, we'll choose "Bus 1"
Network Tab
Select your controller within the network view.
Then, select the "Interfaces" tab on the left hand side of the screen.
Select the appropriate Bus, Protocol type, and Port number.
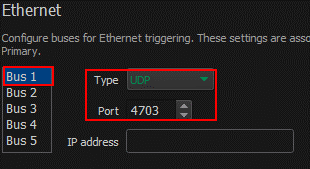
Why is this important?
If a controller's UDP settings were left un-configured, the outbound string will be sent to an unspecified port number regardless of if a port number is configured within the trigger.
In the below trigger our port number is set as 4703. Note that no Bus has been set.
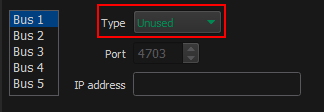
Additionally our controller is un-configured, note that even though a port number is specified in the trigger, our controller's UDP settings are set to unused.
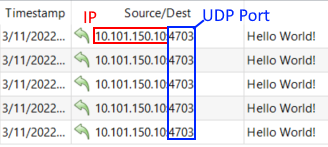
If we take a look at our inbound UDP messages, notice that the inbound port number differs even though the sending IP and messages remain the same.
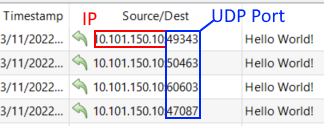
However, if we configure our trigger to send from bus 1 and configure our controller's settings to bus 1, then we'll see a consistent port number at our receiving device.

Our inbound strings now all send from a consistent port number.
