Setting Up a Loaner SmartLink Architectural Control Processor (S-ACP)
S-ACPs require an architectural configuration to function. If the steps below are not followed, your loaner will not function correctly.
Ensure that power to the rack is disconnected before removing any components. Failure to do so can result in damage to your equipment or personal injury.
Saving the Configuration
If your S-ACP is still operable, you will need to save its configuration to an SD card.
If your S-ACP will not boot or is otherwise inoperable, skip to "Removing the Processor". You will need to rewrite this configuration from scratch by following the "Re-Recording Presets" procedure at the end of the article.
To save your processor's configuration, insert an SD card of 2GB capacity or less into the slot on the processor's front panel.
Press [✓] to enter the Main Menu. Scroll down to [File Operations] and press [✓].
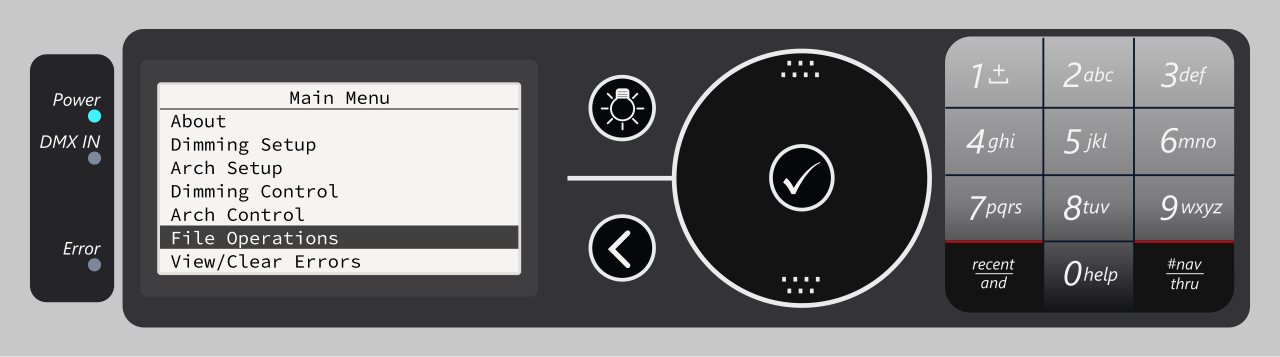
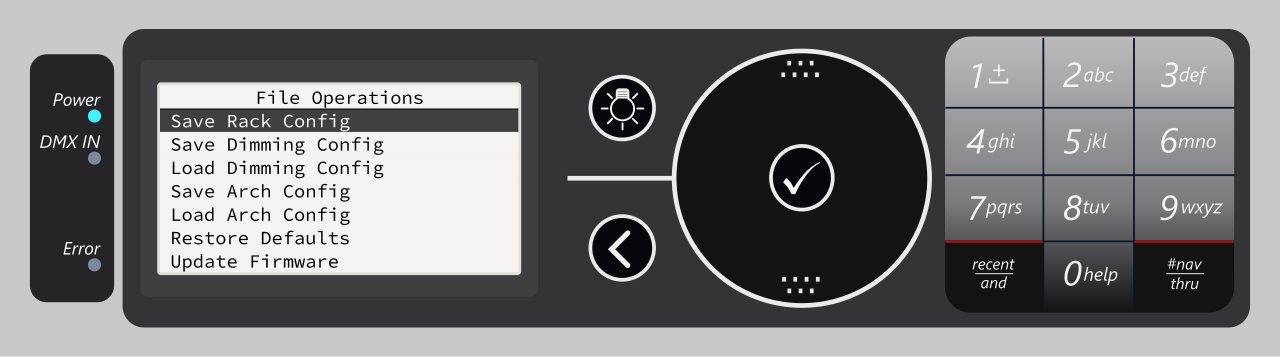
Press [✓] to select [Save Rack Config]. Select [Save to SD Media] and press [✓]. When the config has been written to the card, remove the card from the processor.
Removing the Processor
Power down incoming power to the rack completely. Processors cannot be removed from or installed in a live rack.
Once the rack is de-energized, remove the processor by pulling it straight out of the rack.
Installing the Loaner
Carefully insert the loaner processor into the rack and slide it all the way back. Energize the rack.
The processor will now boot and may display a configuration mismatch error. If this happens, select [Yes] to load the dimming configuration stored in the rack.
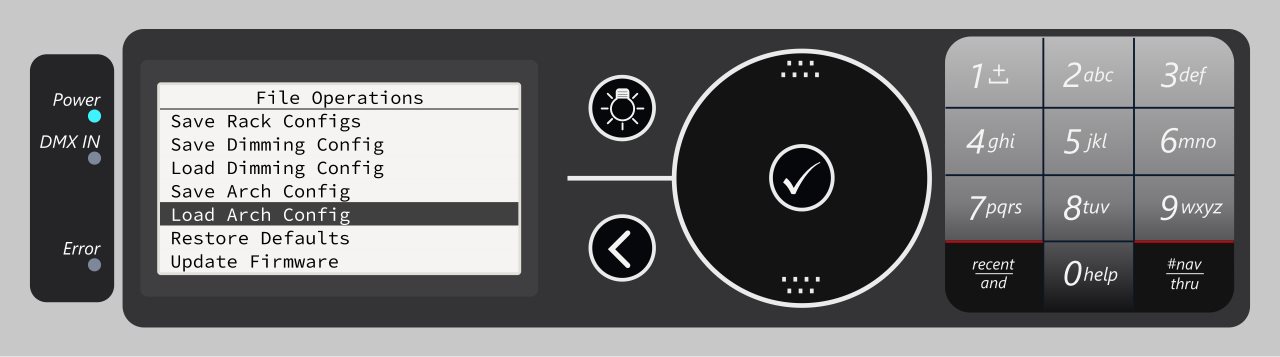
If you saved your processor's configuration to an SD card, insert the card into the loaner. Enter the File Operations menu as before. Scroll down to [Load Arch Config] and press [✓]. Select [Load from SD Media] and then select the correct file to load your saved configuration to the processor.
Once the config is loaded, exit the menu with by pressing [<]. The display should now read "System OK". Test system functionality and ensure you have control over the rack. If errors are present or the rack does not respond to control, contact ETC Technical Services.
Quick Rack Setup
If the loaner was unable to retrieve a dimming configuration from the rack, you may need to perform a quick rack setup to write a new dimming configuration from scratch.
In the Main Menu, navigate to [Dimming Setup] > [Quick Rack Setup].
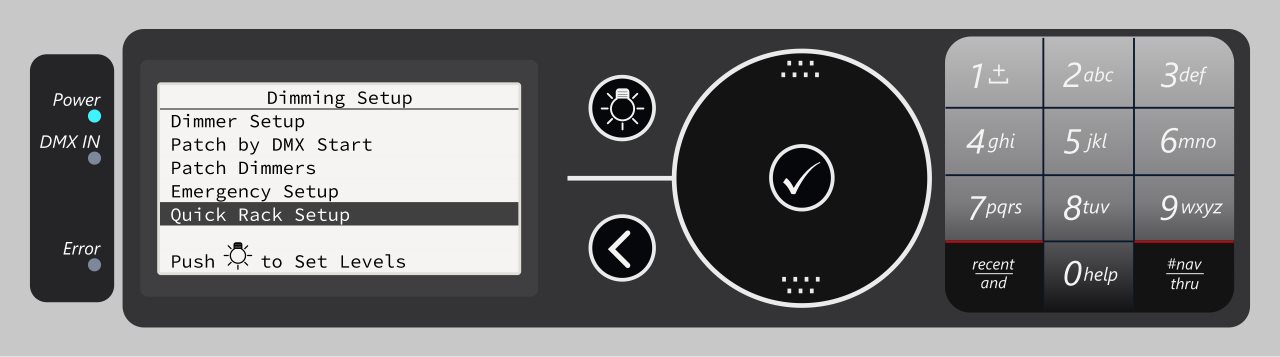
In this menu, select the correct voltage, rack type, module type, balance, and DMX address. Scroll down to [Apply All] and press [✓] to write the new config to the dimming engine.

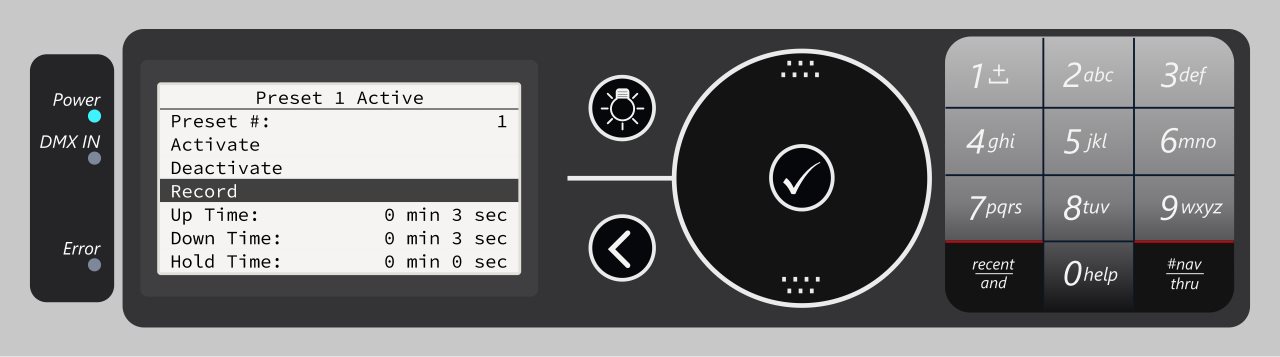
Re-Recording Presets
If you did not save your architectural configuration to an SD card, the loaner will not have any presets programmed. If your system requires the use of SmartLink presets in this rack, you will need to manually rewrite those presets.
Press the lightbulb button to enter the Dimming Control menu, then select [Set Levels].

Use the number pad, [And] and [Thru] keys to select channels in the rack, then press [✓]. Enter a level for these channels between 0 and 100 and press [✓] again to apply it. Repeat these steps to set your desired look for the first preset.
Press [<] to exit the Set Levels menu. Select [No] to avoid clearing set levels. Navigate back to the Main Menu, then select [Arch Control] > [Presets].
Press [✓] on the line [Preset #:] and enter the number of the preset you would like to record, then press [✓]. Scroll down to [Record] and press [✓]. This will record the currently set levels as the selected preset.
Press the lightbulb button again to enter the Dimming Control menu, then scroll down to [Release Set Levels] and press [✓].
Repeat these steps as many times as necessary to rewrite every preset in the system. When you are finished, save a backup copy of the architectural configuration as described at the top of the article.