Imported 3D Scenic Models Appear Transparent/Invisible
Symptoms
When importing a 3D Scenic Model into Augment3d, it appears invisible or only visible from certain views.
Explanation of Issue
In order to understand why this behaviour happens, it is helpful to understand a bit about how computers think about 3D graphics and how that affects 3D Scenic Models.
Winding Order
Each face of a 3D model surface has both a front side and a back side. The winding order defines which direction is the front. Triangles are the most primitive geometric shape and are used to build all of the other shapes that make up a surface and therefore faces of an object. If you number the corners of a triangle and then look at it from different angles, you can determine the winding order.
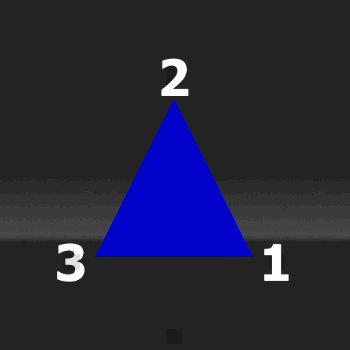
If the corners count upwards in a counter-clockwise order, that is the front side.
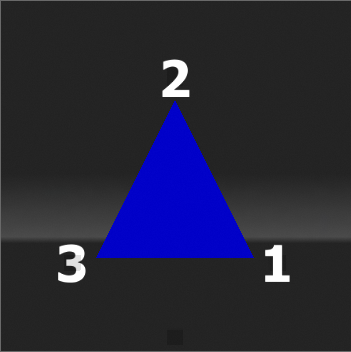
If the numbers count upwards in a clockwise order, that is the back side.
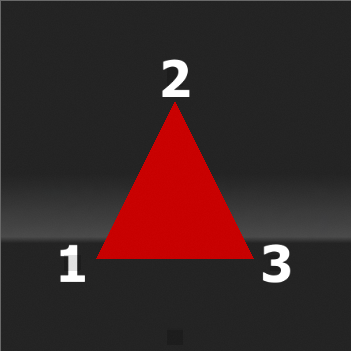
Computers have dedicated hardware that is extremely fast at determining whether the three points spin clockwise or counter-clockwise.
Normals and Faces
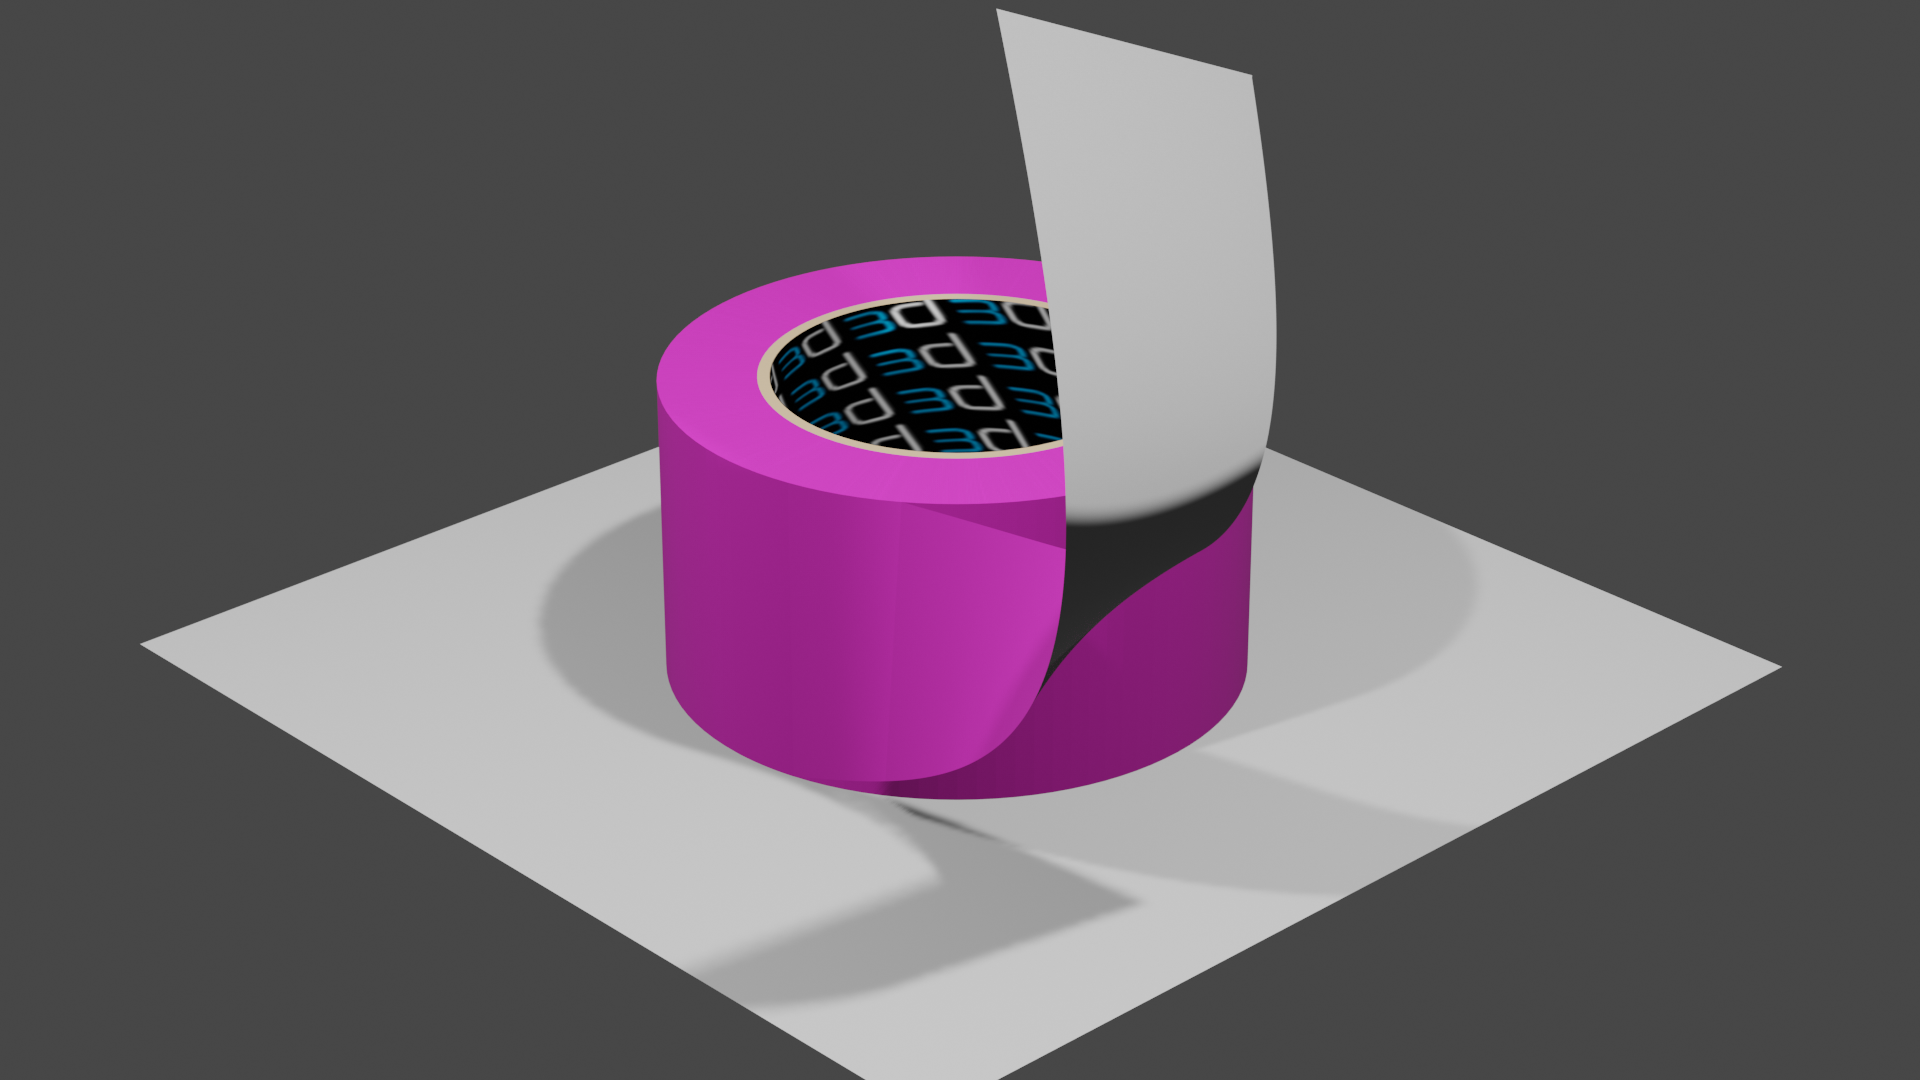
3D model surfaces use a line that is perpendicular to the face called a "normal" to define which side of the plane light interacts with and to smooth out sharp corners of the surface. Think of gaffer's tape: there is a colored cloth side and a sticky side (and it holds the universe together). The front and back sides are determined by the winding order and the normals determine if it is the cloth (front) or the glue (back) that is shown.
Backface Culling
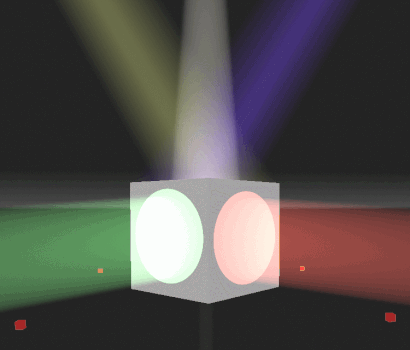
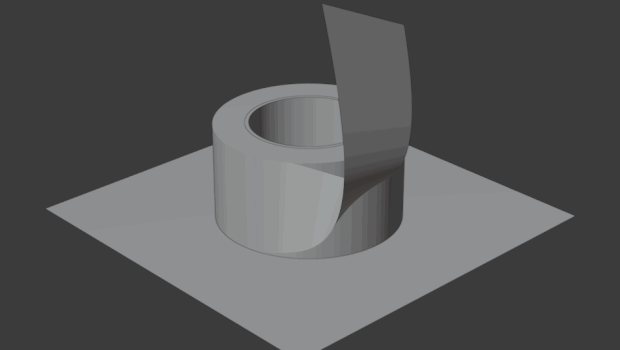
To save processing resources and to ensure that light behaves as expected within the world, 3D rendering programs, including Augment3d, use a process called "Backface Culling" that ignores or removes the backface of the surface. This creates a one-way mirror effect where the front face stops or reflects light, but the backface of the surface is transparent.
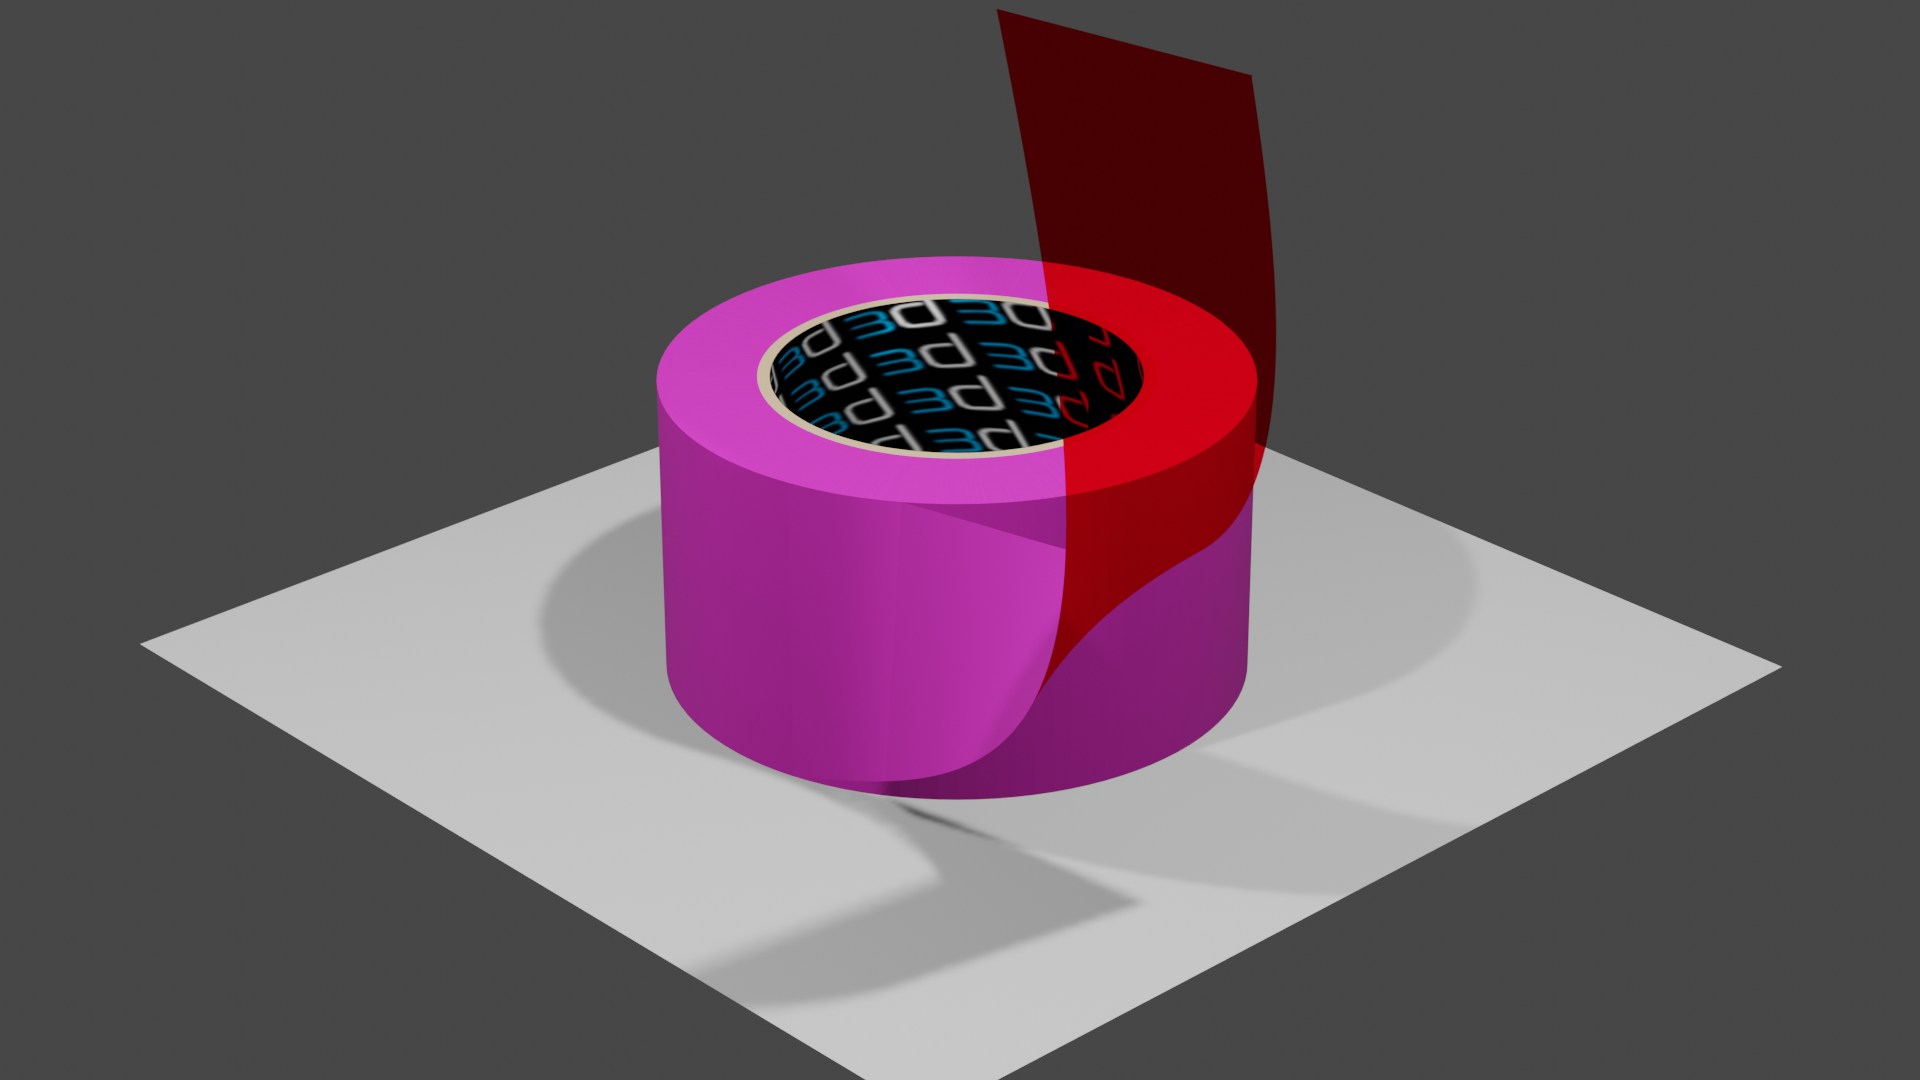
In this animation, the backface has been tinted red and is transparent so that you can see the effect of the backface being removed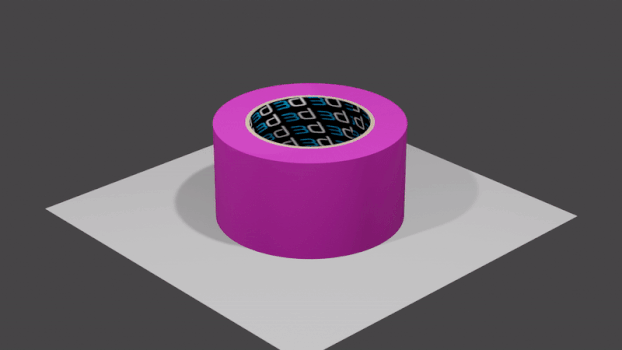
This image has the backface tinted red
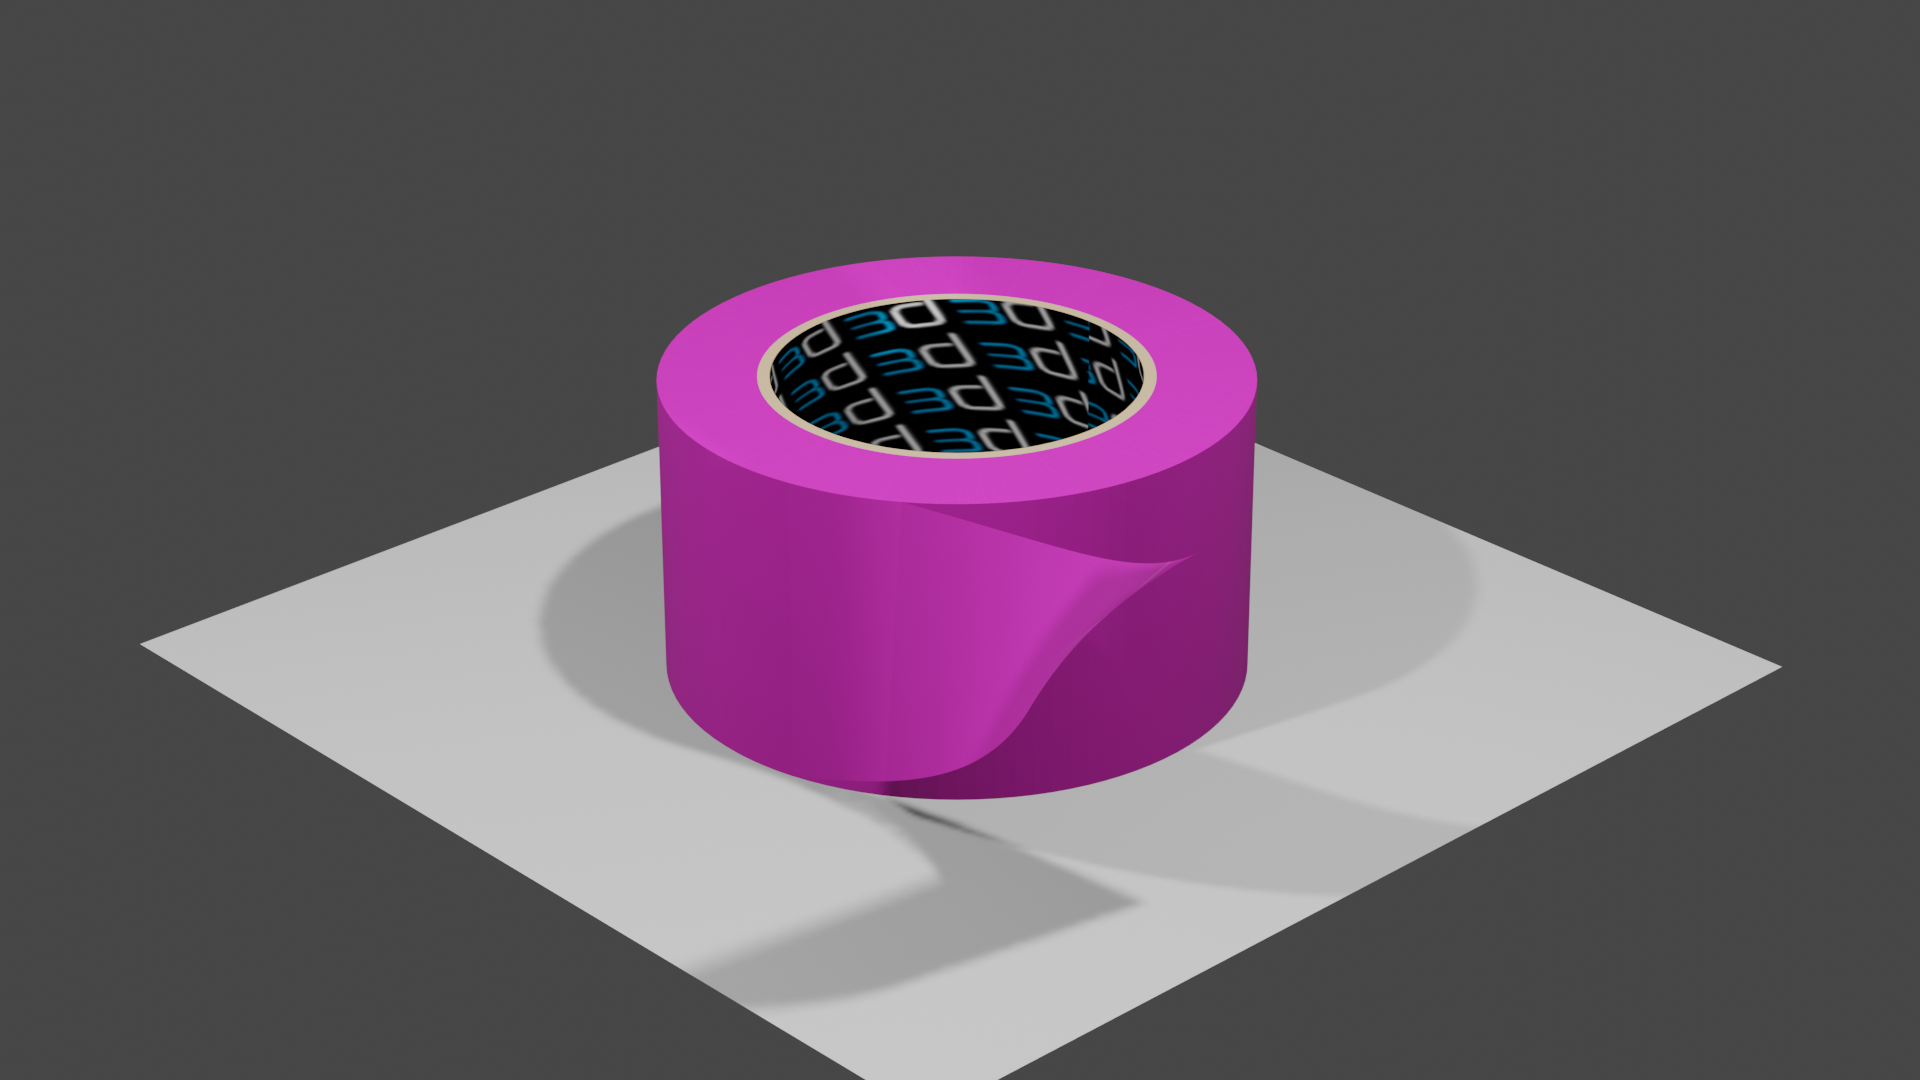
This image has the backface culled
Backface culling can cause some surfaces or even the entire object to appear invisible when viewed from certain angles.
Inverse/Incorrect Normals
Generally, when an object is drawn in a 3D environment, the normals are set to face away from the center of the object so that the object appears solid. However, if a plane was extruded into a three dimensional shape, the face on the back side of that new object may not invert its original normal.
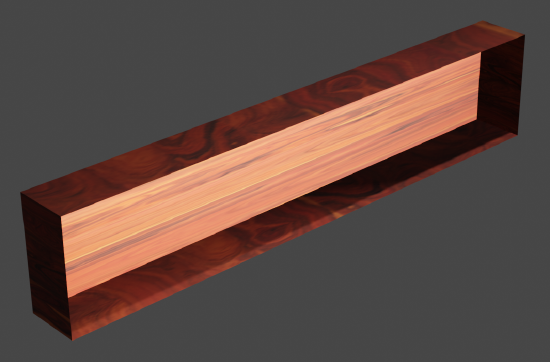
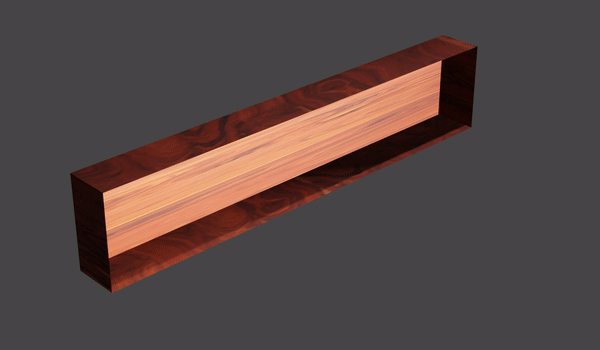
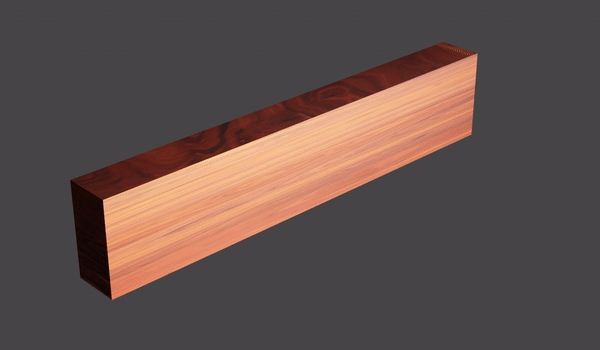
Example: This three dimensional board appears as a box due to how it was extruded.
Other times, a program that does not perform backface culling may not set normals correctly (or how you would expect) on export because it doesn't look at that information in its own presentation.

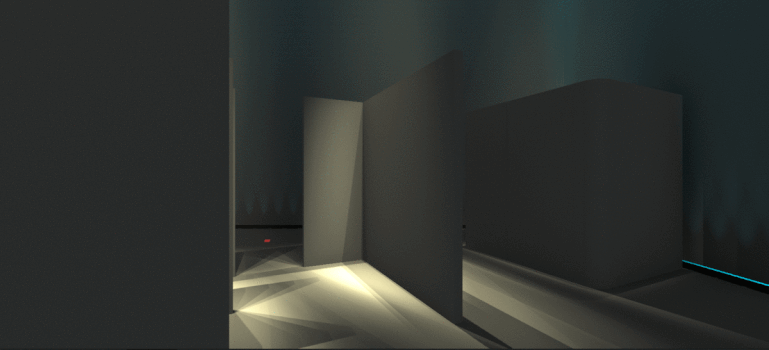
Finally, some objects intentionally have their normals pointing inward so that when you are outside the object you can see into it, but when you are inside the object, the faces appear solid. Augment3d uses this to our advantage with the stock walls so that you can be zoomed out far enough to see the entire space but not have a wall blocking your view into the venue.
In this animation, the red ColorSource Linear fixtures are washing the outside of the walls while the blue fixtures are illuminating the inside face of the walls.
Fix
Three Dimensional Objects
- Import your object into a 3D modeling tool (such as Blender)
- Use that tool's editing functions to correct the normals for the surfaces of the object so that they are facing outward
- Export your object into a compatible format with the corrected normals.

- Import your corrected model into Augment3d.
Planes
- Import your plane into a 3D modeling tool (such as Blender)
- Duplicate your plane so that it is directly behind the face of the original plane
- Use that tool's editing functions to reverse the normals of the duplicate plane so they represent the back side of the plane.
- Export your object into a compatible format with the corrected normals.
- Import your corrected model into Augment3d.
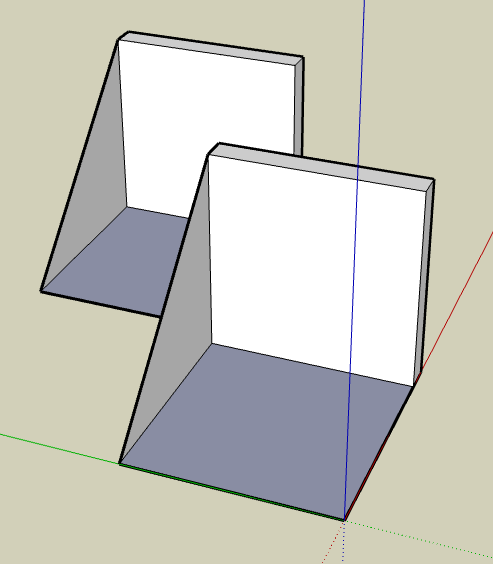
SketchUp
Augment3d removes SketchUp faces that SketchUp says are 'inside' an object and have the default "blue" backface material to improve rendering performance.
If Augment3d is removing a face that you do in fact need, you can let Augment3d know that it's required as follows:
If it is simply 'the wrong way around' (eg a box is inside out):
- Within SketchUp, right-click the faces that are backwards and choose "Reverse Faces".
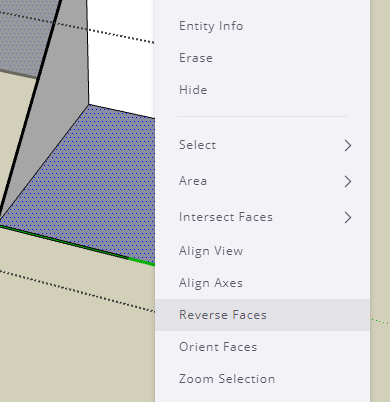
Augment3d will then hide the other side of the face instead.
If you want both sides of the face to be rendered:
- Use the SketchUp paintbucket tool to give the back face a non-default material.
Augment3d will then import both sides of the face.