Replacing CueSpider and CueSpider Lite MicroSD cards
This article is provided only to facilitate a specific troubleshooting process and requires a specific MicroSD card shipped from ETC Technical Services. Replacing the card with any card not provided by ETC will result in a non-functional CueSpider.
You will need:
- MicroSD card (7493D1001-X.X.X [current 4.2.4]) provided by Technical Services
- #1 Phillips Head Screwdriver
- CueSpider
- The MicroSD cards you receive will be labeled with serial numbers. Make sure you use the correct card for the CueSpider you're working with.
Opening the Chassis (Old Model)
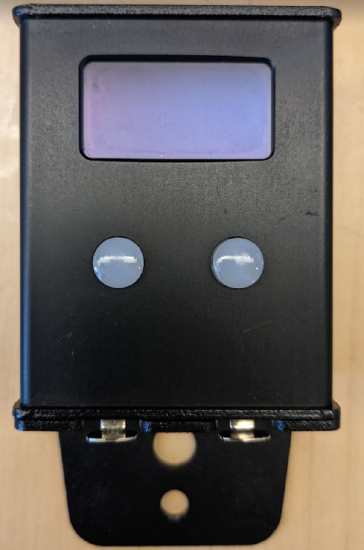
An old model CueSpider
- Remove the labels on the sides of the CueSpider. They are held on by a strong adhesive, so this can be tough--a hairdryer or heat gun will soften the adhesive allowing you to remove them more easily. Note that these labels are no longer available, so they cannot be replaced if they are torn.
- Remove the top 2 screws on the top and bottom of the CueSpider.

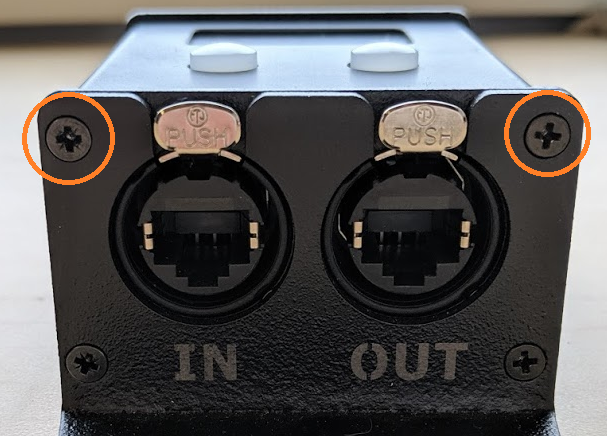
- Remove the front half of the metal enclosure by lifting it away from the rest of the unit. If it feels like it's still held in place after removing the top screws in step 2, slightly loosen the remaining screws.
Opening the Chassis (New Model)
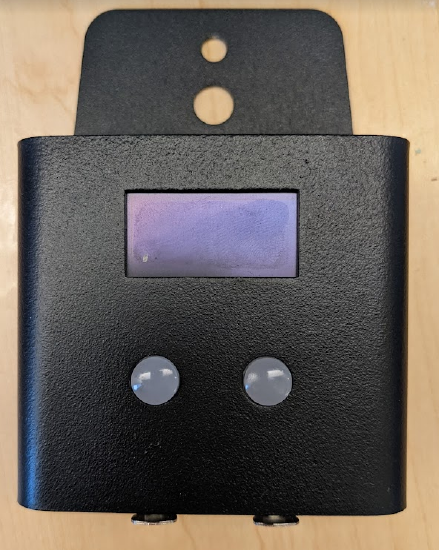
A new model CueSpider
- Remove the two screws on both sides of the unit.
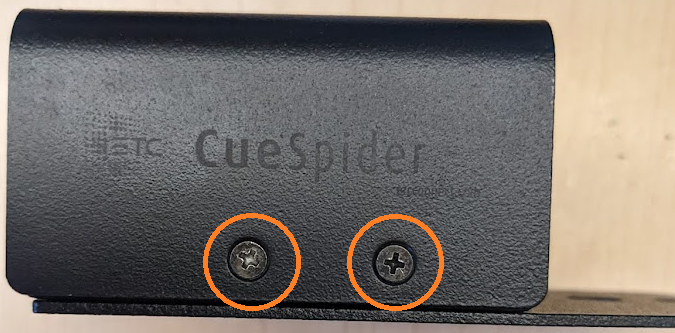
- Take the shell off of the unit.
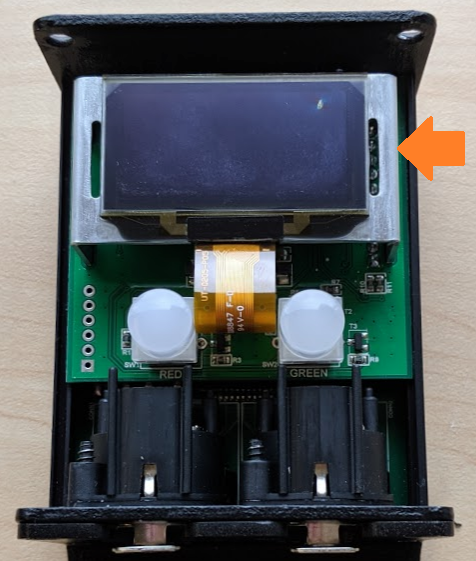
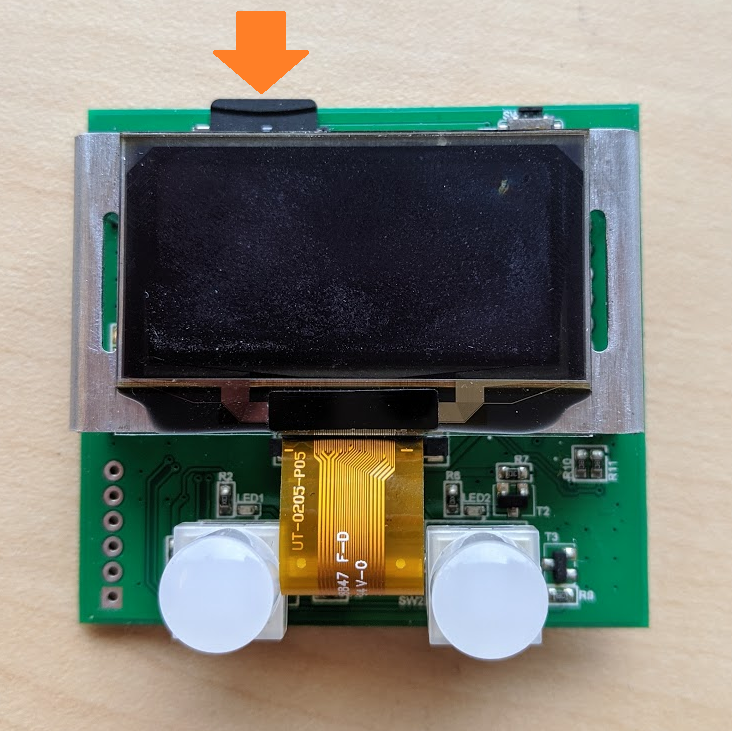
Replacing the MicroSD card
- There are two stacked circuit boards inside the CueSpider--the board with the buttons and the screen, and the board with the RJ45 ports. Remove the board with the screen by gently lifting it away from the RJ45 board, using the metal frame holding the screen in place to grip it.
- Press the MicroSD card gently until it clicks. This will eject the card.
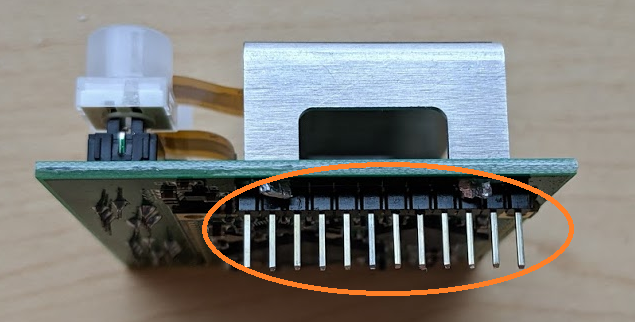
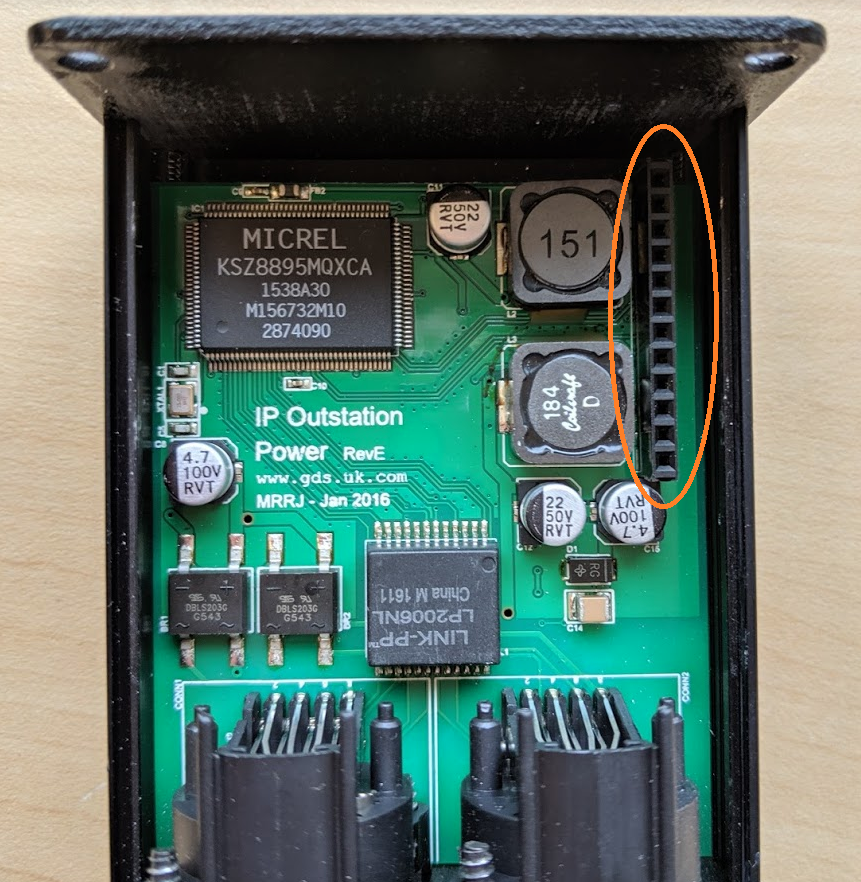
- Replace the card with the new one. Reverse steps 4-2 to reassemble the CueSpider. The top board should be seated into the bottom board using the pins shown below.
- If desired, carefully apply the new labels.