How to Reseat NVMe (SSD) drive in a Windows 10 Element 2
Explanation
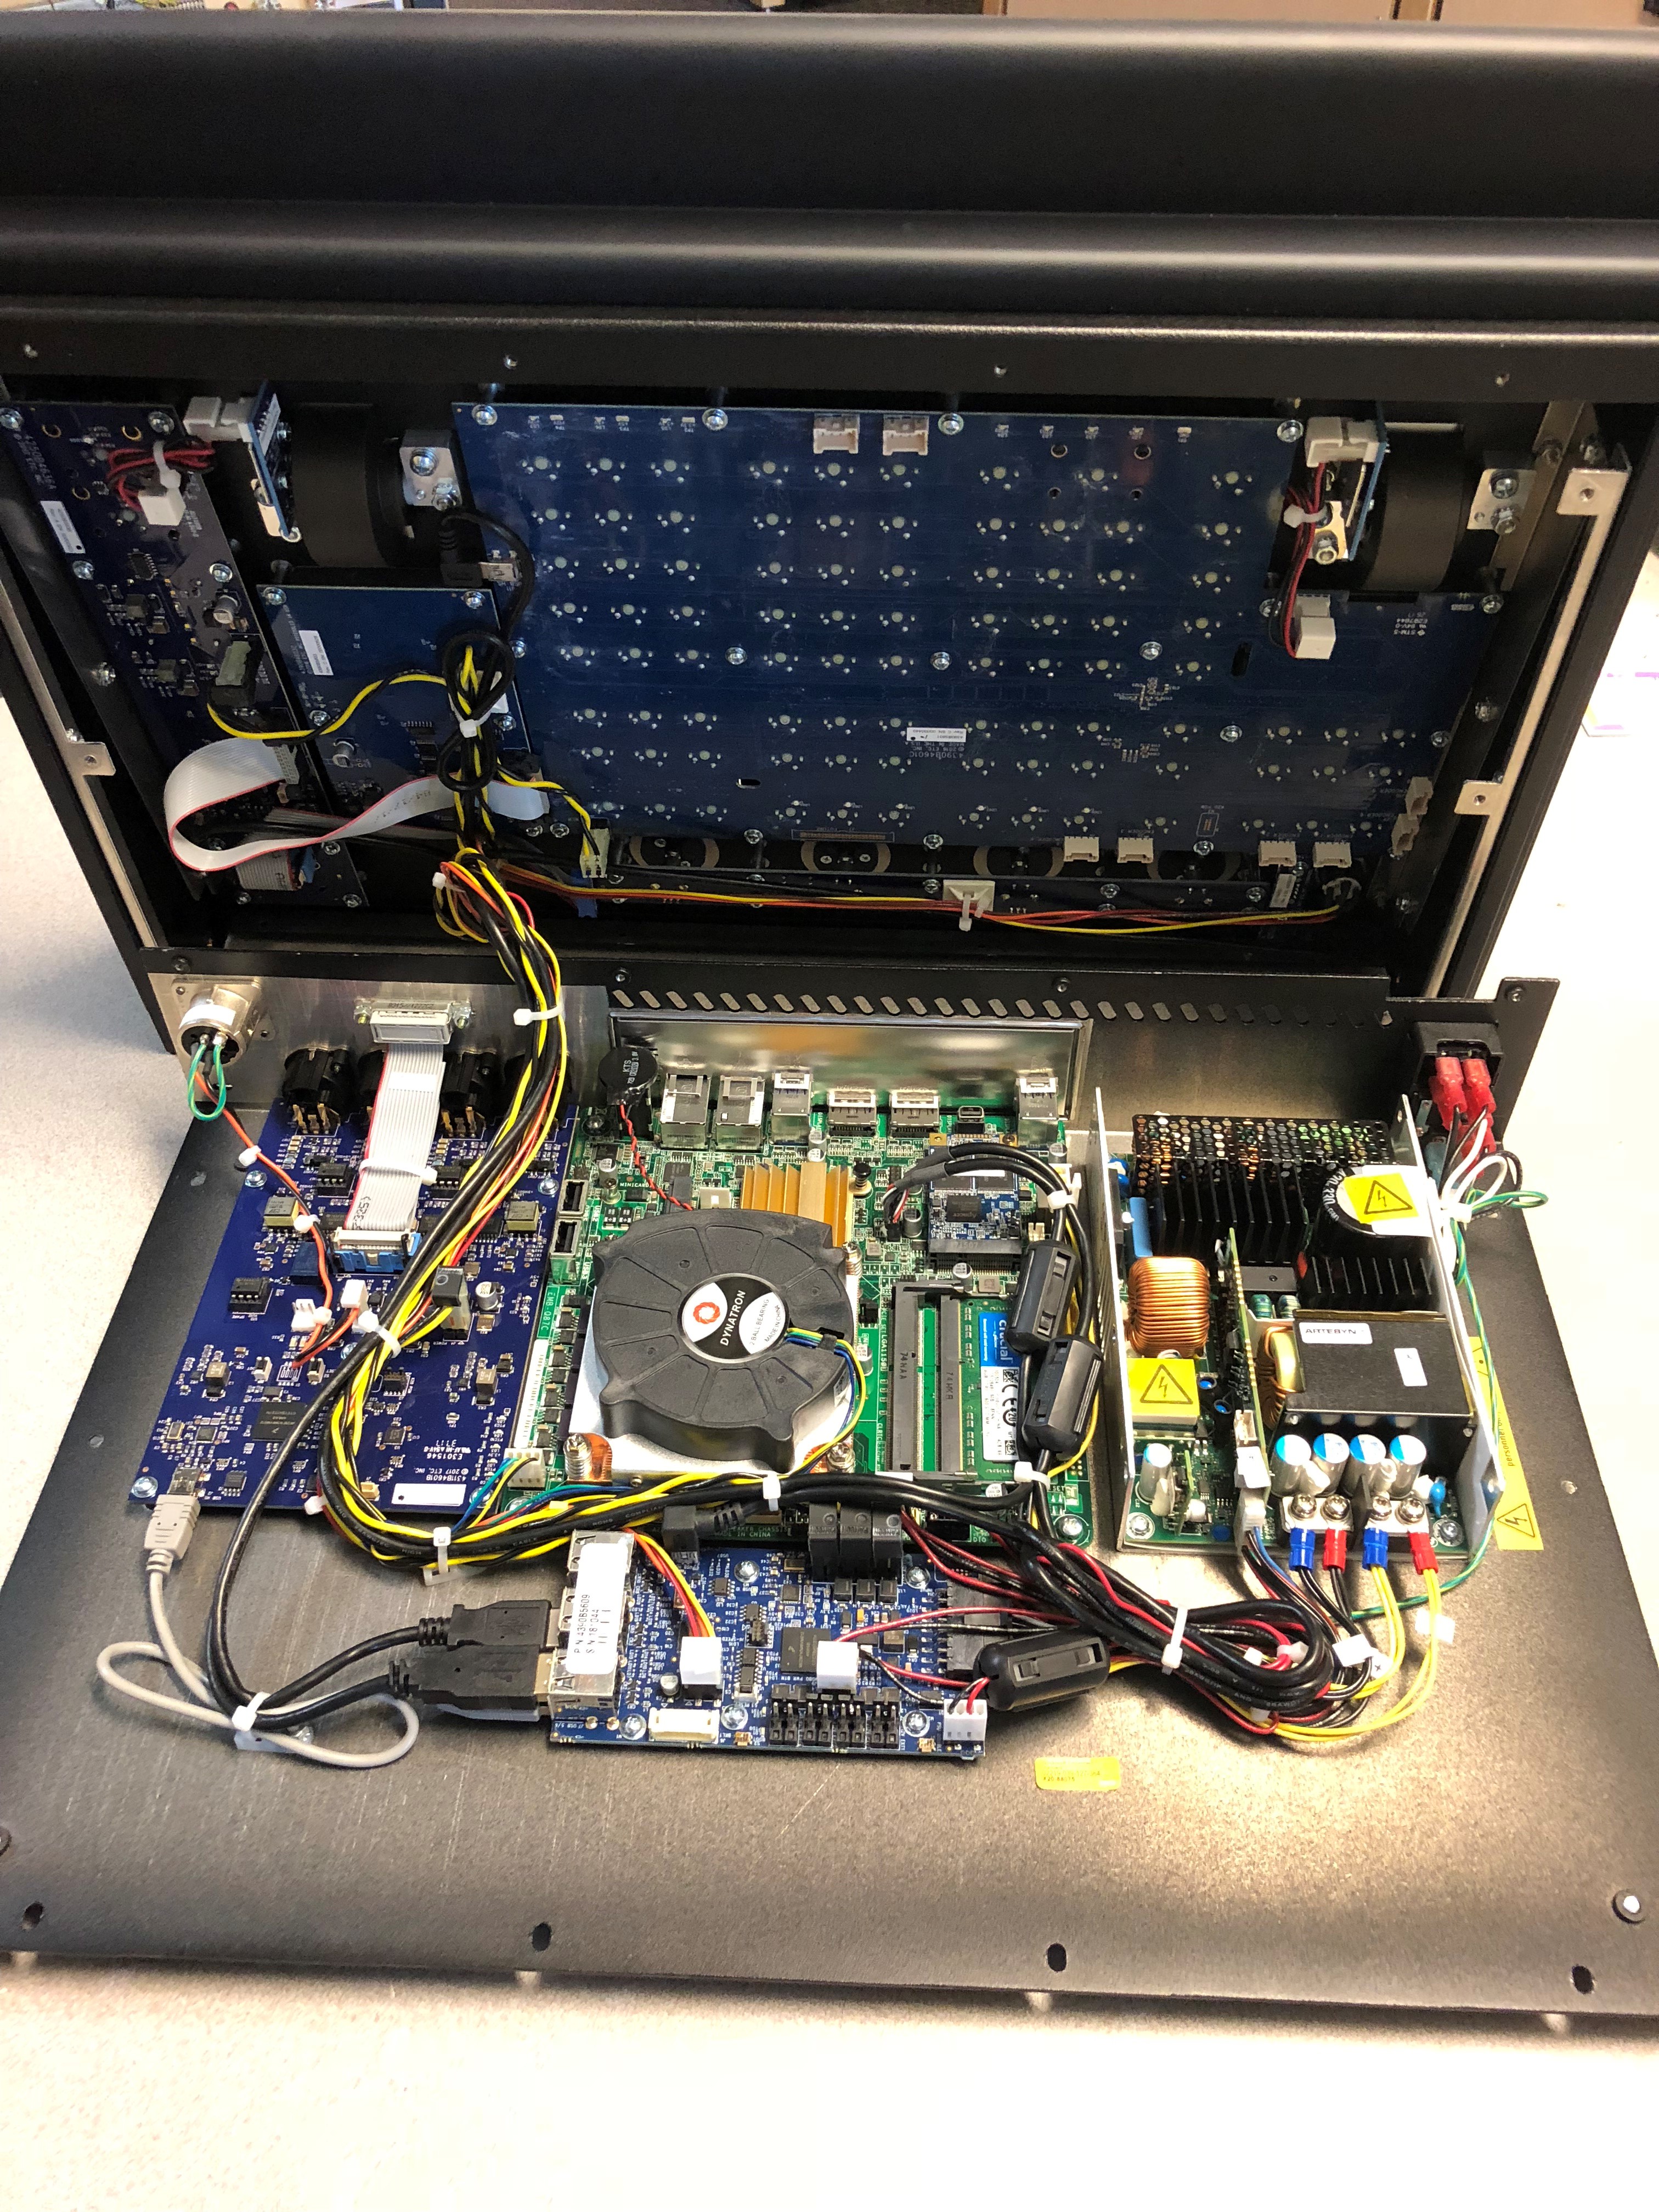
This article will walk you through how to replace or reseat the NVMe solid state drive (SSD) in your Element 2, Ion Xe, or Ion Xe 20.
While the photos here depict an Ion XE, the internal design of the Ion XE, Ion XE20, and Element 2 are similar, and the process to open them and perform the maintenance is the same for all three.
Procedure
Open the Console
- Power down your console and fully disconnect the IEC power cable from the back.
- Flip the console over and lay it face panel down on a soft surface such as carpeting or a towel.
- Remove all screws on the four sides depicted below. They will require a #1 Philips driver.

Be sure to not remove the 4 screws closer to the center of the console labeled with "Do Not Remove 4 Screws". These screws hold the power supply in place, and if removed, could cause the power supply to fall and damage the face panel.
- Carefully flip the console back over. You will want to make sure you hold the bottom tray to the face panel as there are no screws keeping them together anymore.
- Carefully lift the face panel straight up an inch. The bottom tray should stay on your work surface but the face panel will still be tethered to the bottom tray via a wire harness.
- Stand the face panel on its back edge behind the rear of the console.
Replace or Reseat the Drive
- Locate the black Apacer NVMe SSD on the main carrier board of your console.
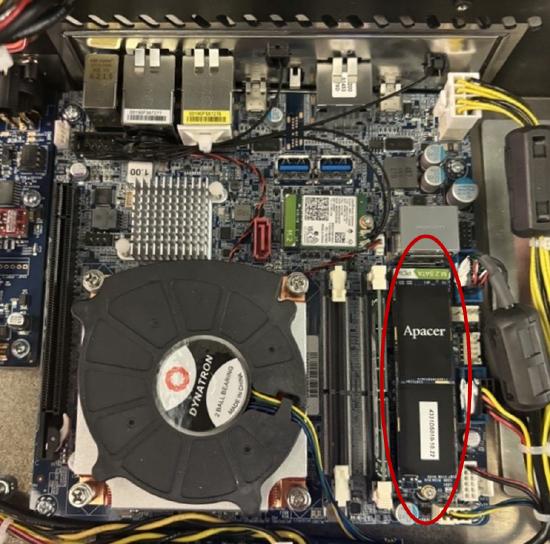
- Remove the single screw holding the NVMe in place, circled in red.

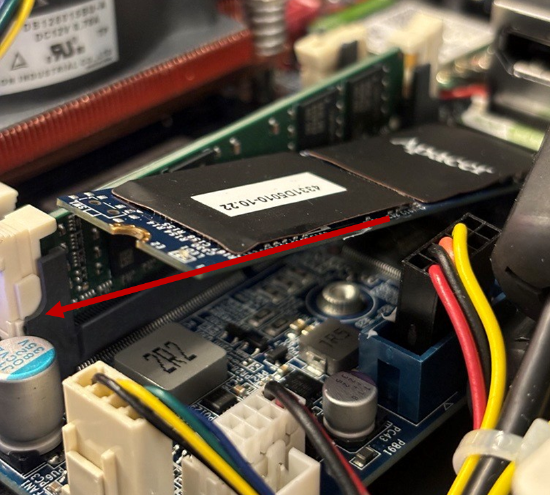
- The NVMe SSD should pop up to about a 30 degree angle. Pull the drive out.
If reseating the drive, reinsert the drive at the same angle.
If replacing the drive, insert the new drive at the same angle.
- Replace the screw at the bottom to push the NVMe SSD down. Make sure to fully tighten the screw to ensure a good connection between the drove and motherboard.
- Close the console and replace all screws.
Reimage the Console
If you have replaced the drive with a new one, follow the reimage instructions for your console to reinstall the operating system and software.