How To Tighten Eos Classic Encoder Knobs
The information in this post is provided to assist in troubleshooting. Perform work at your own risk. ENSURE ANY POWER FROM DEVICES HAS BEEN DISCONNECTED BEFORE SERVICING ANY EQUIPMENT. If you do not feel comfortable performing the work, please contact us or your local service center. Be aware that ETC and its Affiliates are not responsible for any damage or injury caused by service of our products by anyone other than us or our authorized service providers, and such damage is excluded from the product’s warranty.
Issue
From use and time, the encoder caps on an Eos Classic console may become loose. If so, you can tighten them back down by tightening their set screw. To do so follow the procedures laid out below.
Required Tools:
Flat Head Screwdriver
#2 Phillips Screwdriver
#1 Phillips Screwdriver
Needle Nose Pliers
5/16 Nut Driver
1/16 Allen Wrench (Angled Hex Key)
How to:
To access the encoders you will need to open the console. Locate and loosen the
spring-loaded screws located on both sides of the console.

After the screws have been loosened, flip the face panel up like the hood of a car.
In order to tighten the set screw you must remove the encoder touchscreen and encoders to gain access to the set screw.
Disconnect the 3 power connectors from the LCD Screen and the Inverter board.
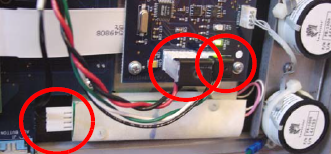
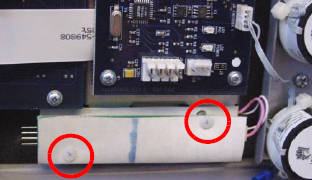
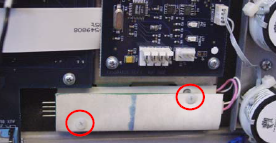
Carefully remove the 2 Nylon #1 Phillips head screws from the LCD Inverter Board.
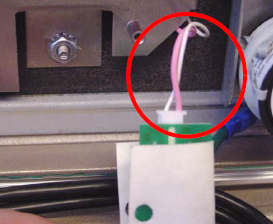
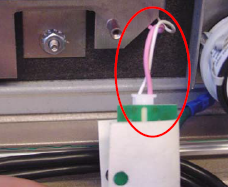
Disconnect the White and Pink power connector from the LCD Inverter Board.
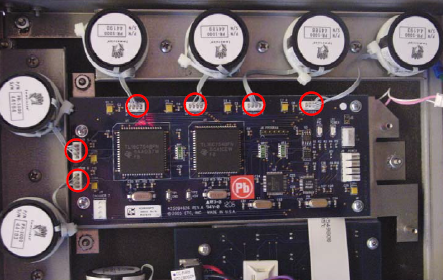
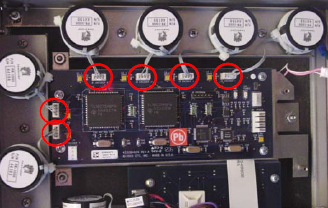
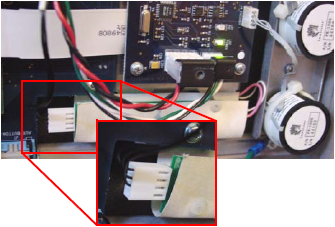
Disconnect the 6 Encoder power Connectors.
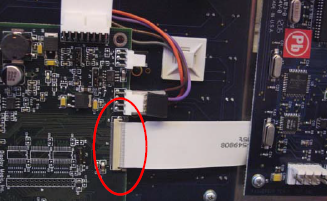
Disconnect the LCD Screen Ribbon cable from the LCD screen controller board.
Remove the 3 x 5/16 nuts holding the LCD Screen in place.

Remove the LCD Screen and set aside.
You should now have access to the set screw (1/16") on each encoder. Tighten this down.

Reassemble:
Slide the ribbon cable back into the LCD controller board receptacle.
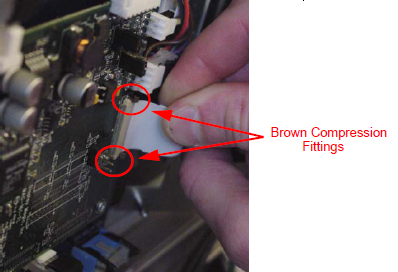
Slide the brown compression fitting behind the LCD Ribbon cable and align with the
receptacle.
Tighten top and bottom pins on the brown compression fitting.
Place the LCD Screen back on the 3 bolts, and tighten down the 3 x 5/16" Nuts.
Connect all 6 of the Encoder power connectors into the LCD Screen board.
Connect the White and Pink power connector from the LCD Inverter Board.
Carefully re attach the 2 Nylon #1 Phillips head screws from the LCD Inverter Board.
Do not forget to include the protective Nomex around the LCD Inverter Board.
Re-Connect the 3 power cables on LCD Screen. Note the orientation of the cable connected to the inverter board.
To close the Eos console lift up to disengage the lock and lower slowly. Re-tighten the screw on each side.