Deploying Eos Family Software v3 via a Corporate Network
Introduction
This support article will give an idea about how best to deploy the Eos Family Software v3 across an Active Directory network.
ETC does not provide technical support for this process. This article serves as an example of how Eos can be deployed across a corporate network. It is the responsibility of a network technician to ensure that this is the correct method for your network.
Description
The Eos Family installer has a silent install switch that can be executed from the command line. This can be triggered via the use of a start-up script in group policy or via Microsoft Deployment Toolkit.
Active Directory (Startup Script)
- Place the installer file that is downloaded from www.etcconnect.com/eos-software into your software distribution share. For example \\FILESERVER1\Software$
- Place the script below into the same share next to the installer. Make sure you update the UNC path to the installer.
@echo off

                SET EOSINSTALLER="C:\Users\jhart\Downloads\ETC_EosFamily_v3.1.5.8.exe"

                IF EXIST "%PROGRAMFILES%\ETC\EosFamily\v3\Eos\Eos.exe" (

                    echo Eos is already installed

                ) ELSE (

                    echo Starting EOS Install

                    %EOSINSTALLER% /S

) - Open up your group policy editor and create a new policy at the desired point
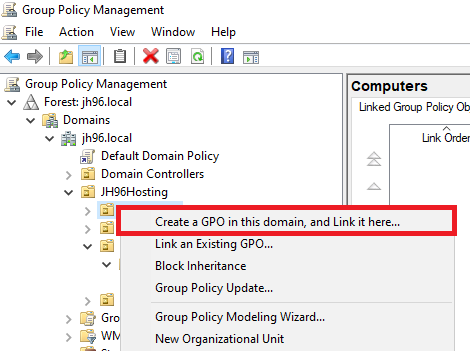
-
Edit your new GPO and navigate to Computer Configuration > Policies > Windows Settings > Scripts (Startup/Shutdown). Then right-click on Startup and go to Properties.
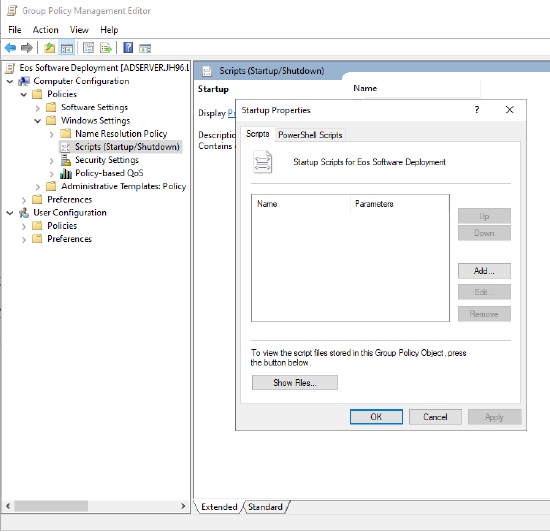
-
Click on Add and add the path to the install script

-
Click ok on the "Add a Script" window. Click 'ok' on the startup script window. Close the GPO.
Microsoft Deployment Toolkit (MDT) Application
- Open up Deployment Workbench and navigate to your deployment share > Applications
- Right click "Applications" and select "New Application"
- Select "Application with source files" and click next
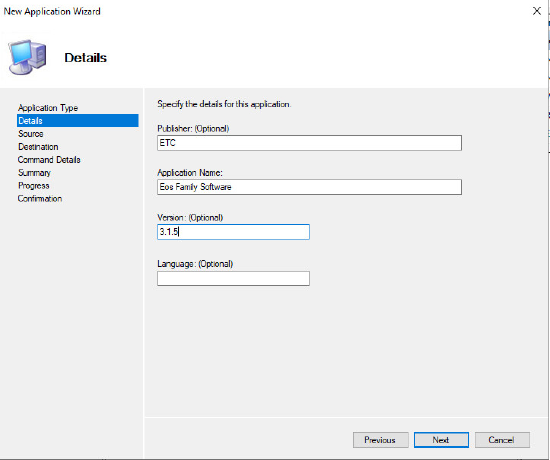
- Enter the following details, while remembering to change the version number if you need to. Then click next
- Browse for the location of the installer file and click next
- Change the destination directory if you want to and click next
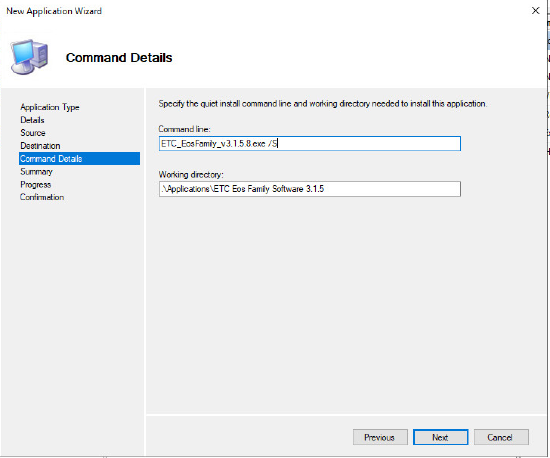
- Enter the following for the command line. Make sure the installer name is correct. Then click next
- On the summary screen, check everything is correct and click next
- When the process is complete. Click Finish