Removing the Brick CPU from an Express Console
How to remove the Brick (CPU) from an Express Console
If you need a repair on your Express, but the face panel is fully functional, you may be asked to send in only the Brick or CPU for repair. This article will cover removing the brick and also reattaching the brick.
The information in this post is provided to assist in troubleshooting. Perform work at your own risk. ENSURE ANY POWER FROM DEVICES HAS BEEN DISCONNECTED BEFORE SERVICING ANY EQUIPMENT. If you do not feel comfortable performing the work, please contact us or your local service center. Be aware that ETC and its Affiliates are not responsible for any damage or injury caused by service of our products by anyone other than us or our authorized service providers, and such damage is excluded from the product’s warranty.
Removing the CPU "Brick"
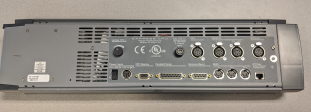
- Disconnect power and all other connections from the back of the console.
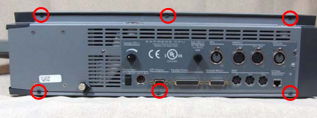
- Place the console on a clean, flat surface with the rear facing you.

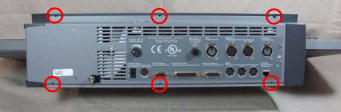
- Remove the six (6) black screws.
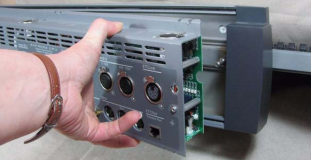
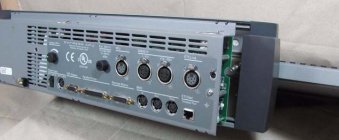
- Remove the CPU assembly, being careful not to touch the internal circuit boards to avoid causing static or physical damage.
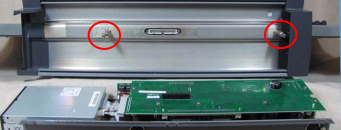
- Unscrew the two (2) rear flathead screws. This may be easiest while something is placed under the face panel to support it, like a piece of foam.
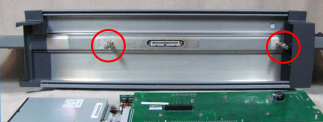

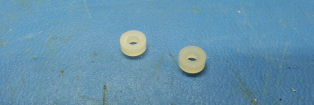
At this point if you find spacers installed in your console, please discard them.
- Now the C shaped piece of metal should be able to slide free from the face panel. Replace this on the back of the CPU to protect the electronics and reinstall the six (6) black screws.
Re-attaching the CPU "Brick"
- Please the face panel on a clean, stable surface.
- Remove the six (6) black screws from the back of the brick and gently remove the CPU.
- Place the C-shaped front metal onto the two posts and tighten the two (2) flat head screws.
- Place the CPU assembly into the front metal bracket, being careful to line up the screws and connector. The CPU should fit tightly into the metal C.
- Replace the six (6) black screws.
- Reconnect the power and other external connections such as the monitor and DMX.
- Power the console on and test fuinctionality.