Obsession 1 Console Configuration and Hardware

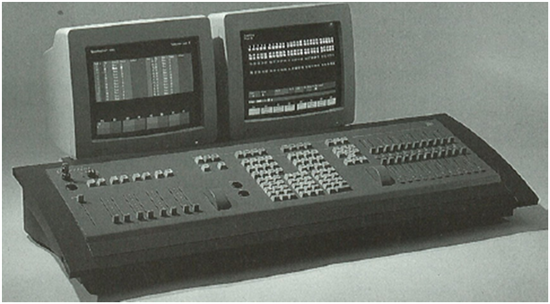
There were two console variants, the Obsession 600 and the Obsession 1200. The 600 and 1200 refer to the number of channels available. Both consoles support up to 1024 Dimmers, via three physical DMX outputs.
Other accessories that worked with the console included a Designers Remote Console (DRC), the Net1 RVI, a Remote Focus Unit(RFU) and a Touchpad RFU.
The console supported /Support/Articles/Consoles/Legacy-Consoles/ for network communication and could work as a tracking backup pair with a second console.
Configuring Obsession Networking and Tracking
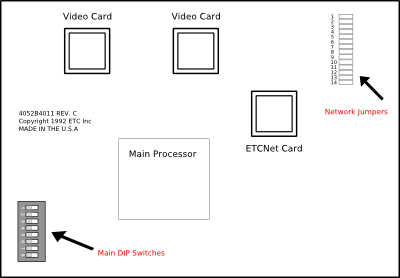
The Obsession 1 uses either a BNC(Thinnet) or RJ45(10baseT) connection for networking. To configure which connector is used you need to alter jumper or dip switch settings inside the console. The changes you need to make depend on the revision of your console's serf board; the revision number is visible on the board.
There are also DIP switches to configure redundant tracking.
Revision C Serf Board

Main DIP Switch Settings :
| Switch | Default Position | Function |
|---|---|---|
| 1 | Off | Factory Use Only |
| 2 | Off | Unused |
| 3 | Off | Unused |
| 4 | Off | Unused |
| 5 | Off | Unused |
| 6 | Off | Console mode on startup if tracking. On = Backup, Off = Master |
| 7 | Off | Full Tracking Backup. On = Tracking Enabled, Off = Tracking Disabled |
| 8 | On | Network installed. On = Yes, Off = No |
The net jumpers define which network connection is used, BNC (ThinNet) or RJ45 (10BaseT).
| ThinNet | Install jumpers 1 through 6 only |
| RJ45/10BaseT | Install jumpers 7 through 12 only |
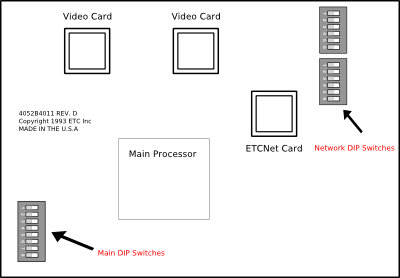
Revision D and E Serf Boards

On revision D and E Serf Boards, the network jumpers are replaced by DIP switches.
The network DIP switches define which network connection is used, BNC (ThinNet) or RJ45 (10BaseT). The operation of the main DIP switches is the same for both boards.
|
ThinNet |
Back 6 DIP switches turned on only |
|
RJ45/10BaseT |
Front 6 DIP switches turned on only |
