Replacing the Power Supply of an ArcSystem 4-Cell Round Fixture
If you have an Arcsystem 4-Cell Round fixture with a bad power supply, you may need to replace the power supply in the field. This process is the same for all color temperature and beam angle variations of the fixture, as well as the RDM / ArcMesh variations and Emergency / Non-Emergency. This process does not apply to the 4-cell Pendant version of the fixture, as its power supply is in the canopy housing.
Things You Will Need
- #1 Phillips Head Screwdriver
- M3 Nut Driver
- Power Supply (ETC P/N PS501)
Process
- Disconnect the fixture from power and data and place it on a work surface.
- Remove the circled screws (ETC P/N HWM1550). The screws circled below are mirrored on the opposite side of the fixture, so there are 6 on the rear of the fixture and 2 on the front.
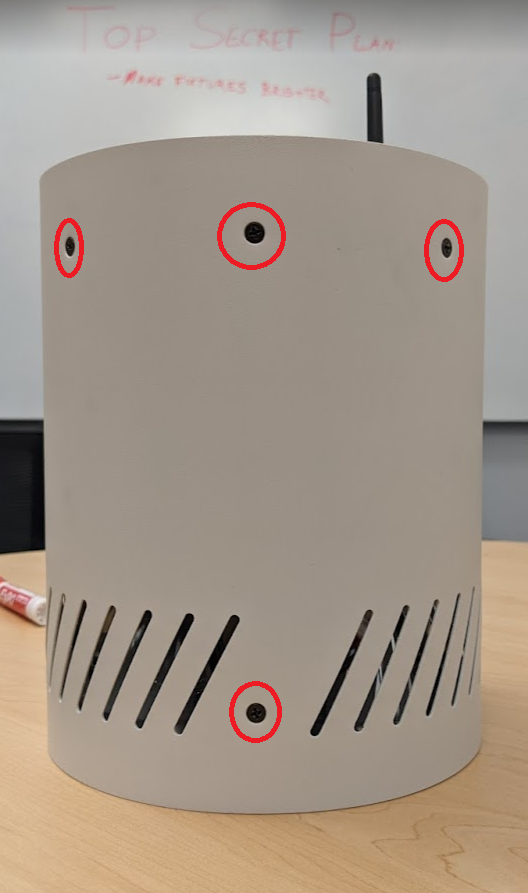
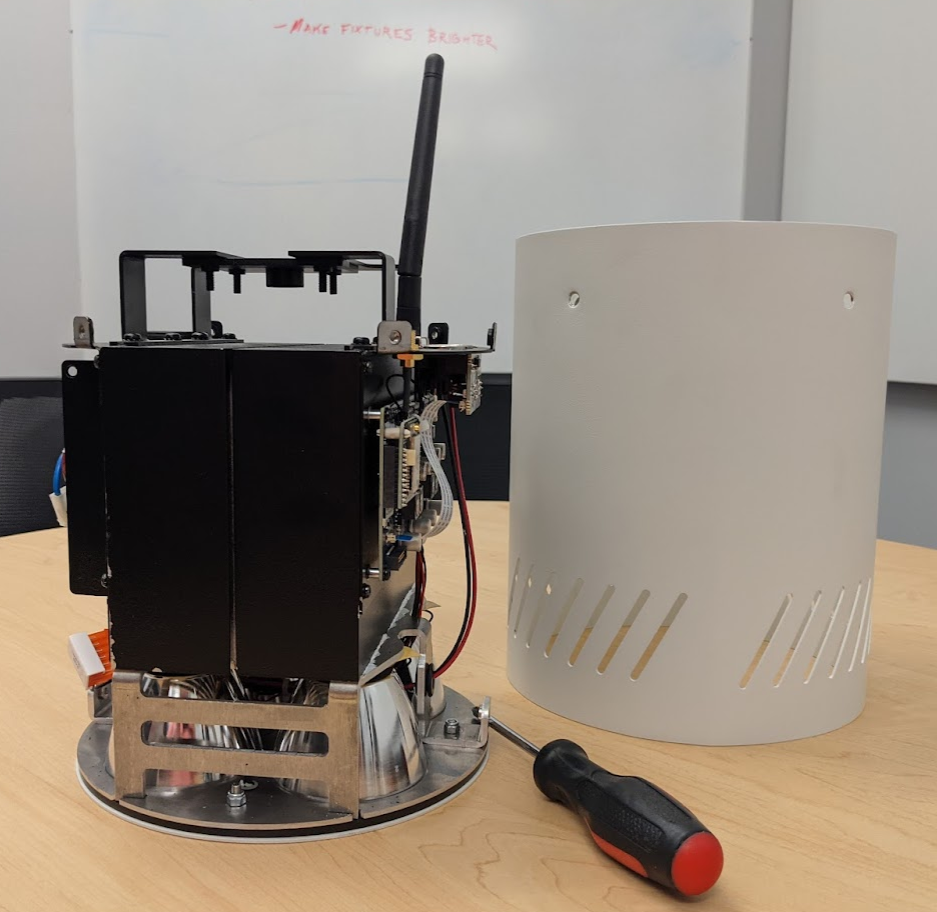
- Remove the outer shell of the fixture by sliding it up and away from the inside. The power supply is on the opposite side of the heatsinks from the driver card PCB, closest to the power input cables(EM) or IEC connector(non-EM).
- Disconnect the circled connectors from the power supply. These connectors are latching--note the orientation of the wires to connect them properly when installing the new supply.
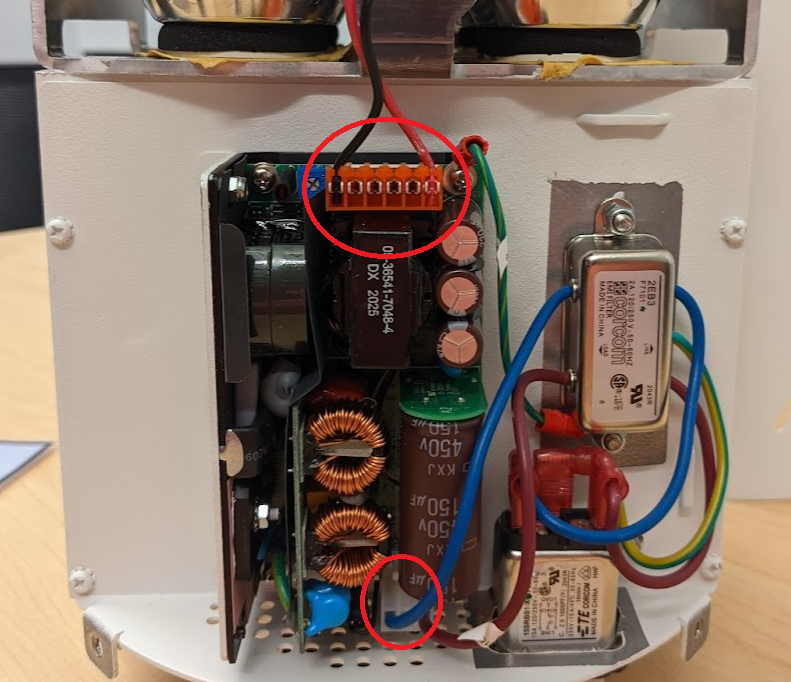
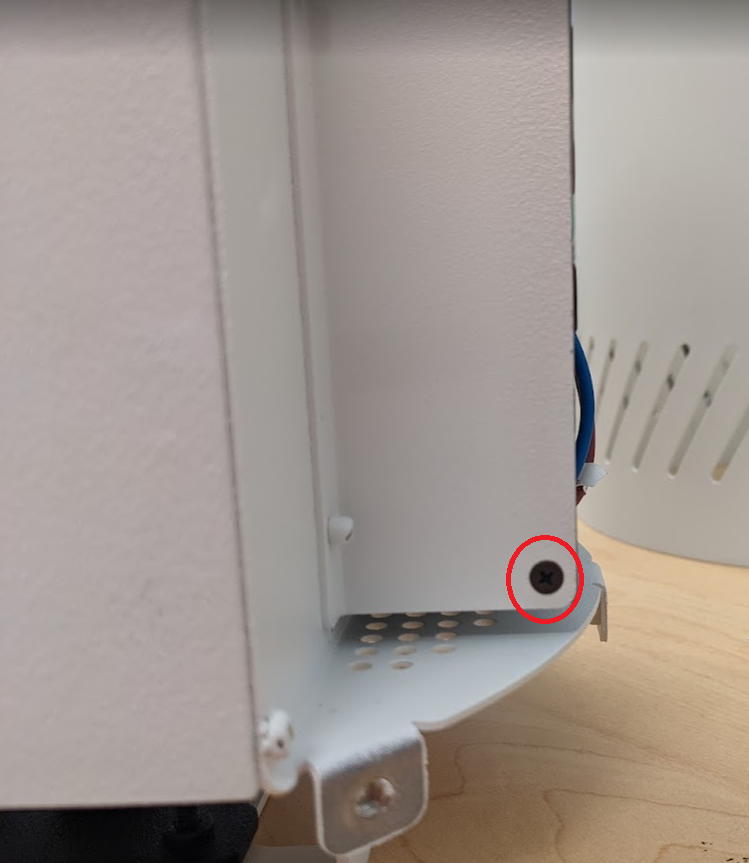
- Remove the screw at the bottom of the power supply bracket (ETC P/N HWM1169).
- Remove the screw holding down the ground wire (This screw is included with the PS501 power supply and does not have an ETC part number).
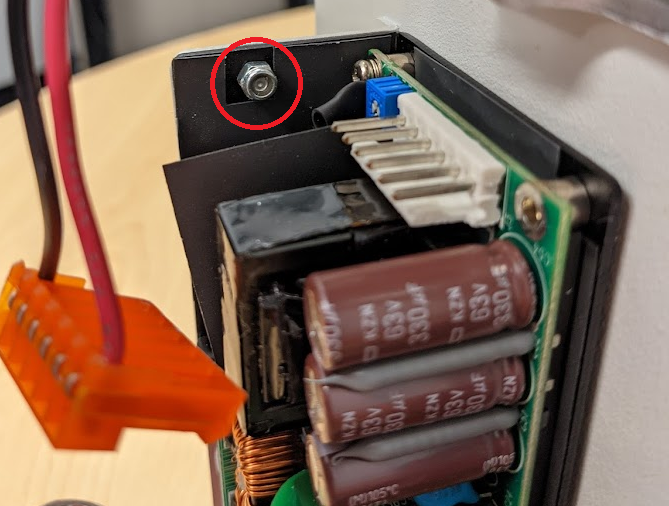
- Remove the nut (ETC P/N HWM314) from the PEM at the top of the power supply bracket with the M3 nut driver to free the power supply. Note that you will need to do this after removing the orange connector from the power supply.
- Perform the above steps in reverse to install the new power supply.