Updating ColorSource Spot to v1.3.0
Explanation
ColorSource Fixture Family v1.3.0 Firmware fixes an issue where the DMX Address of a fixture was not saved properly, and an improved dimming curve for a faster zero-count (bump) response. All fixtures should be updated to v1.3.0 or higher at the same time. This same firmware can be applied to all ColorSource Fixture types, whether "standard" or Deep Blue.
Updating ColorSource fixtures from below v1.3.0 requires two separate Update Steps: first, the bootloader must be updated. Then, the fixture's firmware can be updated.
Updating the Bootloader
- Read the ColorSource v1.3.0 Release Note: http://www.etcconnect.com/WorkArea/DownloadAsset.aspx?id=10737484621
- Download and Install UpdaterAtor Software from our website: https://www.etcconnect.com/Products/Networking/Software/UpdaterAtor.aspx
- Connect a Laptop or PC running Windows 7 / 8 /10 (currently MAC OS not supported) to any one of these devices:
Item Part Number ETC USB/DMX Service Cable (Called the USB WHIP) 5000A1039 ETC USB/DMX Gadget I or Gadget II 4267A1001 or 4267A1004 ETC Networked DMX RDM Gateway http://www.etcconnect.com/Products/Networking/ - Connect one of the above devices to the CS Fixture.

CAUTION: Ensure that all non-ETC DMX Opto-Isolators, Opto-Splitters, or DMX repeaters are removed from the DMX chain between the above devices and the fixtures. Passing the software/firmware updates through one of these devices can leave the fixture without firmware and unusable until sent to ETC for repair. ETC's Response Gateways and Optos are able to pass software/firmware updates on to the fixture. -
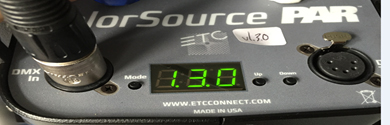
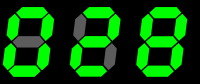
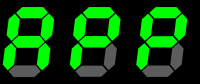
Turn on the Fixture. While it is booting, the display should show what Firmware it has.
It will probably say 1.0.0, 1.0.1, or 1.1.0. If it says 1.3.0 or higher, then the fixture already has an updated bootloader.
If running 1.3.0 or higher, continue below to Updating Firmware.
-
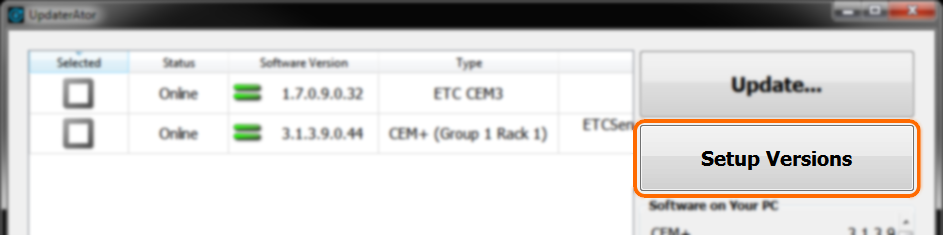
Open UpdaterAtor software and press Setup Versions on the right side:
-
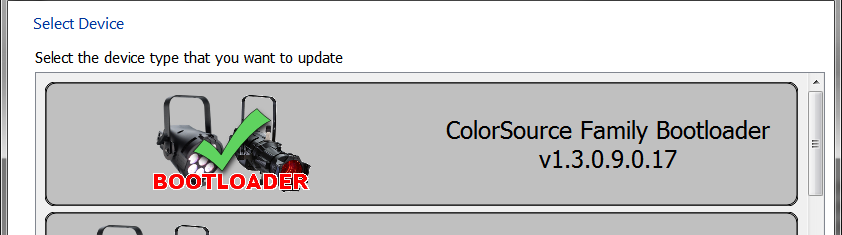
Check to make sure that you have the following versions installed in UpdaterAtor:
Device Type Version ColorSource Family Bootloader 1.3.0.9.0.17 or Higher ColorSource Family v1.3.0+ 1.3.0.9.0.15 or Higher 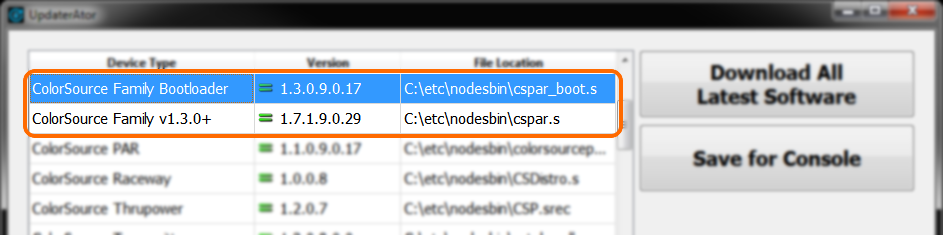
If not, press Download All Latest Software button to the right to get it.
If this button is missing, then the UpdaterAtor software has not detected an Internet connection.
You may need to close this small menu and enter it again if your Internet connection needs to be refreshed. -
Once Firmware v1.3.0 or higher is on your computer and listed as above, then go back to the Main Menu.
Updating Bootloader via USB Whip or Gadget
-
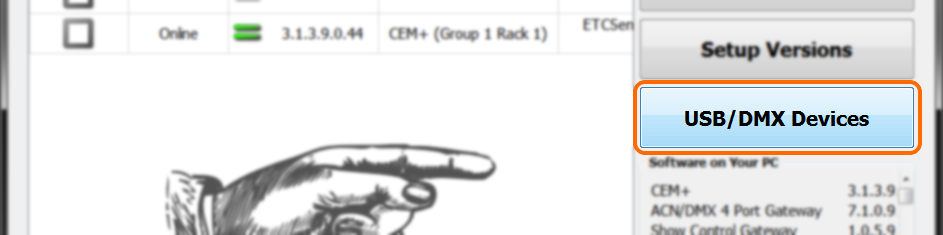
If connected to a fixture via a USB/DMX Cable (USB Whip) or Gadget, click on USB/DMX Devices.
-
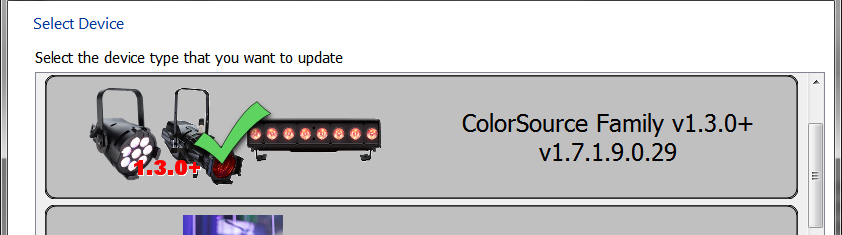
Click Next and then select the ColorSource Family Bootloader v1.3.0.9.0.17 then click Next and finally Update Device(s).
-
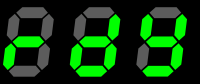
The fixture will display rdY (Ready) and dL (Download) on its display and will count up a percentage completed.
-
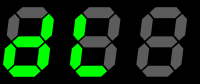
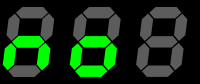
Once the display shows APP and no, it has completed with the Bootloader Update.
If this doesn't appear on the display, then the update has failed. Please re-try this process.
-
Move on to Updating the Firmware
Updating Bootloader via RDM
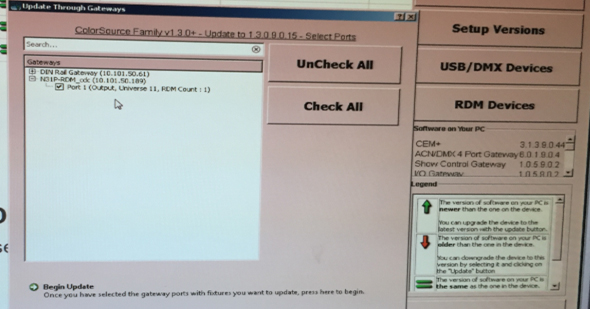
- If connected via a Net3 Gateway, click on RDM Devices.
- Click Next and then select the ColorSource Family Bootloader v1.3.0.9.0.17 then click Next and finally Update Device(s).
- Then check only the Ports that you want to update through, and press Begin Update at bottom
-
The fixture will display rdY (Ready) and dL (Download) on its display and will count up a percentage completed.
-
Once the display shows APP and no, it has completed with the Bootloader Update.
If this doesn't appear on the display, then the update has failed. Please re-try this process.
-
Move on to Updating the Firmware
Updating the Firmware
Updating Firmware via USB Whip or Gadget
-
If connected to a fixture via a USB/DMX Cable (USB Whip) or Gadget, click on USB/DMX Devices.
-
Click Next and then select the ColorSource Family v1.3.0+ then click Next and finally Update Device(s).
-
The fixture will display rdY (Ready) and dL (Download) on its display and will count up a percentage completed.

-
Once the process has completed, reboot the fixture to check the proper version displays on power on.
Updating Firmware via RDM
- If connected via a Net3 Gateway, click on RDM Devices.
- Click Next and then select the ColorSource Family v1.3.0+ then click Next and finally Update Device(s).
- Then check only the Ports that you want to update through, and press Begin Update at bottom
-
The fixture will display rdY (Ready) and dL (Download) on its display and will count up a percentage completed.
-
Once the process has completed, reboot the fixture to check the proper version displays on power on.
If you have questions about this please contact ETC Technical Services.