Manual Installation of Gadget Driver on Windows
Problem
If a problem occurs during the driver installation, it is possible to manually install the drivers for Gadget or the ETCnomad channel dongle on a Windows PC by pointing Device Manager to the correct location.
This could be seen by a Gadget plugged into a computer and having a blinking green light.
Solution
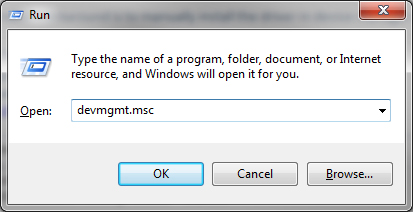
- Go to Start -> Run (Windows+R) and type “devmgmt.msc”
Alternate: in the Start Menu, search for Device Manager
- In Device Manager, locate the entry for the Gadget or the Dongle. It may show up in ETC USB Interfaces, Universal Serial Bus controllers, or in Other Devices.
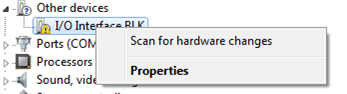
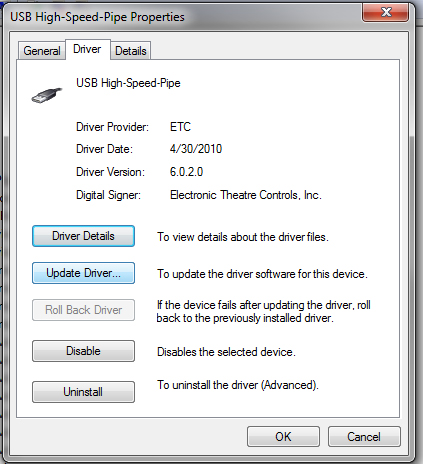
- Right click on it and choose Update Driver. If there isn’t an option available for Update Driver, select Properties instead and choose Update Driver from the tabs.
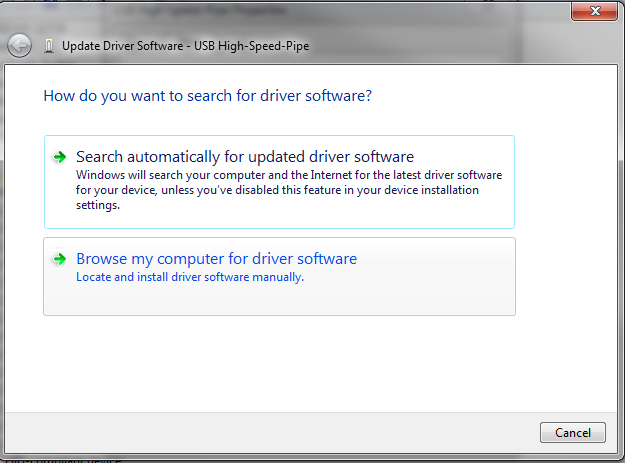
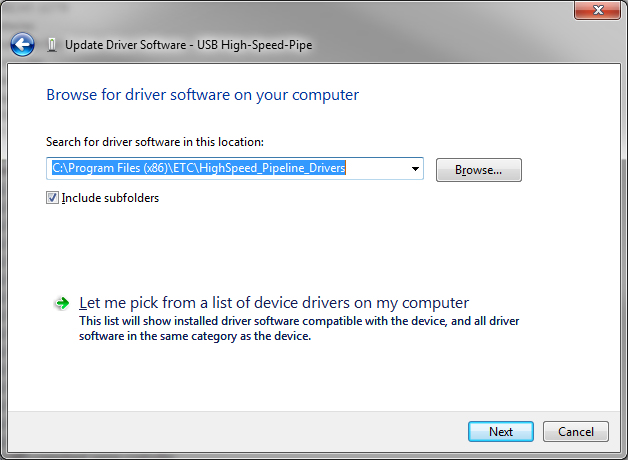
- In the dialog, choose “Browse my computer for driver software”
- Select the correct file directory based on the model of the Gadget you have.
Gadget Model File Directory Original Gadget, 1 DMX Port C:\Program Files (x86)\ETC\Highspeed_Pipeline_Drivers Gadget II, 2 DMX Ports C:\Program Files (x86)\ETC\ETC_WinUSB_Drivers Gadget II CPU2, 2 DMX Ports C:\Program Files (x86)\ETC\ETC_WinUSB_Drivers
- The computer will load the drivers and the Gadget should now show up in the Universal Serial Bus controllers section with the names described below for each hardware type. NOTE: The ETCnomad Channel Dongle can be found in the Universal Serial Bus Controllers section and will be labeled as SafeNet, Inc. HASP Key and another line labeled SafeNet Inc. USB Key.
- Original Gadget = ETC Gadget
- Gadget II = ETC Gadget HS
- Gadget II CPU2 = ETC Gadget HS IMX