How to Replace Sensor CEM Classic DMX Driver Chips
Explanation of Issue
DMX driver chips may fail when subjected to excessively high voltage. This is commonly caused by a power event such as a lightning strike.
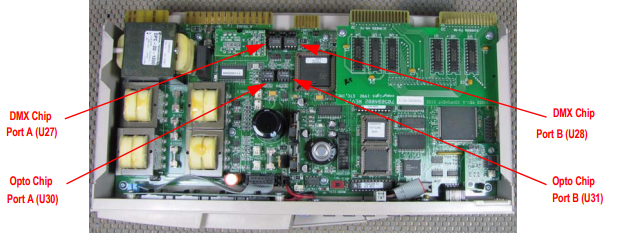
You may need to replace the DMX driver chip if the CEM is not receiving DMX from a known working control source (Example message: DMX Port A: No Input), if your lights flicker or if the chip appears burnt or damaged. If there has been damage, it is best practice to replace both the DMX chip (U27 or U28) and the DMX Opto Chip (U30 or U31) on the CPU board.
DMX Chips (Z1458-F) are available for purchase in our online store here.
Opto Chips (Z423-F) can be purchased by your favorite ETC Dealer. If you don't know who your local dealer is, use our find a dealer page.
Dimmer racks without an accessible power disconnect device cannot be serviced safely. Before removing dimmer or control modules for service, de-energize main feed to dimmer rack and follow appropriate Lockout/Tagout procedures as described in NFPA Standard 70E. It is important to note that electrical equipment such as dimmer racks can present an arc flash safety hazard if improperly serviced. This is due to available large short circuit currents on the feeders of the equipment. Any work on energized equipment must comply with OSHA Electrical Safe Working Practices
Solution
- Ensure power is turned off to the dimming rack
- Open the door and locate the control module.

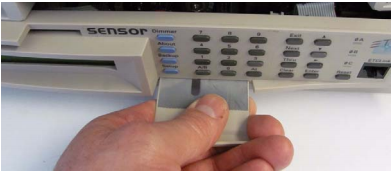
- Remove CEM control module from the dimming rack by grasping the small handle on the front.
- Pull the CEM straight out and place the unit on a clean stable surface.
- With your chip puller or needle nose pliers, gently remove the DMX chip that needs to be replaced by pulling it straight out and up.
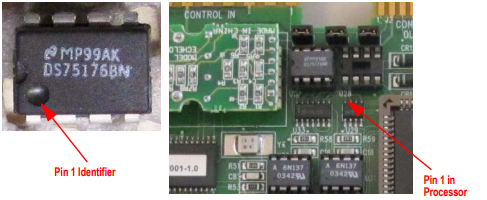
- Insert the replacement chip into the socket so that pin one is in the correct location.
- Replace CEM into the Sensor rack. Press firmly on the unit to ensure it is fully seated in to its connections.
- Close and lock the Sensor rack door before restoring power.
- Test unit for desired functionality.