Smartpack DMX Chip Replacement
Symptoms
The Smartpack my be receiving valid DMX signal, but not respond to the signal. If this is the case the DMX LED will blink continuously, even when valid DMX is applied.
Explanation of Issue
DMX is processed through the Control Card, which uses a DMX Chip. If this chip has been damaged or failed then it may need to be replaced. It is a socketed chip which can be replaced in the field. The part number is Z1458-F, which can be purchased here (in the US) or from any ETC dealer.
Solution
The information in this post is provided to assist in troubleshooting. Perform work at your own risk. ENSURE ANY POWER FROM DEVICES HAS BEEN DISCONNECTED BEFORE SERVICING ANY EQUIPMENT. If you do not feel comfortable performing the work, please contact us or your local service center. Be aware that ETC and its Affiliates are not responsible for any damage or injury caused by service of our products by anyone other than us or our authorized service providers, and such damage is excluded from the product’s warranty.
- Fully disconnect the Smartpack from its power source.
- With a Phillips #2 screwdriver, remove the screws holding the lid on the pack. There are seven on a rackmount/portable pack and four on a wallmount.
- The Control Card is the circuit board mounted to the fan. The DMX chip is located on this board. It is easiest to replace this chip if you remove the control card from the pack.
- Disconnect the data connection from the control card:
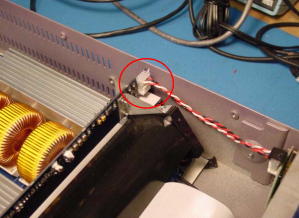
- Disconnect the fan cable.
- Remove the two screws holding the control card and fan assembly in place.
- Gently wiggle the fan and control card assembly to disconnect it from it's sockets, and lift it out of the pack. The ribbon cable and cat5 are still connected, but should provide enough length to reach the desired chip.
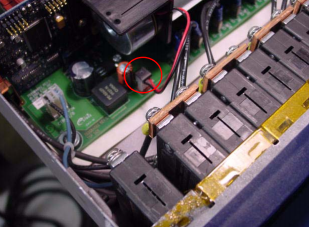
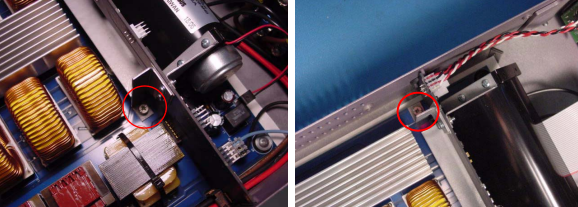
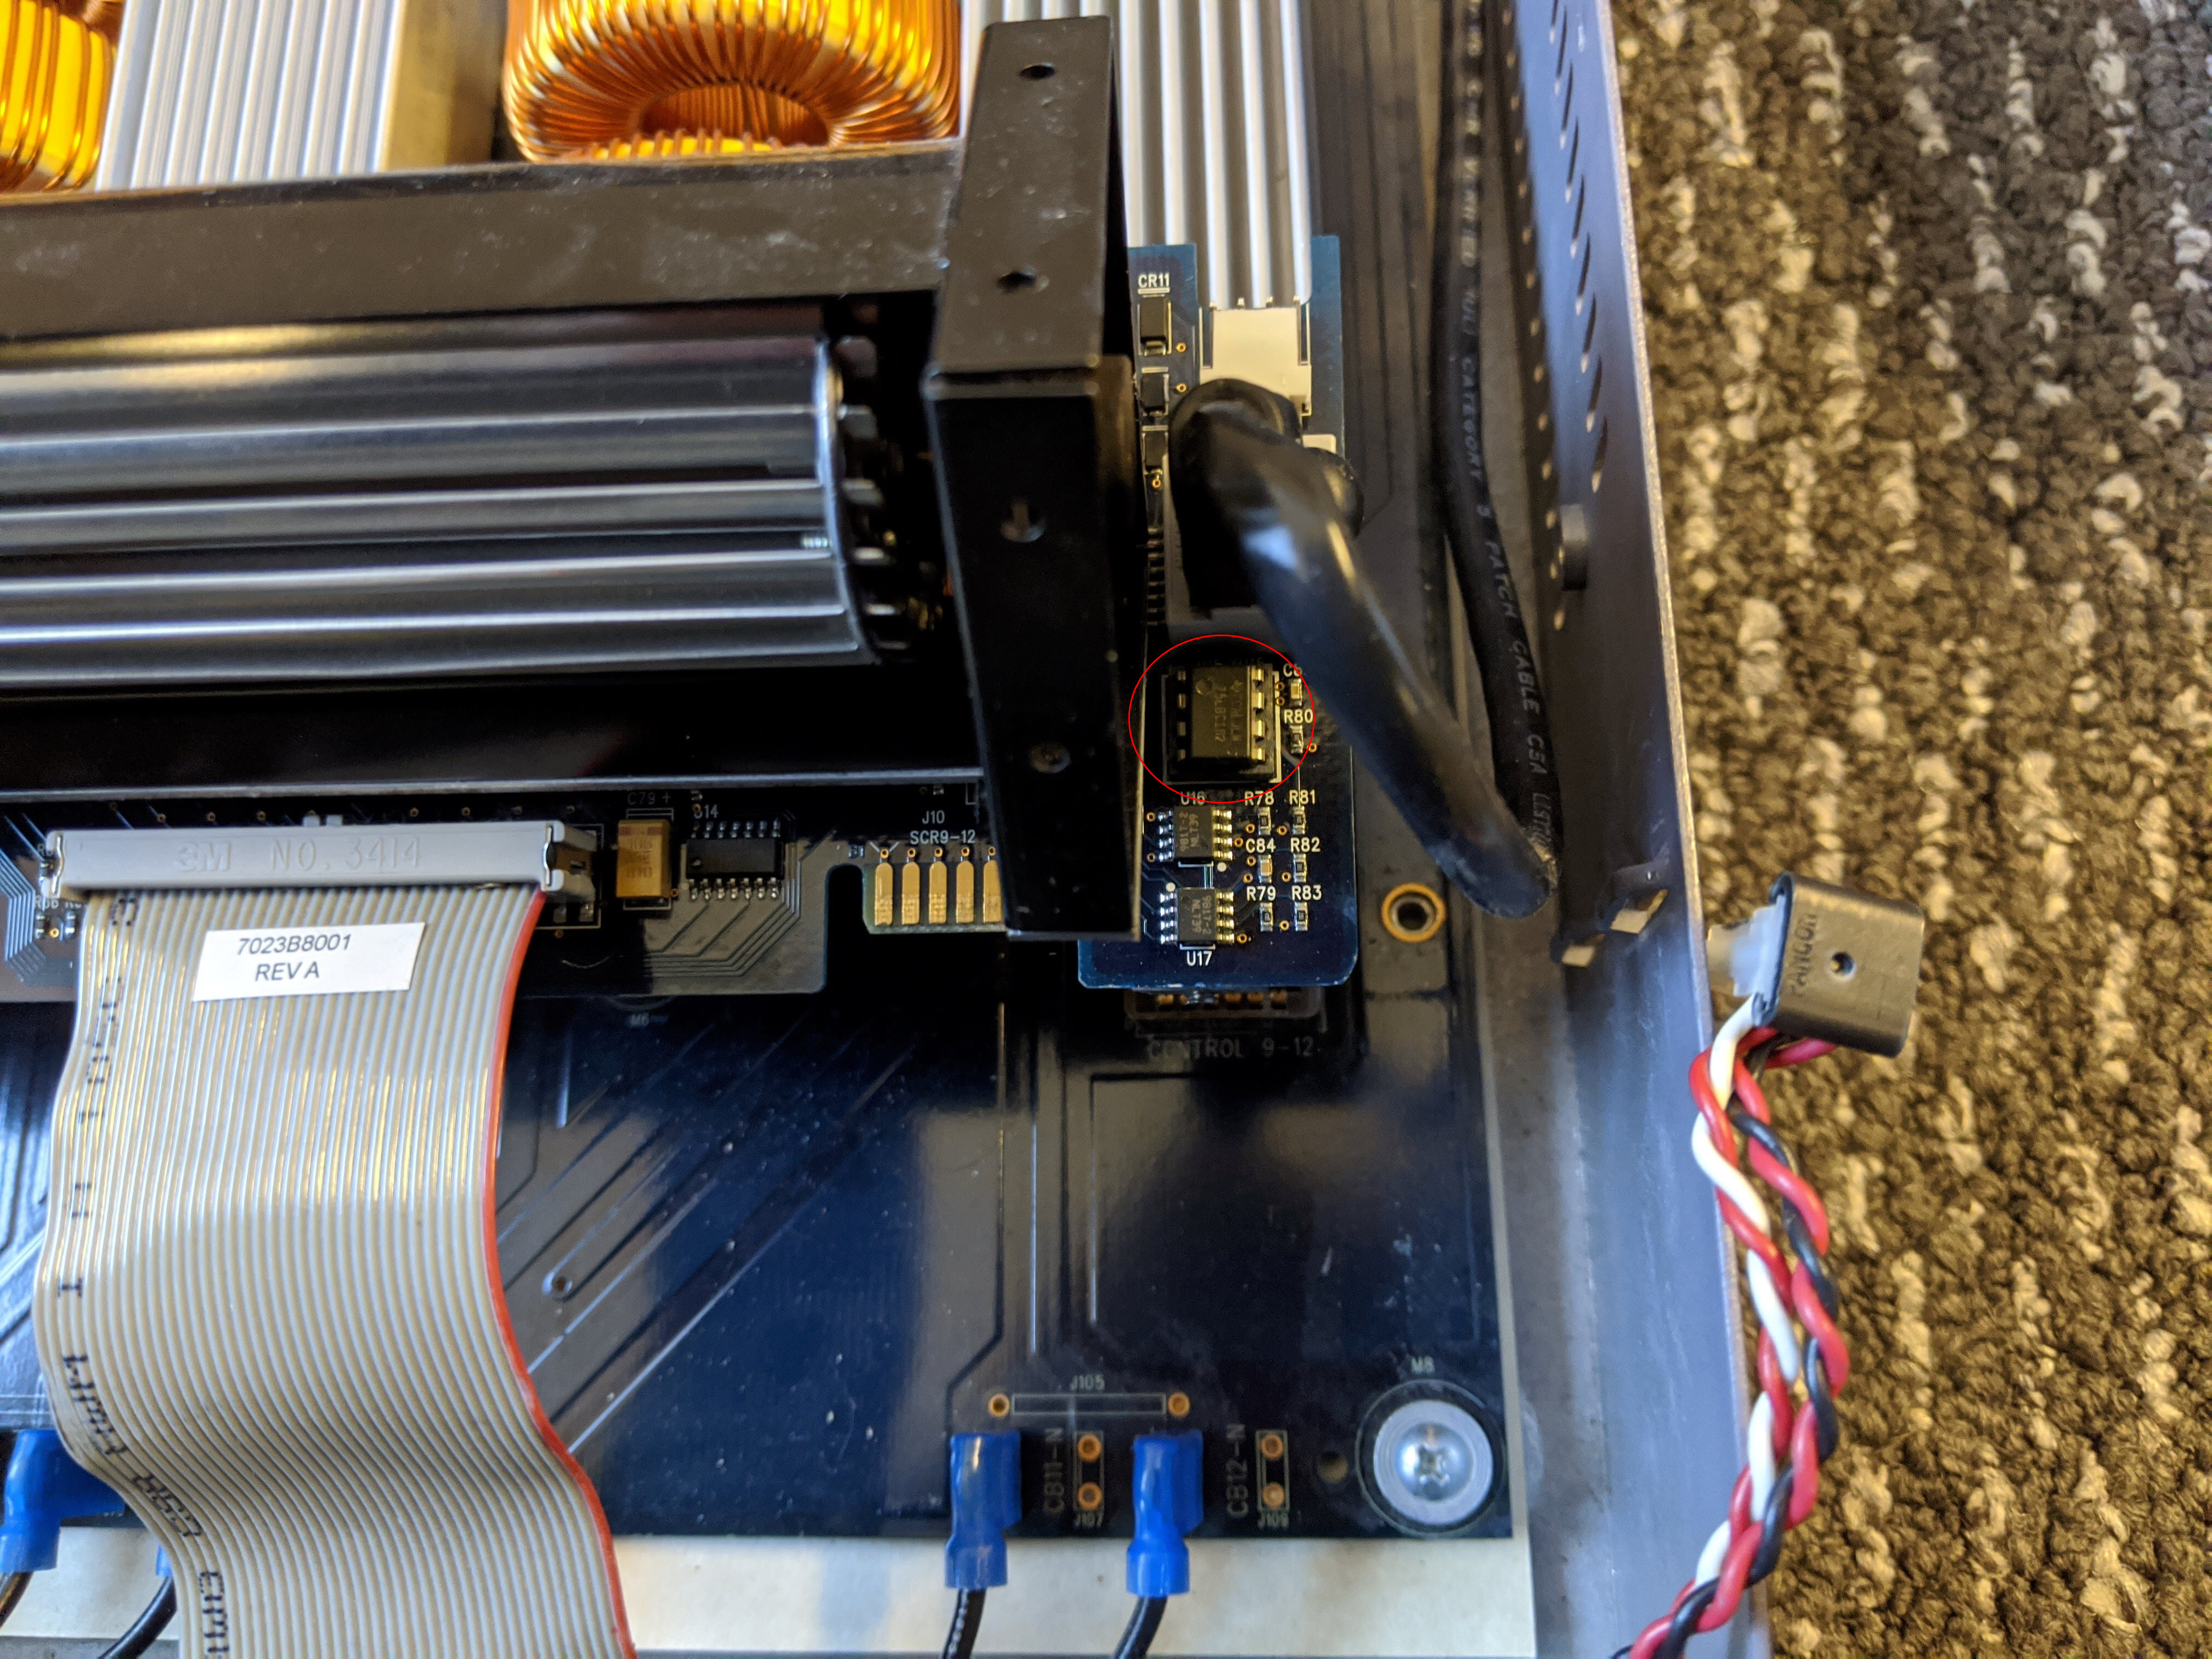
- The DMX chip is located just below the RJ45 connector on the circuit board. It is in location U15. Note the position of the small dot on the chip, which is the pin 1 indicator. Gently pull this chip up and out of it's socket. This can be done with a chip puller, or piers. The first image below shows the DMX chip. The second shows the chip removed.
.jpg?revision=1&size=bestfit&width=540&height=405)
- Insert the replacement chip into the socket, being careful to place the pin 1 indicator dot in the upper left corner.
- Gentle push the fan and control card assembly back into their sockets.
- Reconnect the fan wire.
- Reconnect the data connection.
- Re-attach the screws to mount the card assembly and replace the cover.