BIOS Battery Replacement for Hog iPC
Explanation
The BIOS battery used in the Hog iPC console may deteriorate over time and require changing. High End Systems recommends using a new battery CR2032. This document describes how to change the BIOS battery and restore the custom BIOS settings based on the motherboard within your Hog iPC console. Prior to changing the settings, you need to identify which motherboard is installed in your console.
Perform repair work at your own risk. ENSURE ANY POWER FROM DEVICES HAS BEEN DISCONNECTED BEFORE BEGINNING ANY REPAIR WORK. If you do not feel comfortable performing the repair work, please contact HES or your local service center. Be aware that HES is not responsible for any damage or injury caused by repair or service of HES Products by anyone other than HES or its authorized repair agents and such damage is excluded from HES’s warranty.
Tools required
- 4mm hex tool
- #2 Philips screwdriver
- CR3032 Battery
Changing the Battery
- Remove the four front panel-retaining screws using the 4mm hex tool
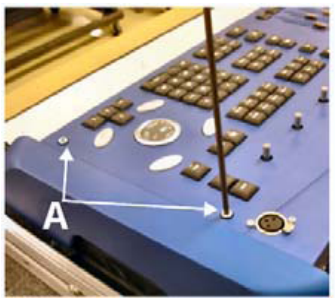
- Slowly and gently lift up the rear of the front panel and disconnect the cable connections.
Make note the connector labels and locations
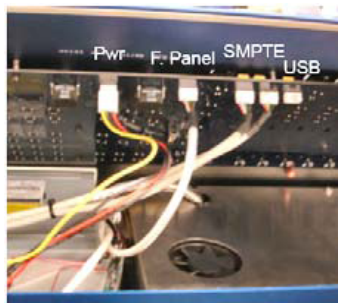
- Remove the front panel and set aside
- Remove the 5 screws that mount the computer housing cover using the #2 Philips screwdriver
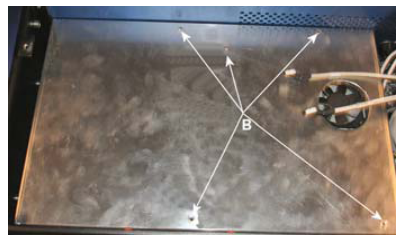
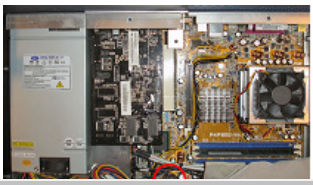
- Gently lift the computer housing cover so the motherboard is exposed. Look for BIOS battery on the motherboard
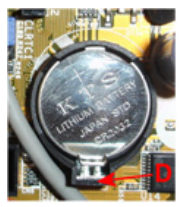
- Push back the batter-retaining clip (D) to pop the battery out.
- Insert new battery and lock down with clip. Ensure the positive ( + ) indicator is facing up.
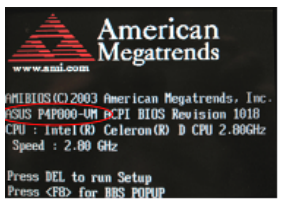
Identifying Hog iPC Motherboard Model
- Turn on the console
- The model number will be displayed when the console first boots.
The picture shows where it might be
