Replacing a DMX IO Board on a DP8000
Use this guide to replace a Power Supply on a DP 8000.
The information in this post is provided to assist in troubleshooting. Perform work at your own risk. ENSURE ANY POWER FROM DEVICES HAS BEEN DISCONNECTED BEFORE SERVICING ANY EQUIPMENT. If you do not feel comfortable performing the work, please contact us or your local service center. Be aware that ETC and its Affiliates are not responsible for any damage or injury caused by service of our products by anyone other than us or our authorized service providers, and such damage is excluded from the product’s warranty.
Tools required
- #1 Phillips (cross-head) screwdriver
- #2 Phillips (cross-head) screwdriver
- 2.5 mm flat head screwdriver
- 5/64 Allen Key
Steps
Power off the DP 8000 and disconnect its AC power cord before servicing
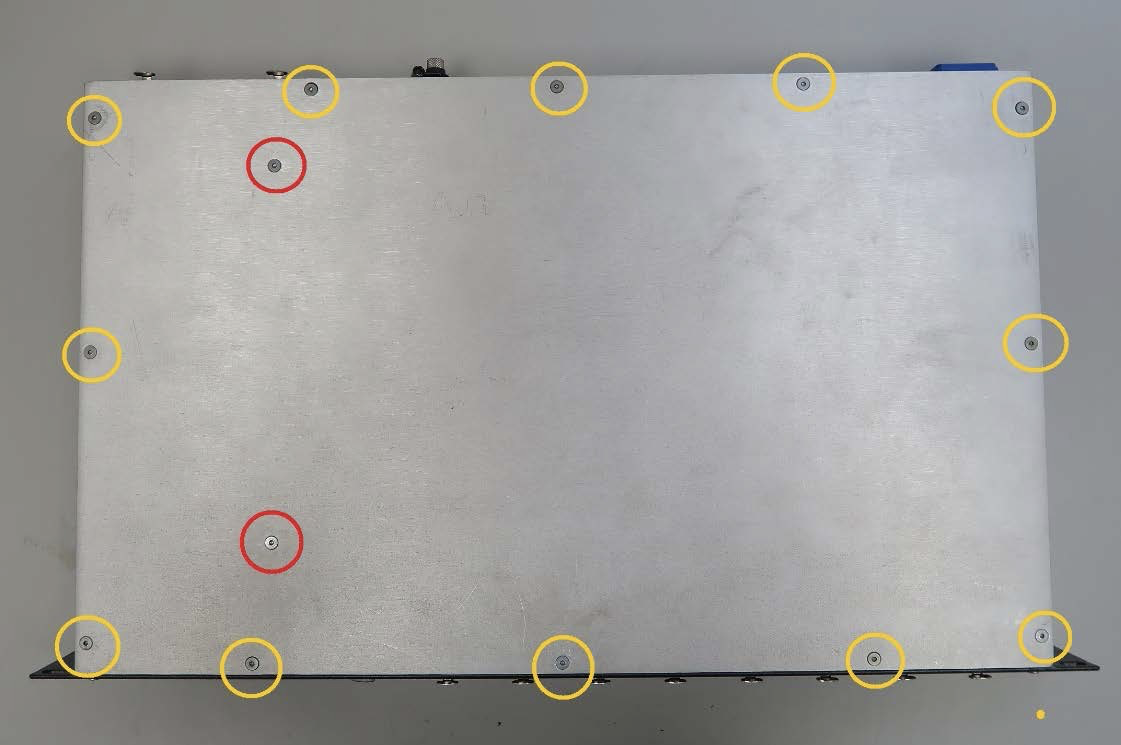
- Remove 14x allen screws. Those with RED circles (2x) are attached to the heat sink underneath and are longer than the rest.
- Put the cover aside and PCBs can be seen as below
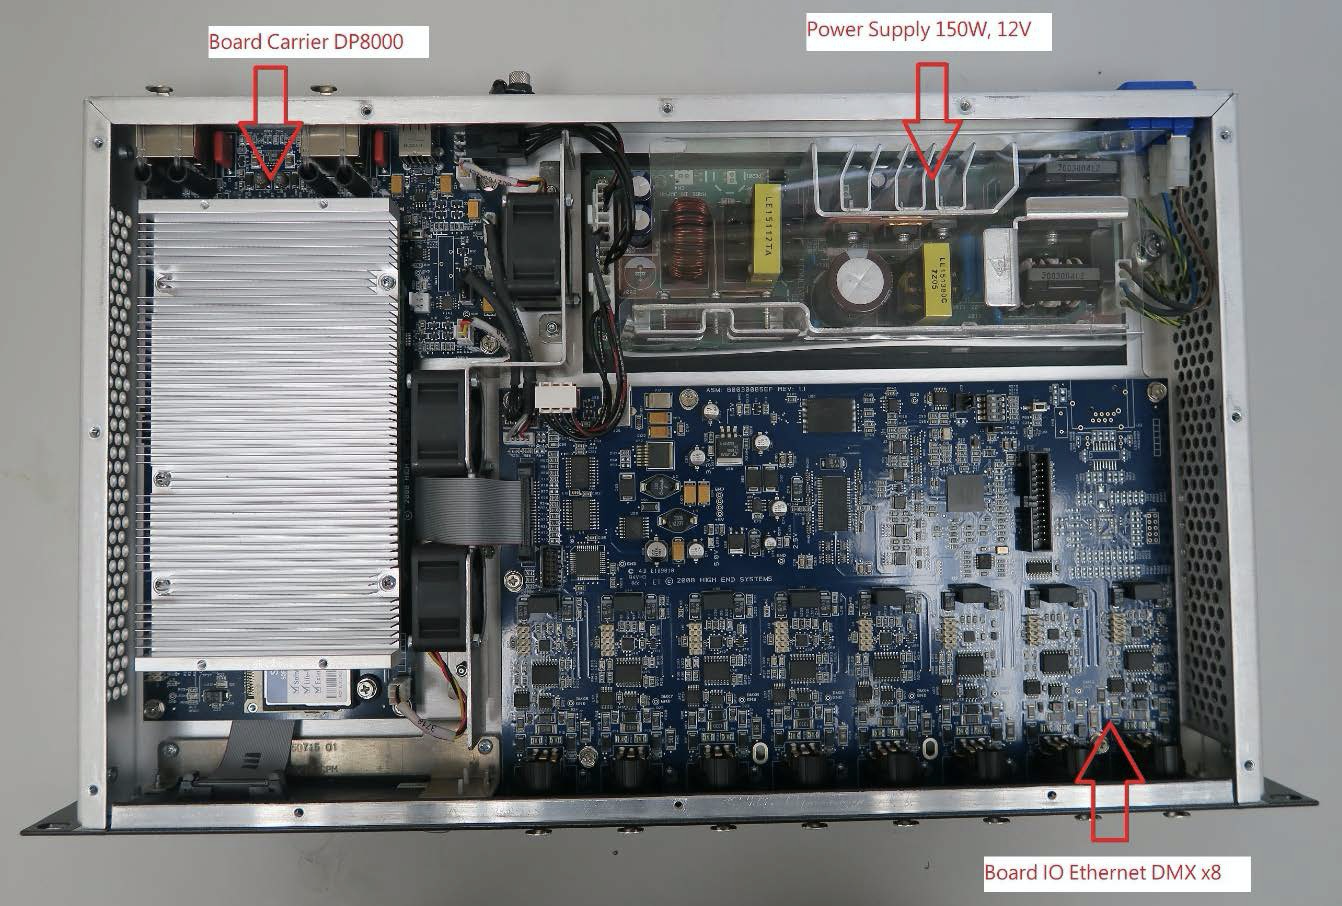
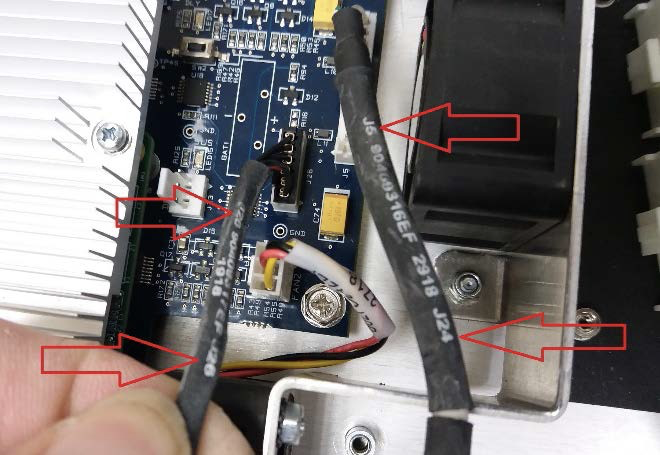
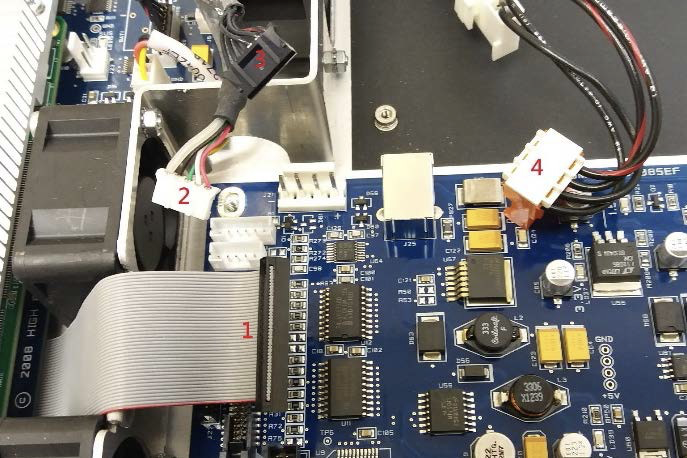
- Remove 6x Phillips head screws and disconnect ALL connectors on the PCB. The connectors are labeled for easy reconnection
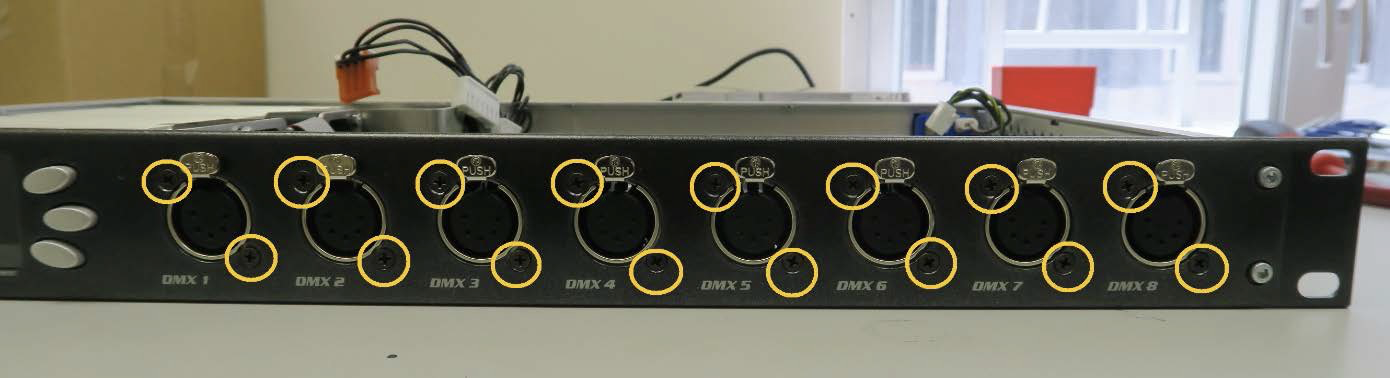
- Undo 16x screws so that the whole PCB is free to be removed
- Verify the DIP switch setting of SW2 on the NEW DMX IO board match the one you just replaced
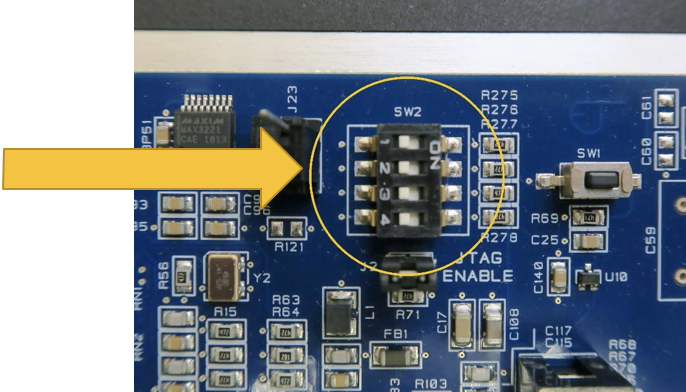
The DIP switch settings should be:
1 - ON
2 - OFF
3 - OFF
4 - OFF - Take out the old DMX IO board and put the new one in. Follow the steps in reverse to complete the replacement.
The part number for the PCB, DMX Output is 80030112EF.