Setting Up a Loaner DRd Dimming Engine
Ensure that power to the rack is disconnected before removing any components. Failure to do so can result in damage to your equipment or personal injury.
Removing the DRd Dimming Engine
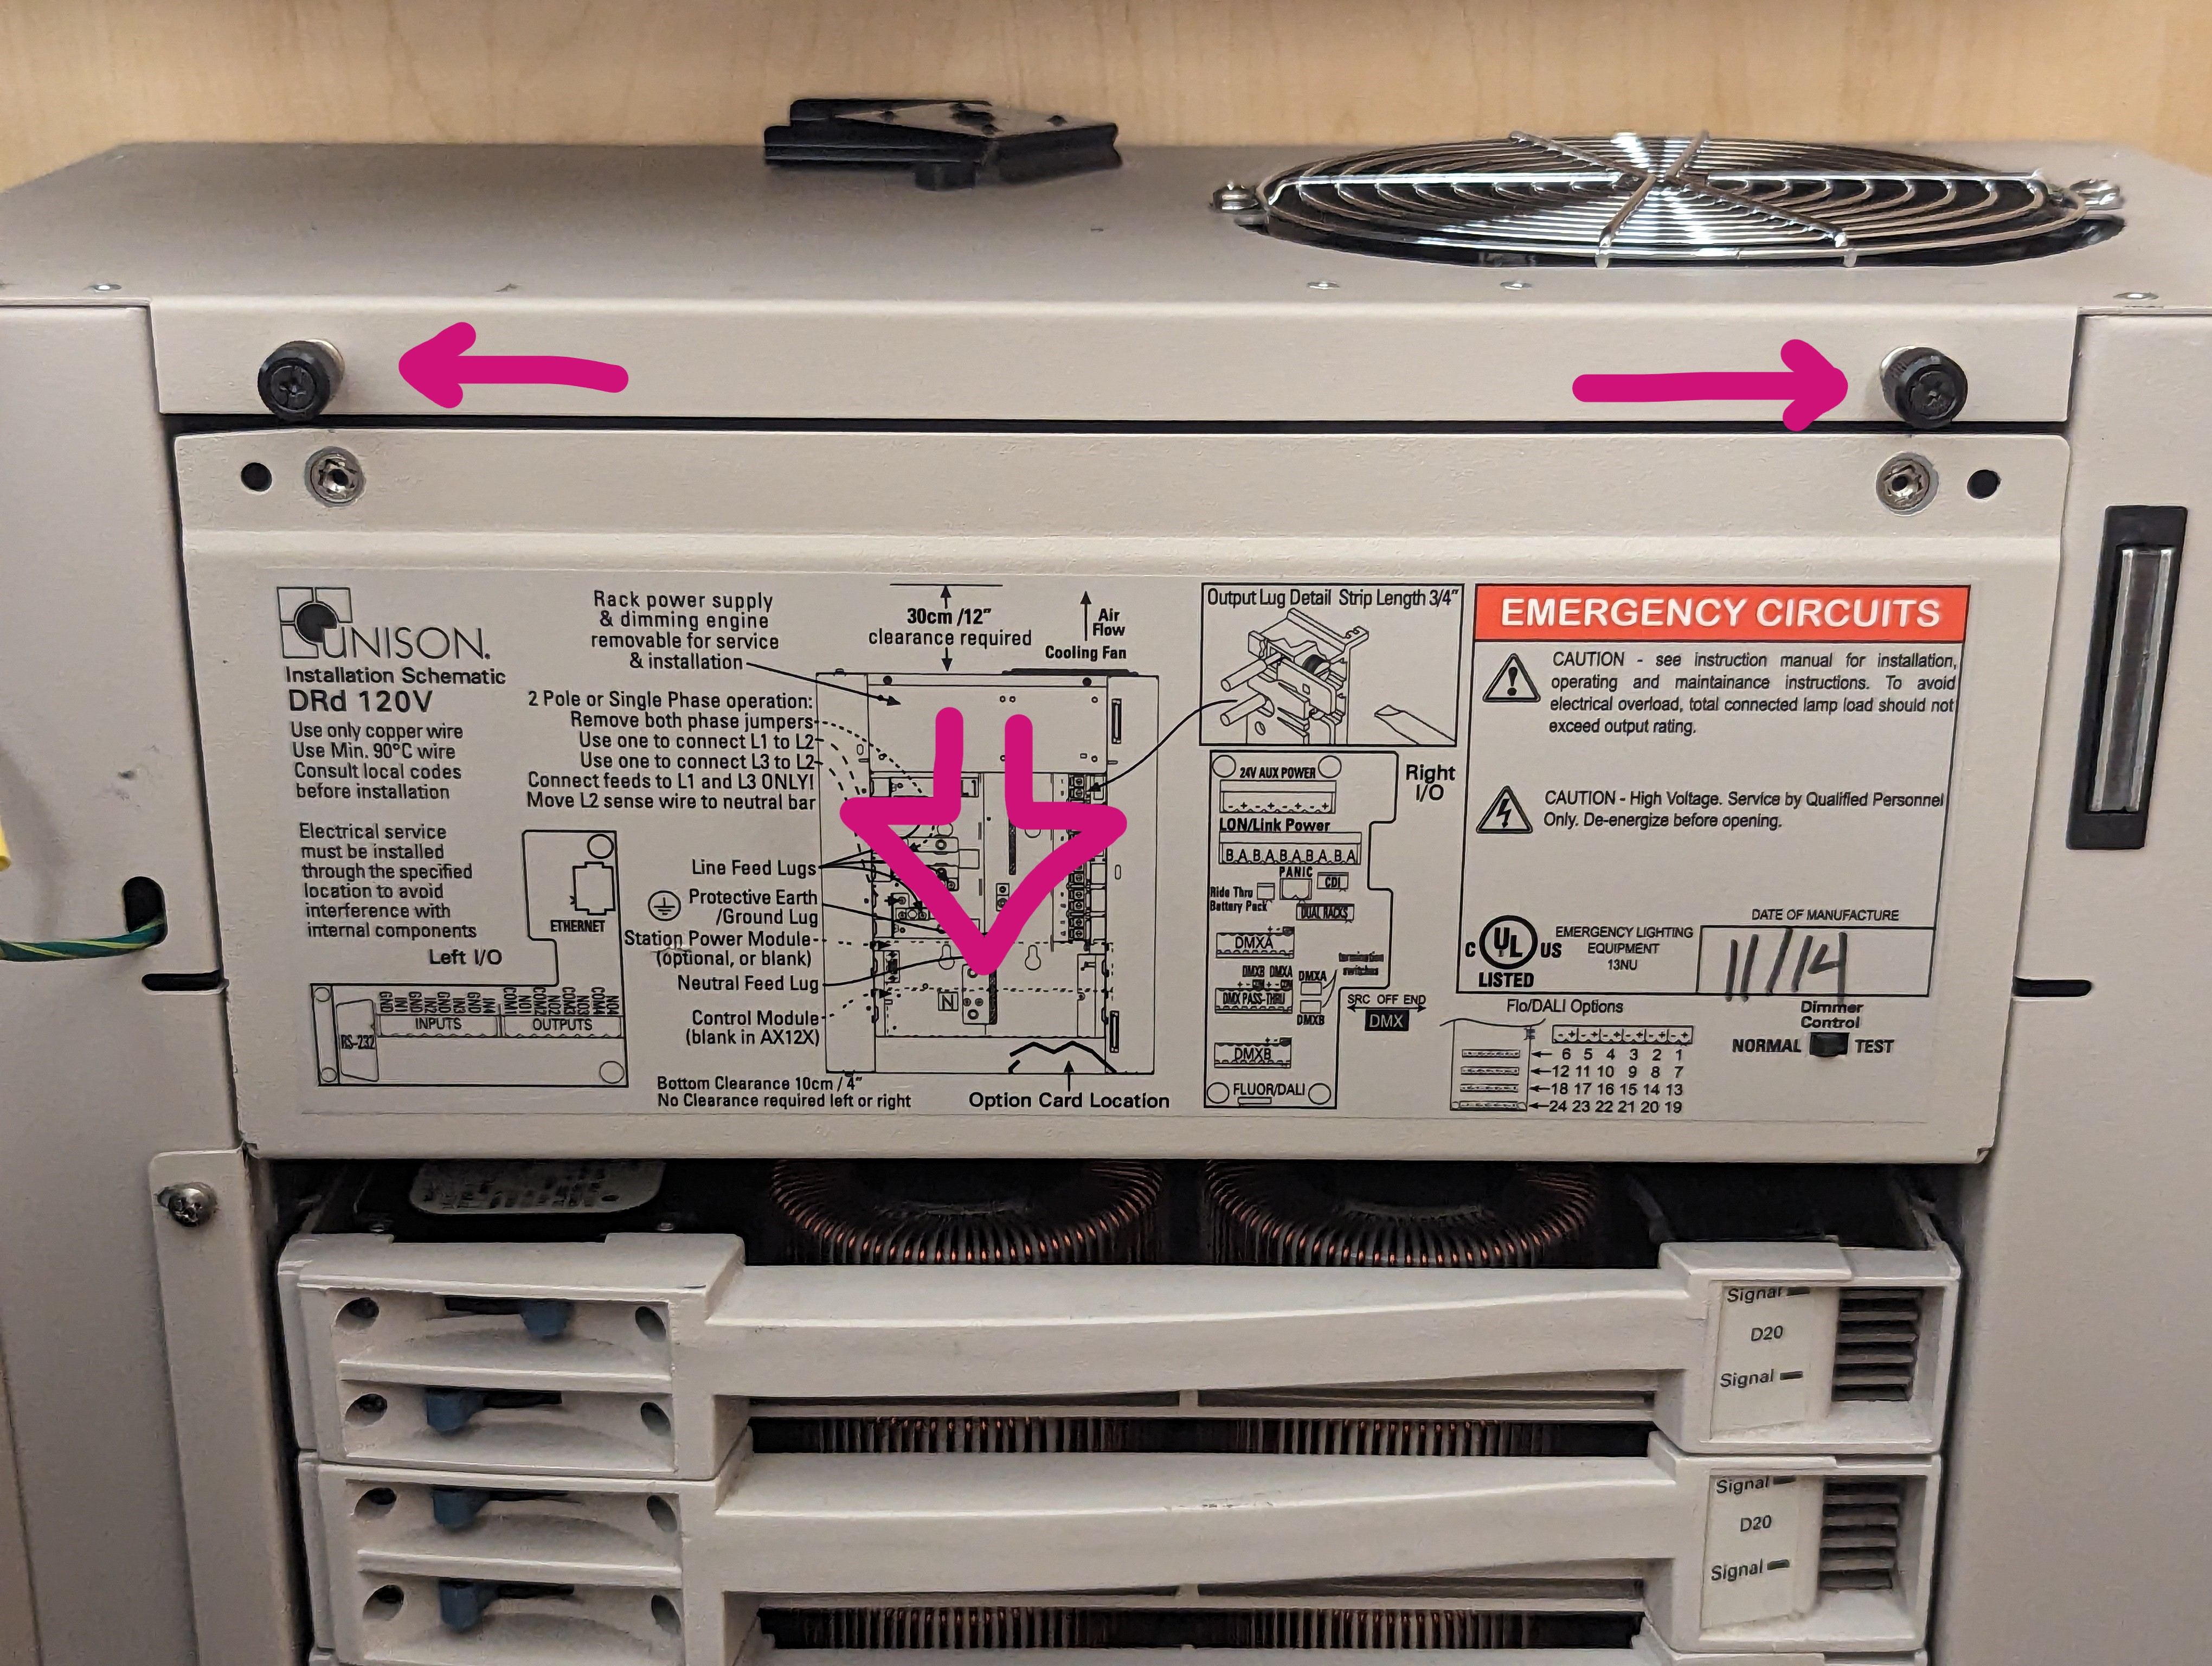
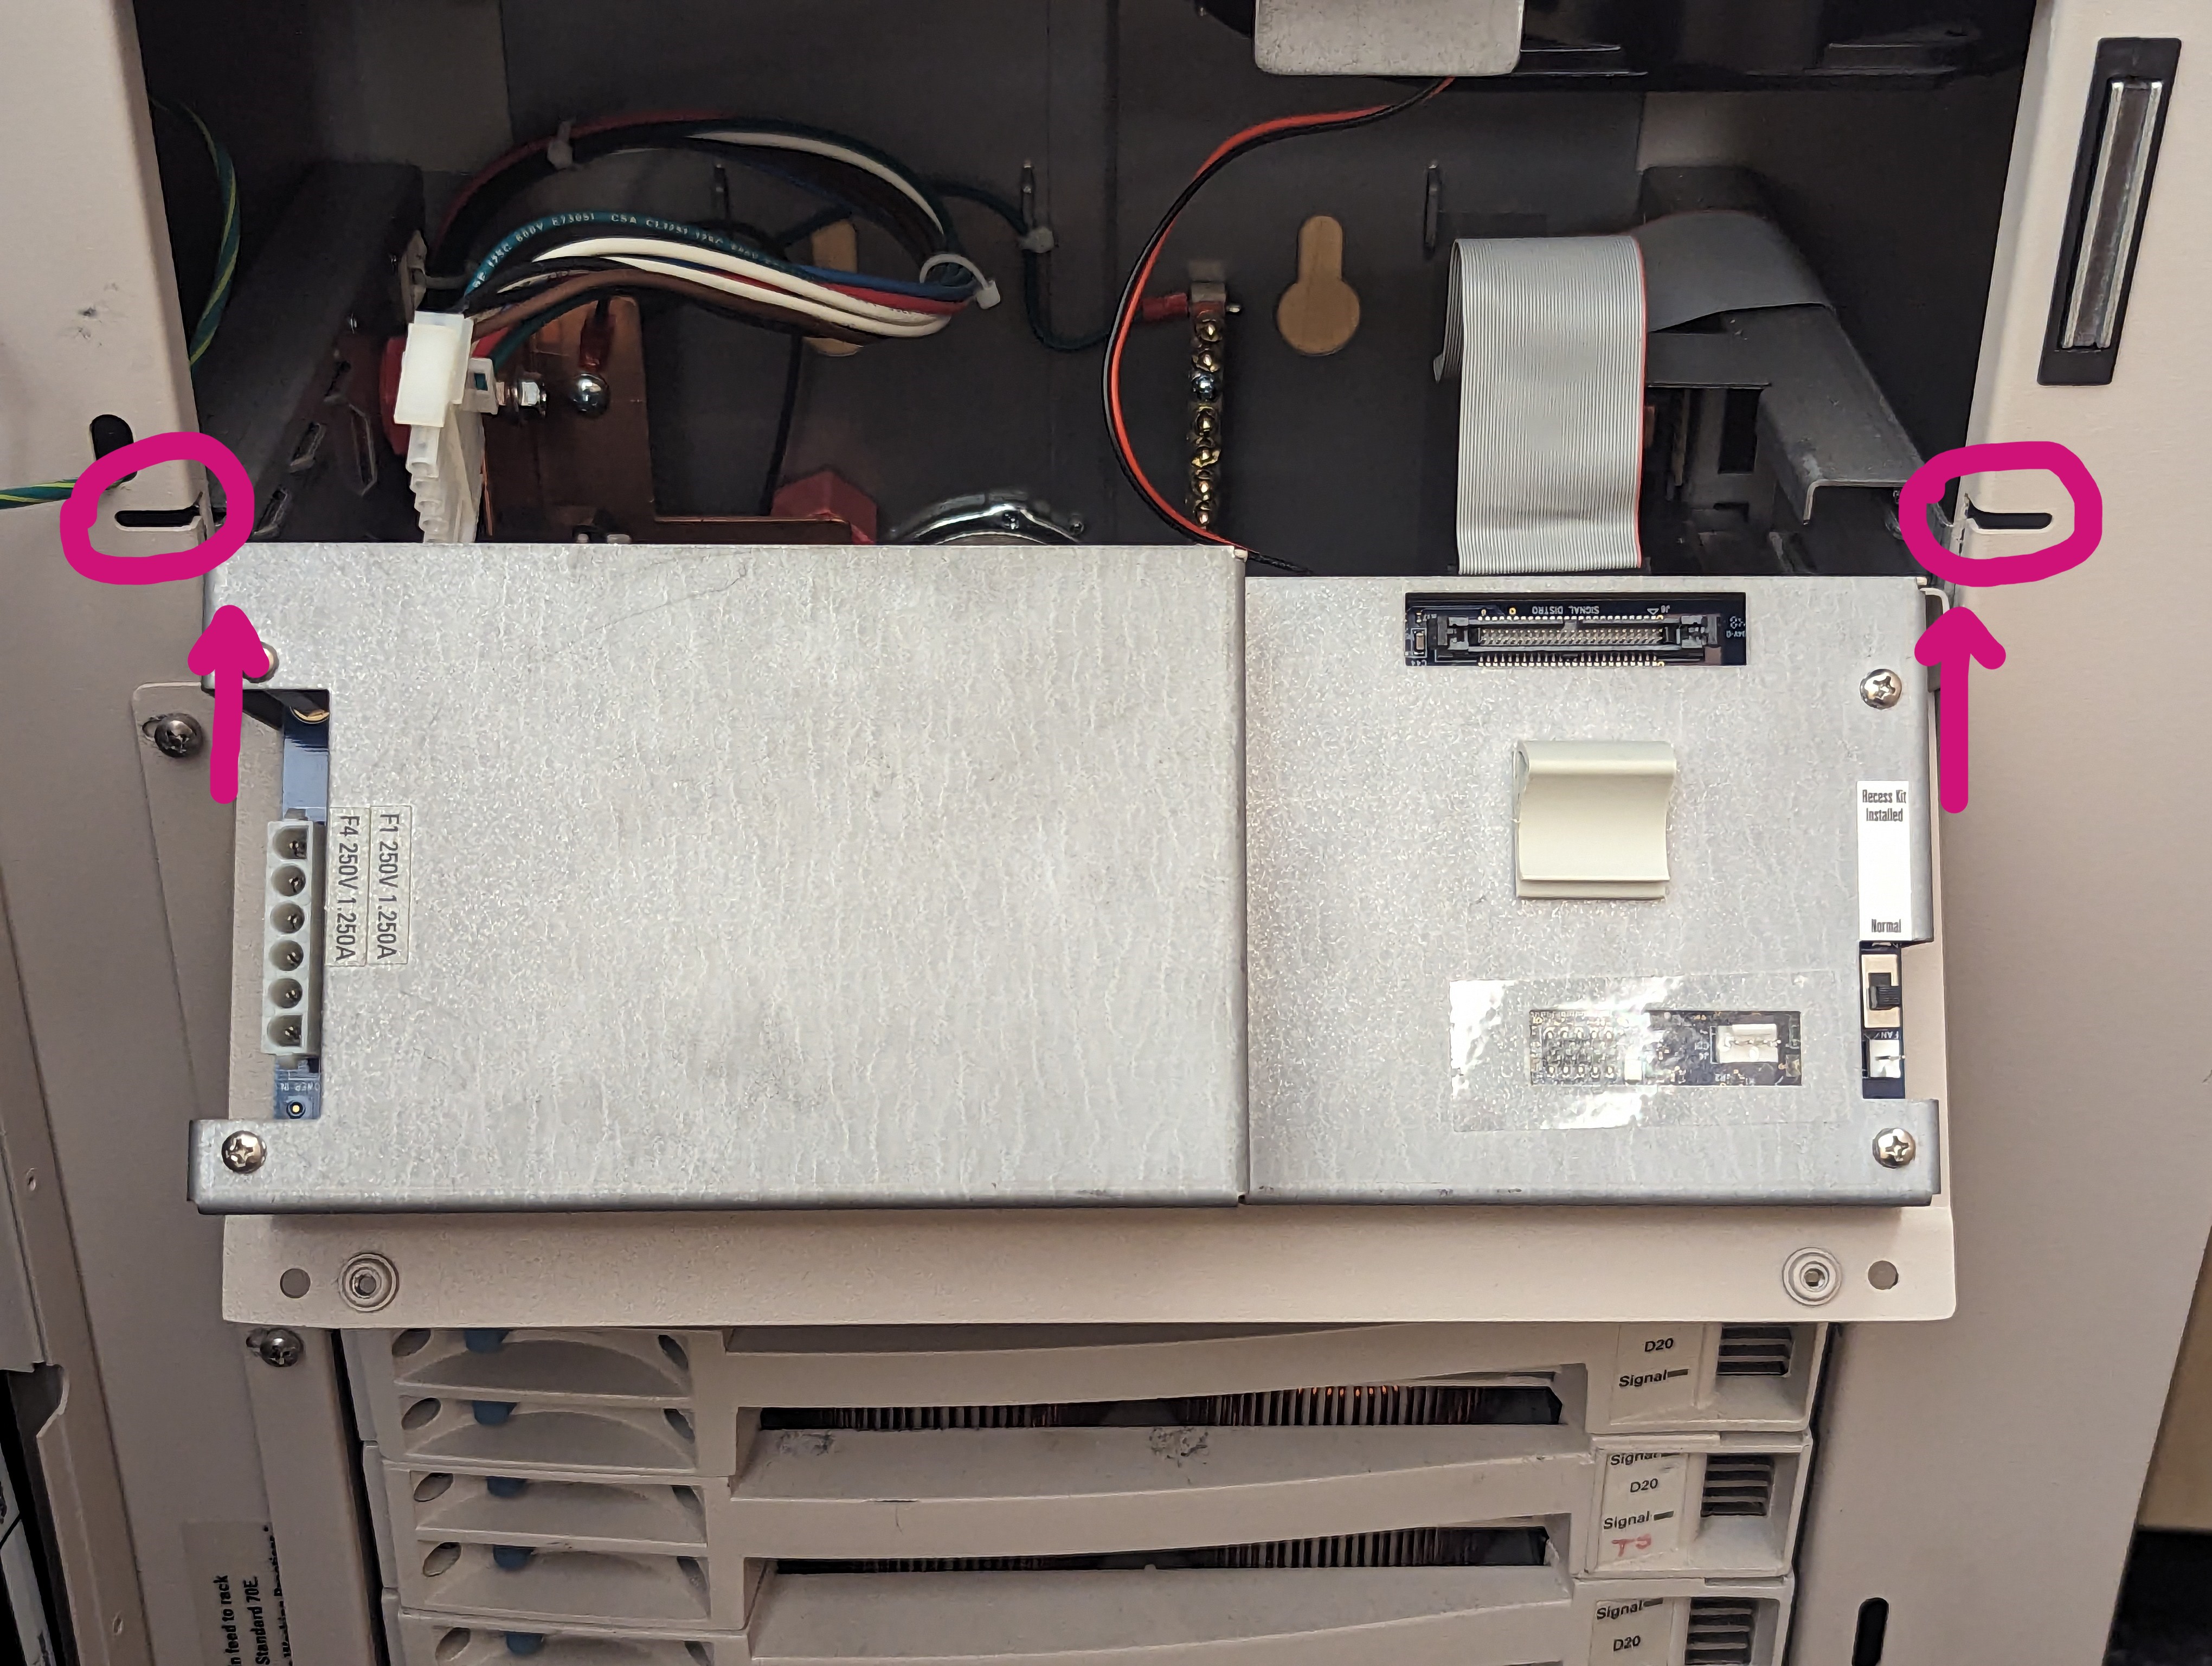
Before the DRd dimming engine can be removed, incoming power to the rack must be shut down completely. Once you have cut power to the rack, remove the topmost module, then loosen the indicated black thumbscrews. The dimming engine should drop straight down about an inch. Then rotate the dimming engine outward until the rear panel is exposed.
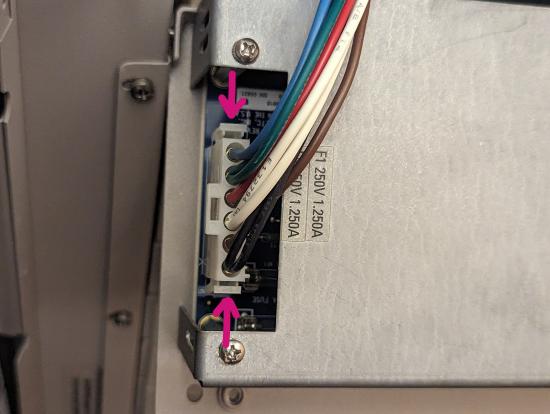
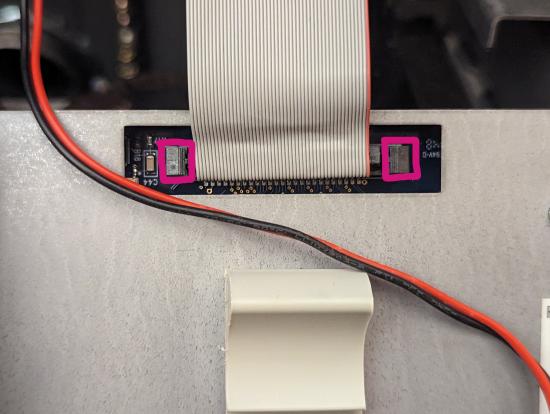
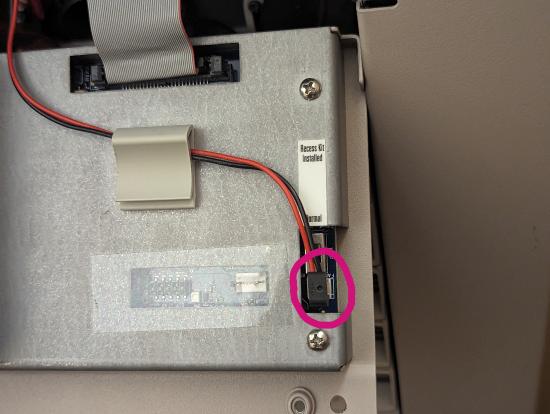
Disconnect the power harness on the left side by pressing in the tabs on either end of the connector and pulling it straight outward. Disconnect the fan harness on the bottom right. Disconnect the ribbon cable on the top right by depressing both tabs at either end of the connector, then carefully removing the connector from its socket.
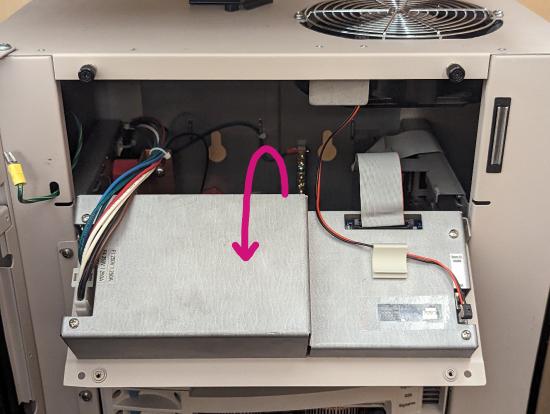
Lift the dimming engine straight upward until the pins on either side align with the indicated slots in the rack frame. Pull the dimming engine out of the rack.
Installing the Loaner
Align the pins on the loaner with the slots and insert the loaner into the rack.
Connect all three wiring harnesses to the loaner in the same orientation. The power harness should have the blue wire on top, the ribbon cable should have the red wire on the right, and the fan harness should have the red wire on the left. Make sure to secure the fan wires in the cable retention clip.
Rotate the dimming engine upward, slide it upward, and tighten the thumbscrews. Reinstall the topmost module. Re-energize the rack.
Resolving the Config Mismatch
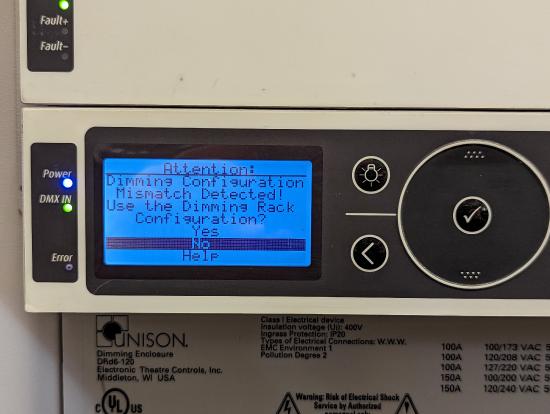
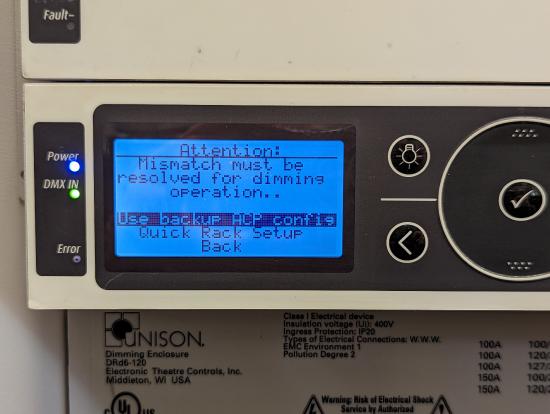
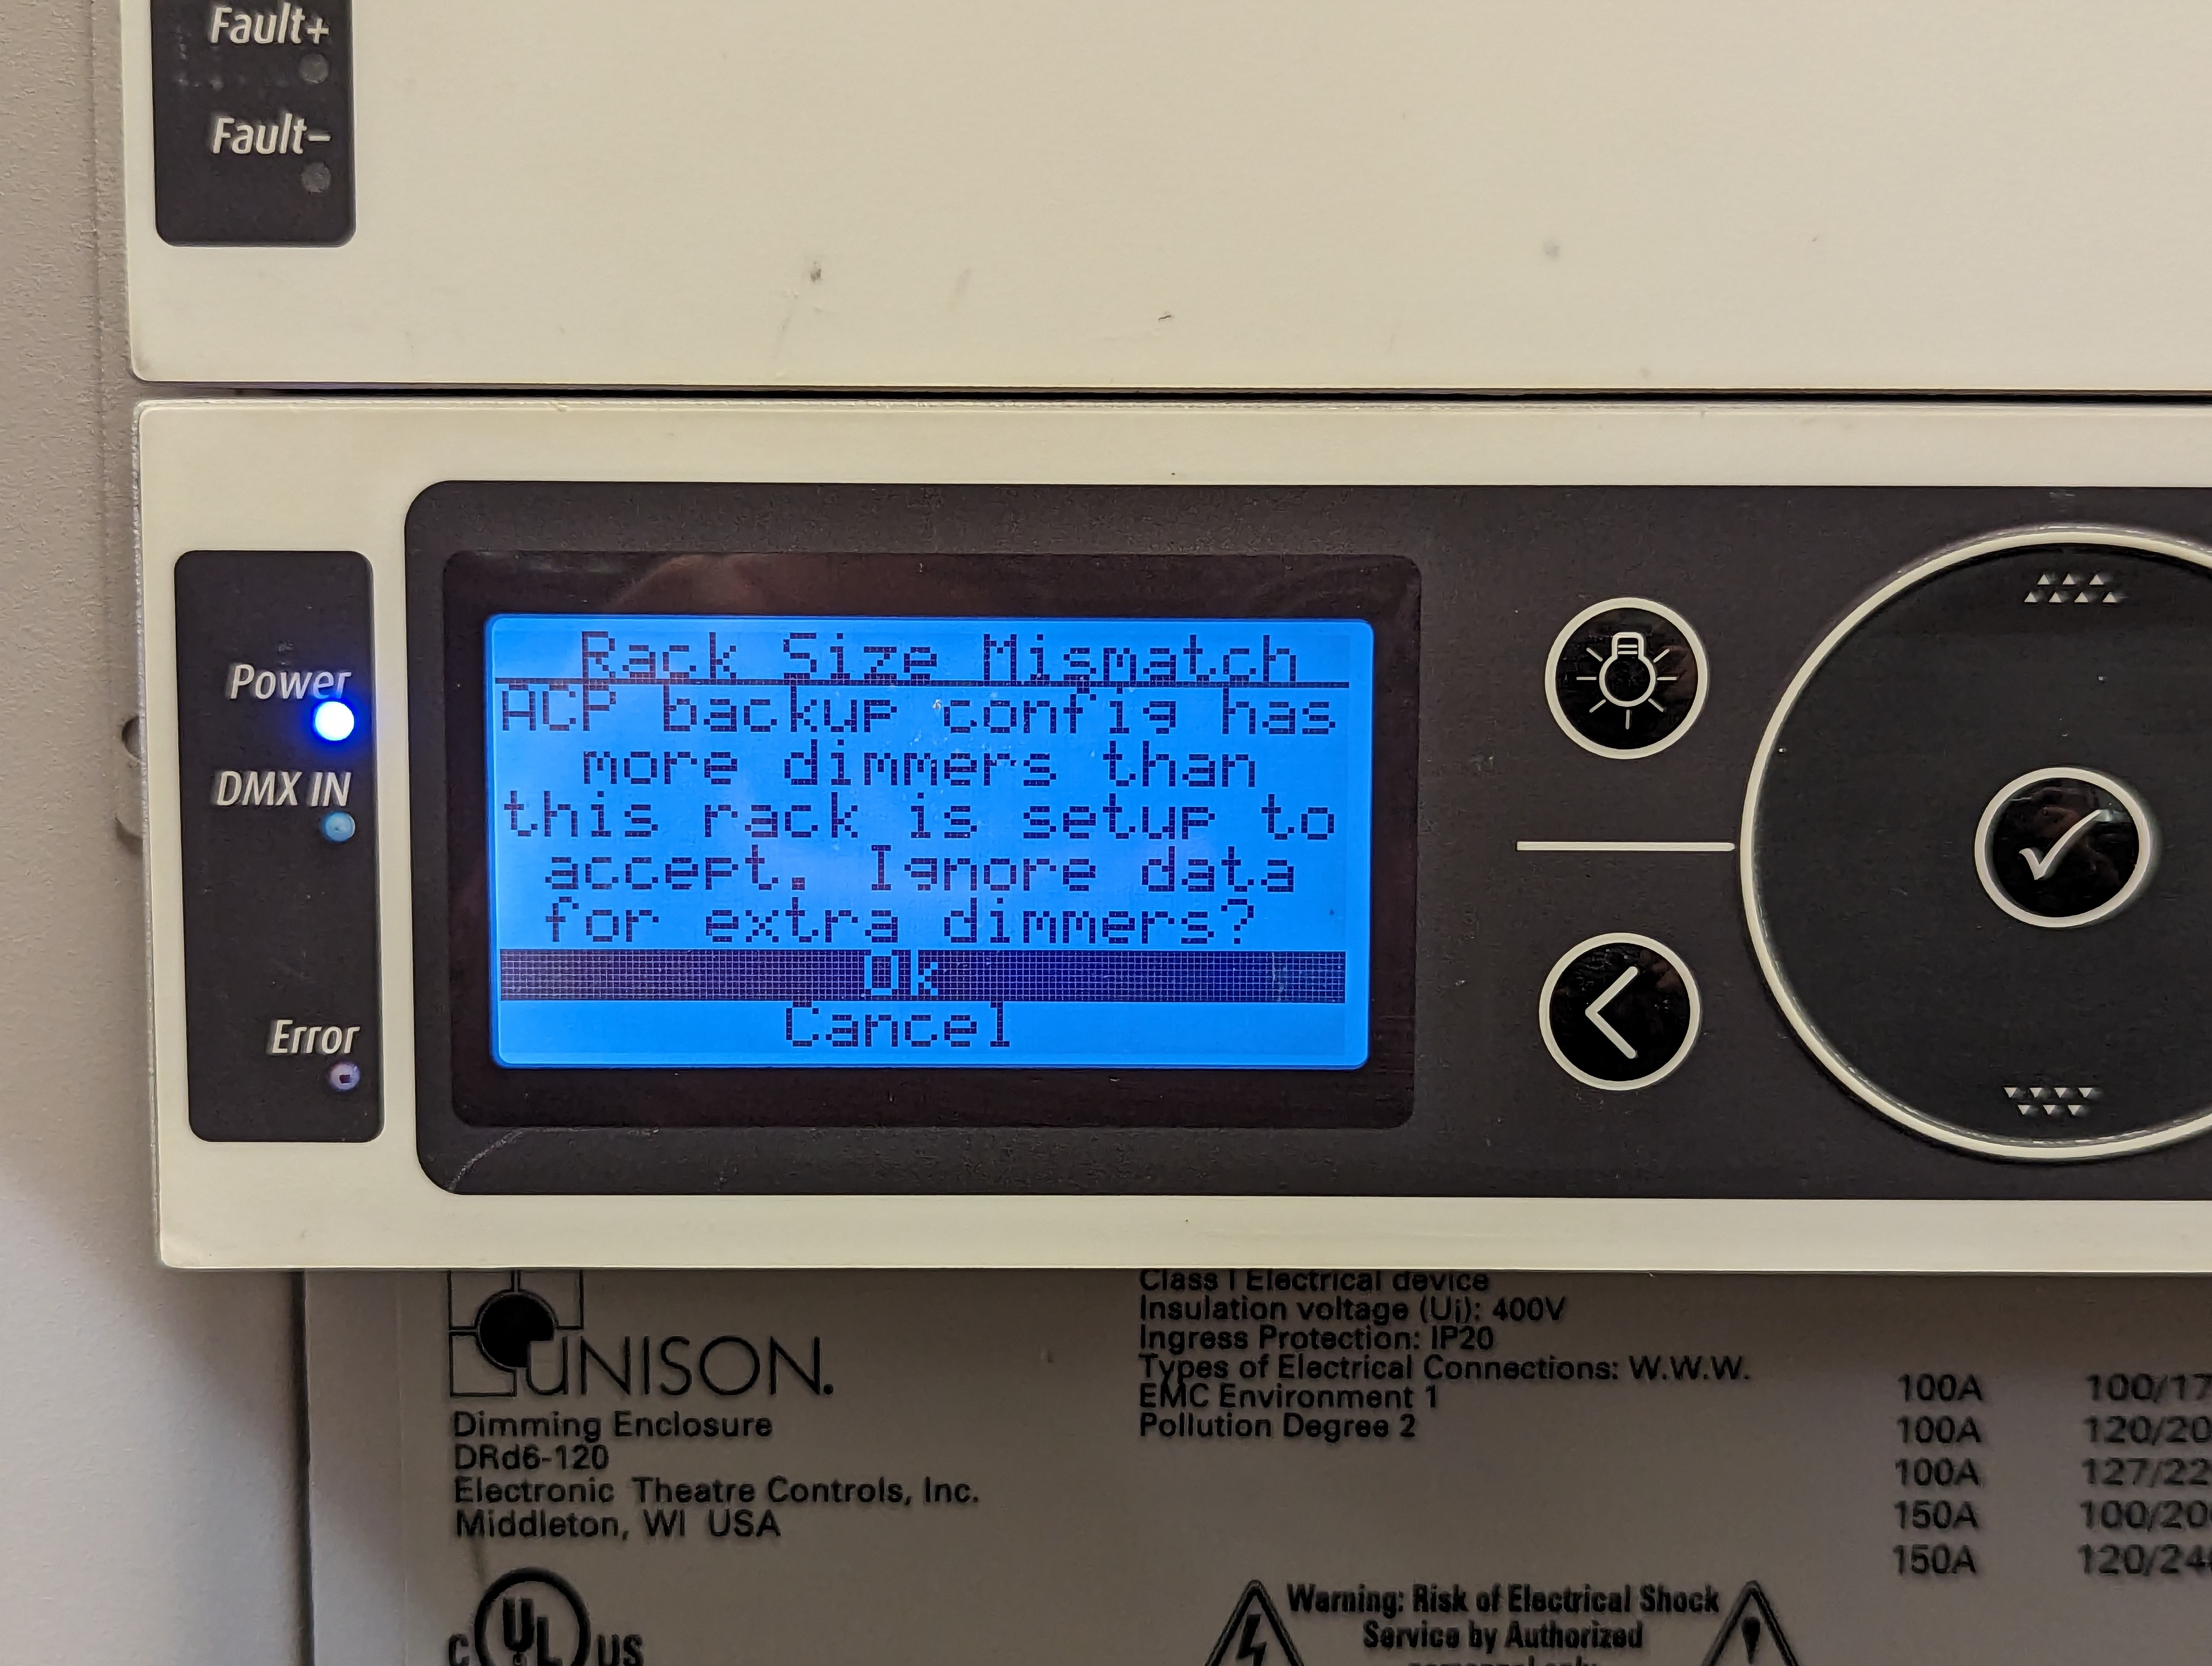
After the processor boots, it will likely display a "Dimming Configuration Mismatch Detected!" message. Scroll down to "No" and select it. On the next screen, select the option "Use backup ACP config". This will copy the configuration stored in your processor to the loaner dimming engine. If you get a "Rack Size Mismatch" message, select "Ok".
If the processor displays "System OK", the rack is now ready for use. If the processor continues to display "Dimmer Errors" after following these instructions, contact ETC Technical Services.