How to add, delete, or edit timed events on a Paradigm P-TS18 or VTS touchscreen
The easiest way to add, delete, or edit timed events on a Paradigm P-TS18 or VTS (Virtual Touchscreen) is by using the Timed Event Calendar widget, which needs to be incorporated into the touchscreen configuration. For information about how to add that to a configuration, see the link at the bottom of this article. An alternative to using the P-TS18 or VTS for editing timed events is to access the WebUI of the P-CCS (Paradigm Central Control Server), where you can also add, edit, or delete timed events.
Once you've chosen to add or edit from the Timed Event Calendar, follow the instructions below:
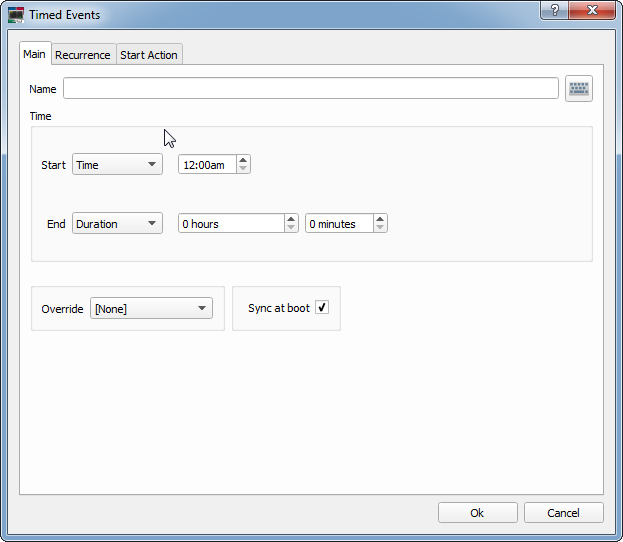
- Choose a unique name for your timed event
- Specify the "Start Time." Choices include "Time", "Sunrise", "Sunset", or "Event Offset". Depending on the selection, additional options may display:
- If "Time" is selected, enter the specific time which you want the event to start.
- If "Sunrise" or "Sunset" are selected, additional selection for an "Offset" is required. An offset is specified as an additive (press the [+] button) or negative (press the [-] button) hour and minutes setting from the astronomical time.
- Specify the "End Time". The options for "End Time" are similar to the "Start Time" except "Duration" is now an option. When "Duration" is the selected "End Time", you will also be required to specify the hour and minutes the event should run from its start time.
- If an override has been created for the Timed Event, select the override. For more information regarding overrides, please reference the Paradigm LightDesigner online help system or contact ETC Technical Services.

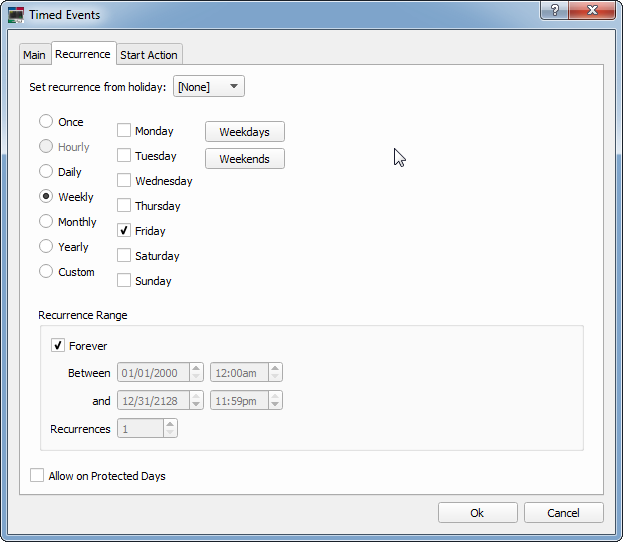
- Click on the [Recurrence] tab to specify the recurrence settings of the Timed Event.
- Select the recurrence type from the options available
- Additional settings are provided depending on the recurrence type selected. For example, if "Weekly" is selected you'll also have options to choose the days of the week.

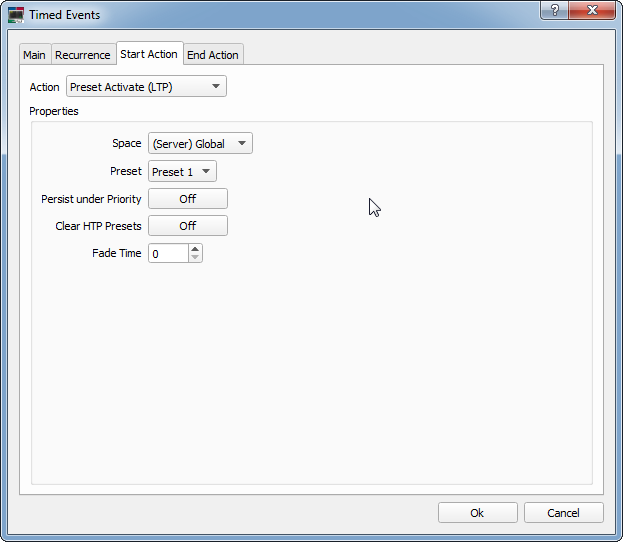
- Click on the [Start Action] tab to define the action that occurs at the beginning of the timed event.
- Choose the desired action and complete the options as required.

- If you have an end action for this timed event, click on the [End Action] tab, and define the action in the same way which you defined the start action
- Click the [OK] button to save the settings and return to your configuration.
