How to Add, Delete, or Edit Timed Events on a Paradigm P-TS7 or P-LCD Touchscreen
- Last updated
- Save as PDF
Navigate to the Setup Menu
Using a paper clip or other similarly sized pointy device, press the [Mode] button once to access the Setup menu. The mode button is located on the bottom edge of a wall-mount screen, behind the service door on the bottom of a portable wired screen, or behind the service door on the top of a wireless handheld screen.
You can also access a Timed Event widget through a button on your touchscreen's configuration if implemented. Pressing that button will take you to a calendar page in your configuration which allows you to add, edit, or delete Timed Events. After pressing the Add, or Edit buttons you will see the interface as outlined in the rest of this article. See the link at the bottom of this article for instructions on how to add a Timed Event button to a touchscreen configuration. This feature is only available on Paradigm systems running software v3.0.0 or higher.
Next press the Config tab at the top of the menu, and press [Timed Events] and enter the Setup code (default is 3031) to access the Timed Event Setup page, which allows you to add, delete, or edit timed events. This page display the currently existing timed events. Press the [Add] button to create a new timed event, or select an existing timed event and press [Edit] to change that event. The rest of the instructions are similar no matter which option you've chosen.
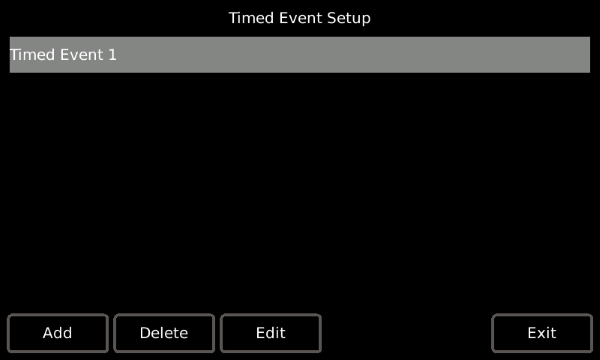
- Pressing the [Add] or [Edit] buttons will display the "Timed Event" configurator
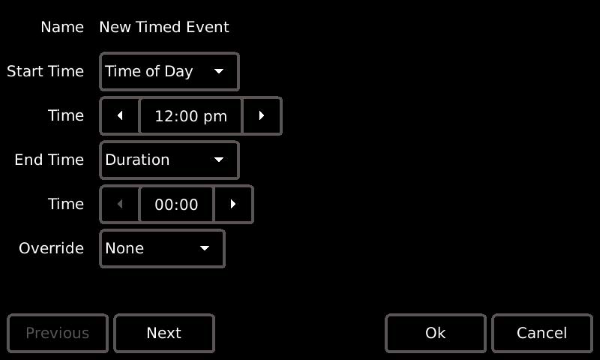
- Specify the "Start Time." Pressing the default [Time of Day] button displays a list of available start times, including "Time of Day", "Sunrise", and "Sunset". Press to select the option. Depending on the selection, additional options may display:
- If "Time of Day" is selected, additional selection for a "Start Time" is required.
- If "Sunrise" or "Sunset" are selected, additional selection for an "Offset" is required. An offset is specified as an additive (press the [+] button) or negative (press the [-] button) hour and minutes setting from the astronomical time.
- Specify the "End Time". The options for "End Time" are similar to the "Start Time" except "Duration" is now an option. When "Duration" is the selected "End Time", you will also be required to specify the hour and minutes the event should run from its start time.
- If an override has been created for the Timed Event, select the override from the options. For more information regarding overrides, please reference the Paradigm LightDesigner online help system or contact ETC Technical Services.
- Press [Next] to specify the Recurrence settings of the Timed Event.
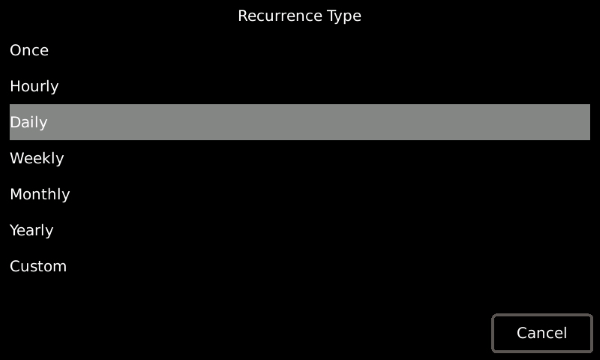
- Select the "Recurrence Type" from the options available.
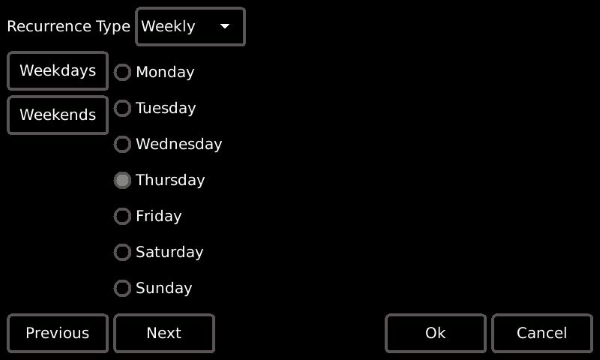
- Additional settings are provided depending on the "Recurrence Type" selected. For example, if "Weekly" is selected, the following options display:
- Press [Next] then select the drop down selection located next to "Start Action" to display available options.
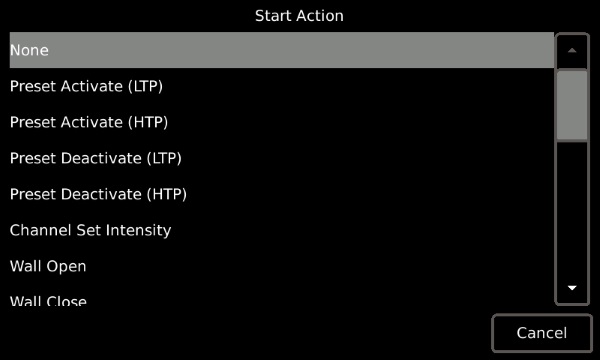
- Press to select the option from the list. Notice the ability to scroll to more options using the scroll bar to the right. Depending on the selection, more options may display for setting on the "Start Action" page. Complete the options as required.
- Press [Next] then select the drop down selection located next to “End Action” to display available options.
- Press to select the option from the list. Notice the ability to scroll to more options using the scroll bar on the right. Depending on the selection, more options may display for setting on the “End Action” page. Complete the options as required.
- Press [OK] to save the changes and return to the Timed Event Setup page.
- Press [Exit] to return to the Setup menu. Then press [OK] to return to your configuration.
