Backup and Restore User Data
Backup Showfiles and System Settings
- Eos version 2.6.4 and earlier
- Boot up your console and launch into {Primary}.
- Double-tap the [Displays] key to open the Browser and navigate to Setup>Desk Settings.
- If you have not already, download and print out the Eos Family Settings Spreadsheet.
- Using this spreadsheet, fill out the section marked "Desk Settings".
- Each highlighted heading in the spreadsheet corresponds to a tab button on the left side of the CIA.
- Each highlighted heading in the spreadsheet corresponds to a tab button on the left side of the CIA.
- Save your current show file.
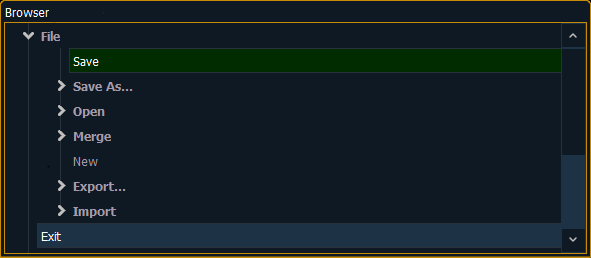
- Double-tap the [Displays] key to open the Browser and navigate to File > Save.
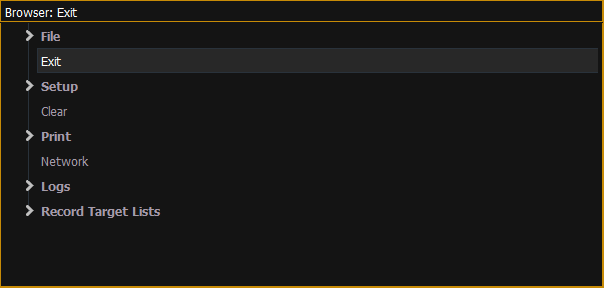
- Exit out to the Shell.
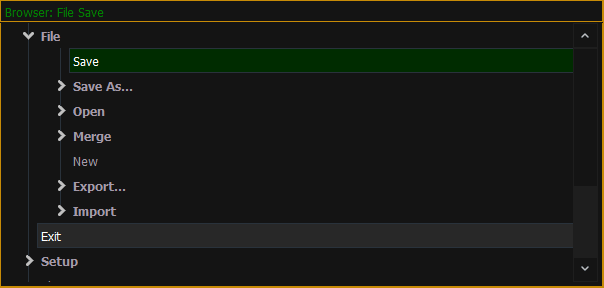
- Within the already-open Browser, double-tap the line that says Exit.
- Tap {OK} when prompted.
- Plug in the flash drive you want to backup your data to. This should be a different drive than the Re-Imaging Drive provided by ETC.
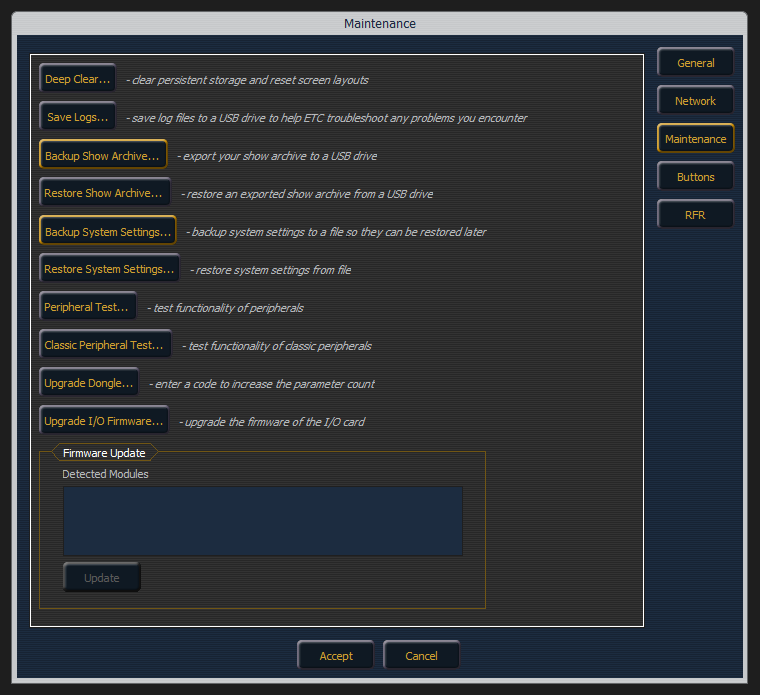
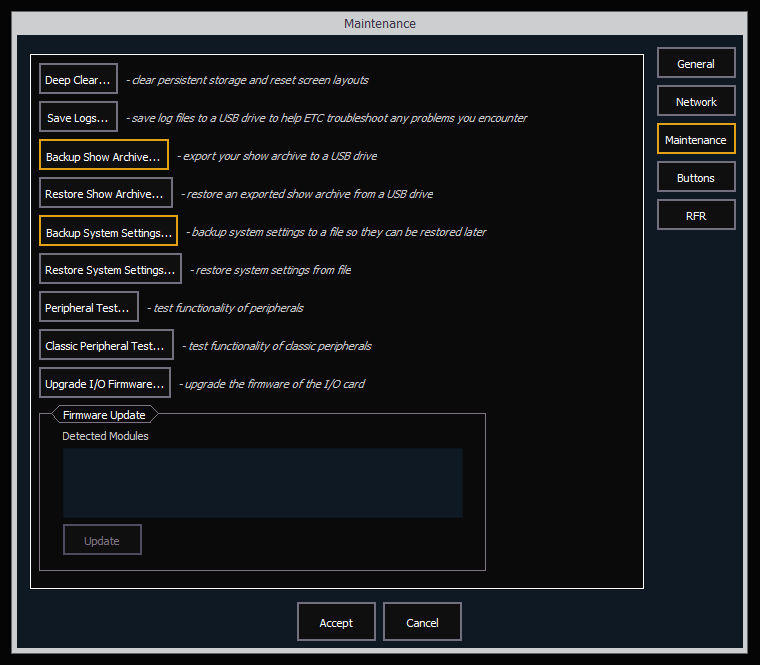
- Once in the Shell, tap on {Settings} and navigate to {Maintenance} on the right.
- Backup your show files to your flash drive
- Tap {Backup Show Archive}.
- You will be prompted to choose the "Latest" show files or "Everything".
- Choosing {Everything} will backup all versions of each show while choosing {Latest} will only backup the most current version of each show.
- After making your selection, you will be prompted to choose which drive to export to. Be sure to select your flash drive and not the ETC Re-Imaging Drive. Tap {Save}.
- While saving, the console may appear unresponsive. Be patient and wait for the confirmation your files have been successfully processed. This may take several minutes.
- Tap {OK} once the files have been processed.
- Backup your system settings.
- If you do not see the {Backup System Settings...} button:
- use the second page of the Eos Family Settings Spreadsheet marked "Eos Shell Settings" to note your console's settings. Each highlighted heading in the spreadsheet corresponds to a tab button on the right of the shell.
- Once you have filled out the spreadsheet, continue to "Re-Image Your Console" below.
- If you do see the {Backup System Settings...} button:
- You will once again be prompted to choose which drive to export to. Be sure to select your flash drive and not the ETC Re-Imaging Drive. Tap {Accept}. Then tap {OK}.
- You will once again be prompted to choose which drive to export to. Be sure to select your flash drive and not the ETC Re-Imaging Drive. Tap {Accept}. Then tap {OK}.
- If you do not see the {Backup System Settings...} button:
Backup Settings and Show Files
Additional Required Materials
In addition to the materials previously listed above, you will need to download and print out the Eos Family Settings Spreadsheet.


- Eos version 2.7.0 to 2.9.3
- Boot up your console and launch into {Primary}.
- Save your current show file.
- Double-tap the [Displays] key to open the Browser and navigate to File > Save.
- Exit out to the Shell.
- Within the already-open Browser, double-tap the line that says Exit.
- Tap {OK} when prompted.
- Plug in the flash drive you want to backup your data to. This should be a different drive than the Re-Imaging Drive provided by ETC.
- Once in the Shell, tap on {Settings} and navigate to {Maintenance} on the right.
- Backup your show files to your flash drive.
- Tap {Backup Show Archive}.
- You will be prompted to choose the "Latest" show files or "Everything".
- Choosing {Everything} will backup all versions of each show while choosing {Latest} will only backup the most current version of each show.
- After making your selection, you will be prompted to choose which drive to export to. Be sure to select your flash drive and not the ETC Re-Imaging Drive. Tap {Save}.
- While saving, the console may appear unresponsive. Be patient and wait for the confirmation your files have been successfully processed. This may take several minutes.
- Tap {OK} once the files have been processed.
- Backup your system settings.
- Tap {Backup System Settings}.
- You will once again be prompted to choose which drive to export to. Be sure to select your flash drive and not the ETC Re-Imaging Drive. Tap {Accept}. Then tap {OK}.
Backup Show Files and System Settings


If your console is running version 2.9.0 or 2.9.1, {Backup Show Archive} will not be able to backup .esf2 show files. If you are using .esf2 show files, you must manually backup your show files using the {File Manager} button. Click here for more information. This issue was resolved in v2.9.2.
- Eos version 3.0.0 and later
- Boot up your console and launch into {Primary}.
- Save your current show file.
- Double-tap the [Displays] key to open the Browser and navigate to File > Save.
- Exit out to the Shell.
- Within the already-open Browser, double-tap the line that says Exit.
- Tap {OK} when prompted.
- Plug in the flash drive you want to backup your data to. This should be a different drive than the Re-Imaging Drive provided by ETC.
- Once in the Shell, tap on {Settings} and navigate to {Maintenance} on the right.
- Backup your show files to your flash drive.
- Tap {Backup Show Archive}.
- You will be prompted to choose the "Latest" show files or "Everything".
- Choosing {Everything} will backup all versions of each show while choosing {Latest} will only backup the most current version of each show.
- After making your selection, you will be prompted to choose which drive to export to. Be sure to select your flash drive and not the ETC Re-Imaging Drive. Tap {Save}.
- While saving, the console may appear unresponsive. Be patient and wait for the confirmation your files have been successfully processed. This may take several minutes.
- Tap {OK} once the files have been processed.
- Backup your system settings.
- Tap {Backup System Settings}.
- You will once again be prompted to choose which drive to export to. Be sure to select your flash drive and not the ETC Re-Imaging Drive. Tap {Accept}. Then tap {OK}.
Backup Show Files and System Settings

- Ion Xe, Ion Xe 20, and Element 2 (Eos version 2.9.3 and earlier)
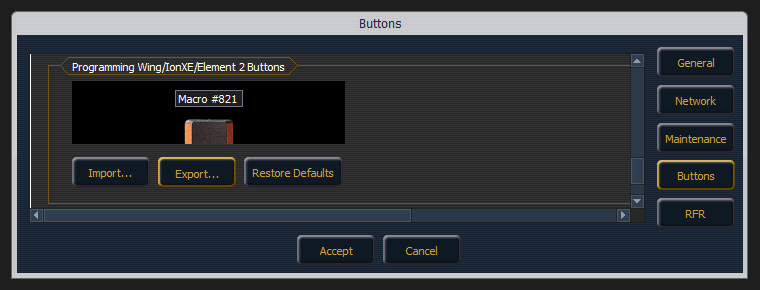
- Tap {Buttons} on the right side of the Shell.
- Scroll to the bottom of the section titled "Programming Wing/IonXe/Element 2 Buttons" and tap {Export}.
- You will once again be prompted to choose which drive to export to. Be sure to select your flash drive and not the ETC Re-Imaging Drive. Tap {Accept}. Then tap {Ok}.
Export Button Configuration
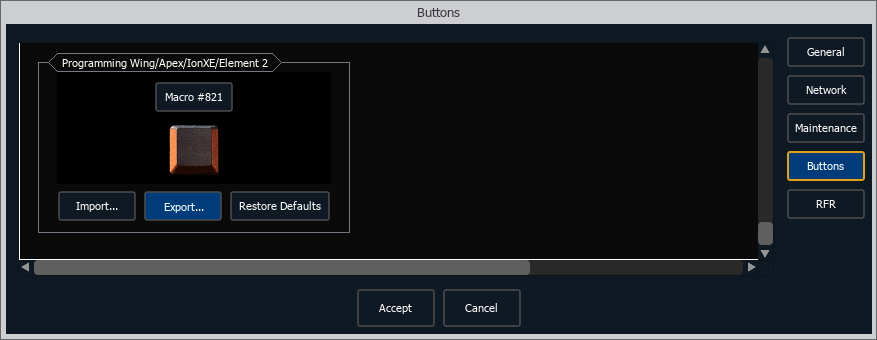
- Ion Xe, Ion Xe 20, and Element 2 (Eos version 3.0.0 and later)
- Tap {Buttons} on the right side of the Shell.
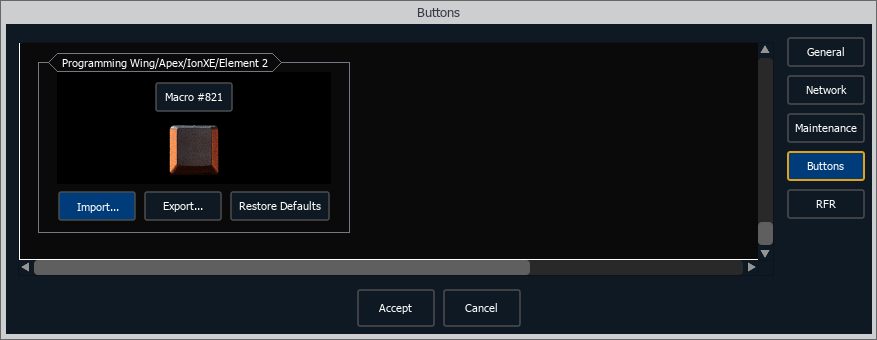
- Scroll to the bottom of the section titled "Programming Wing/Apex/IonXe/Element 2 Buttons" and tap {Export}.
- You will once again be prompted to choose which drive to export to. Be sure to select your flash drive and not the ETC Re-Imaging Drive. Tap {Accept}. Then tap {Ok}.
Export Button Configuration
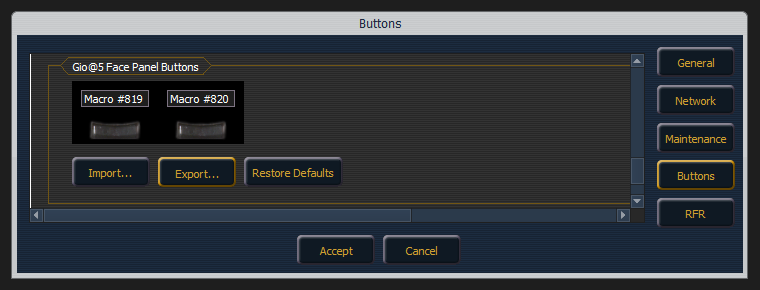
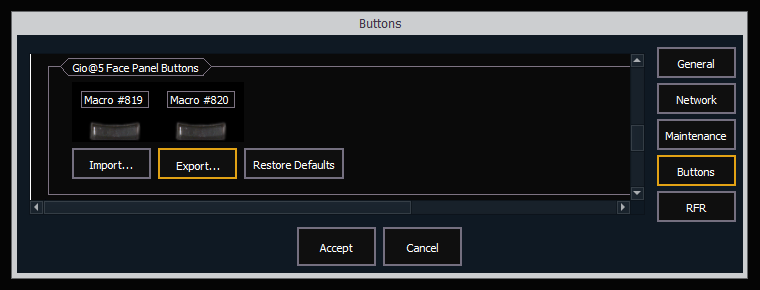
- Gio @5 (Eos version 2.9.3 and earlier)
- Tap {Buttons} on the right side of the Shell.
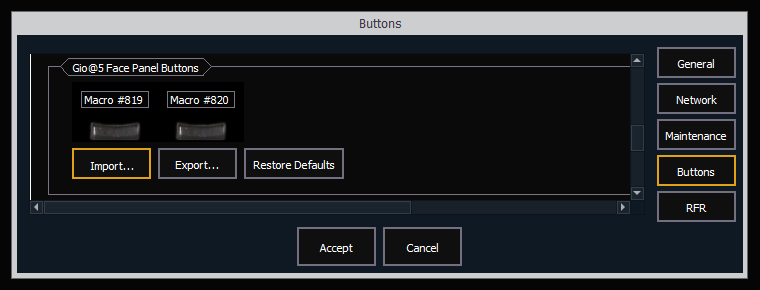
- Scroll to the bottom of the section titled "Gio@5 Face Panel Buttons" and tap {Export}.
- You will once again be prompted to choose which drive to export to. Be sure to select your flash drive and not the ETC Re-Imaging Drive. Tap {Accept}. Then tap {Ok}.
Export Button Configuration
- Gio @5 (Eos version 3.0.0 and later)
- Tap {Buttons} on the right side of the Shell.
- Scroll to the bottom of the section titled "Gio@5 Face Panel Buttons" and tap {Export}.
- You will once again be prompted to choose which drive to export to. Be sure to select your flash drive and not the ETC Re-Imaging Drive. Tap {Accept}. Then tap {Ok}.
Export Button Configuration
- RPU3, RVI3, and Ion Xe RPU (Eos version 2.9.3 and earlier)
- Tap {Buttons} on the right side of the Shell.
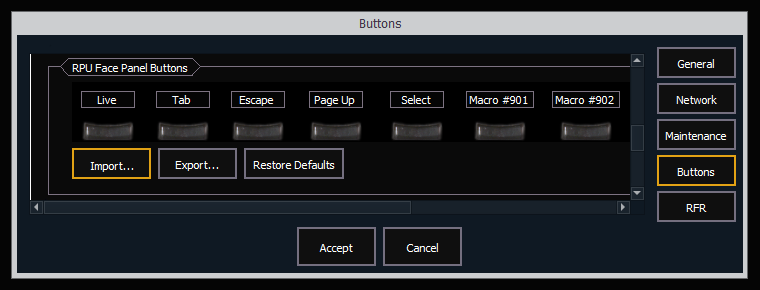
- Scroll to the bottom of the section titled "RPU Face Panel Buttons" and tap {Export}.
- You will once again be prompted to choose which drive to export to. Be sure to select your flash drive and not the ETC Re-Imaging Drive. Tap {Accept}. Then tap {Ok}.
Export Button Configuration
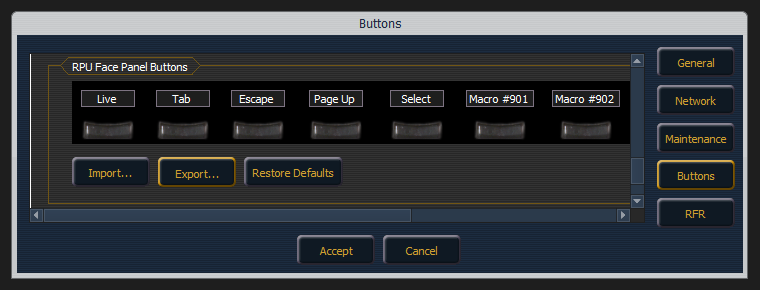
- RPU3, RVI3, and Ion Xe RPU (Eos version 3.0.0 and later)
- Tap {Buttons} on the right side of the Shell.
- Scroll to the bottom of the section titled "RPU Face Panel Buttons" and tap {Export}.
- You will once again be prompted to choose which drive to export to. Be sure to select your flash drive and not the ETC Re-Imaging Drive. Tap {Accept}. Then tap {Ok}.
Export Button Configuration
- All devices and Eos versions
- Exit out to the Shell.
- Double-tap the [Displays] key to open the Browser and double-click the line that says Exit.
- Tap {OK} when prompted.
- Plug in the flash drive you originally used to back up your data.
- Once in the Shell, tap on {Settings} and navigate to {Maintenance} on the right.
- Restore your Show Archive from your flash drive.
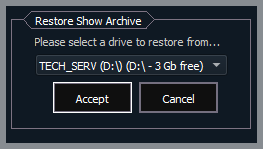
- Tap {Restore Show Archive}.
- You will be prompted to choose which drive to import from. Be sure to select the flash drive you originally used to back up your data. Tap {Accept}.
- You will be prompted to choose the "Latest" show files or "Everything".
- Choosing {Everything} will restore all versions of each show from your flash drive while choosing {Latest} will only restore the most current version of each show.
- After making your selection, you will be presented with a prompt to select the shows you wish to restore. By default, all shows will be selected. Tap {Save}.
- You will be presented with a prompt explaining your files have been successfully processed. Tap {Ok}.
- Restore your system settings from your flash drive.
- Tap {Restore System Settings}.
- You will be prompted to select the .ini file you originally backed up to your flash drive. Once selected, tap {Ok}.
- You will be presented with a prompt explaining the system settings have been restored. Tap {Ok}.

- Exit out to the Shell.
- Ion Xe, Ion Xe 20, and Element 2 (all versions)
- Tap {Buttons} on the right side of the Shell.
- Scroll to the bottom of the section titled "Programming Wing/Apex/IonXe/Element 2 Buttons" and tap {Import}.
- Eos should automatically detect the button settings on your flash drive. Tap {Yes} to confirm import, then tap {Ok}.
Import Button Configuration
- Gio @5 (all versions)
- Tap {Buttons} on the right side of the Shell.
- Scroll to the bottom of the section titled "Gio @5 Face Panel Buttons" and tap {Import}.
- Eos should automatically detect the button settings on your flash drive. Tap {Yes} to confirm import, then tap {Ok}.
Import Button Configuration
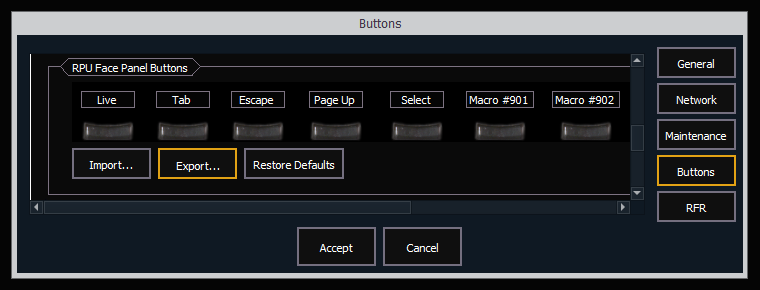
- RPU3, RVI3, and Ion Xe RPU (all versions)
- Tap {Buttons} on the right side of the Shell.
- Scroll to the bottom of the section titled "RPU Face Panel Buttons" and tap {Import}.
- Eos should automatically detect the button settings on your flash drive. Tap {Yes} to confirm import, then tap {Ok}.
Import Button Configuration