Encoder Replacement on Eos Ti Enhanced
For information on the differences between Eos Ti and Eos Ti Enhanced see What is the Difference Between Eos Ti Enhanced and Original Eos Ti

Tools & parts you will need
Large coin or flat head screwdriver
#1 screw driver
Crescent wrench
4300A2002-CFG Haptic Encoder Assembly
Getting started
To open the unit, use a coin or large flat screwdriver to turn the locks located on the underside of the front control panel.
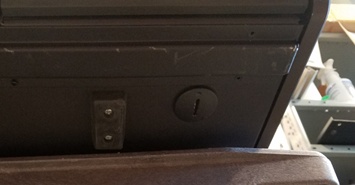
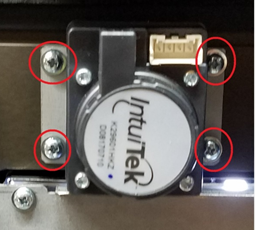
Now you should be able to lift the face panel up. Use the #1 screw driver to remove the 4 screws that hold the encoder to the face panel. Once these screws are removed, the motor can be pulled from of the encoder; there is no set screw that needs to be loosened.
Before you continue, turn on the console being careful not to let the encoder short to anything. Go to the facepanel test in the maintenance tab of the Eos shell, and check that you still have a failure of the encoder by rotating and pressing the shaft directly (without the wheel). If not, you may have a rough washer or stuck button in the wheel.
Also, check that all the wires in the encoder harness are well seated and not pulling out. They are sometimes loose and can be fixed by simply removing the connector and reseating the wire.
If you still have a failure, shut down the console and continue...
Remove the cable to the encoder by pressing on the plastic locking tab and pulling.

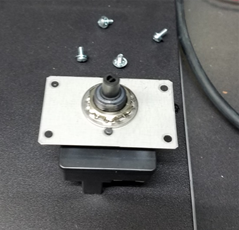
Now use the crescent wrench to remove the nut that holds the encoder to the metal bracket.

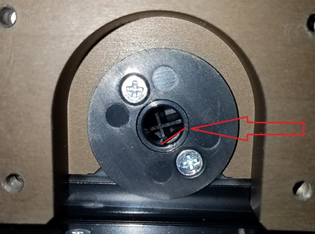
Follow the steps backwards to install the new encoder, make sure the flat part on the shaft of the encoder goes with the flat part of the knob. Seen above.