How to install an Eos Ti / Gio 6x2 retrofit kit
Please read these instructions completely before beginning work. If you feel this is beyond your skill level, contact an Authorized Service Center for assistance. ETC is not responsible for any damage that may occur due to improper installation.
Affected kits:
- 4350K1012 - Eos Ti Enhanced 6x2 PCB Retrofit Kit
- 4240K1013 - Gio Enhanced 6x2 PCB Retrofit Kit
These kits can only be used with Eos Family software version 2.6.3 or higher. Also, they are only meant for replacing older 6x2 hardkeys with WHITE circuit boards. If you have a 6x2 with a BLUE circuit board, you only need to order the board itself and not this kit.
Purpose:
This document outlines the process to retrofit the face panel 6x2 "crescent" hardkey circuit boards to the latest version on an Eos Ti or Gio. There has been some minor variance in the USB cables used internally, and the upgrade kit includes new compatible cables where applicable. These parts are backwards compatible with all versions of Eos Ti and Gio consoles. Kits contain all boards highlighted below.
Procedure:
If you are ONLY replacing these boards and still have the original main board, the new keycaps will not exactly match the existing ones. They will sit 1/16" deeper in the chassis, and are slightly clearer. These differences don't affect functionality, but if it is a concern to you, you may want to consider purchasing the keyboard retrofit kit for Ti or Gio.
Tools needed:
- Packing or similar tape
- #1 & 2 phillips screwdriver
- 3mm Allen key
- 5/16" or 8mm or adjustable wrench
Removing the old boards:
- Power down the console.
- Unplug the console from mains power.
- Remove the back panel cover over the motherboard underneath the display panel using a #2 phillips.
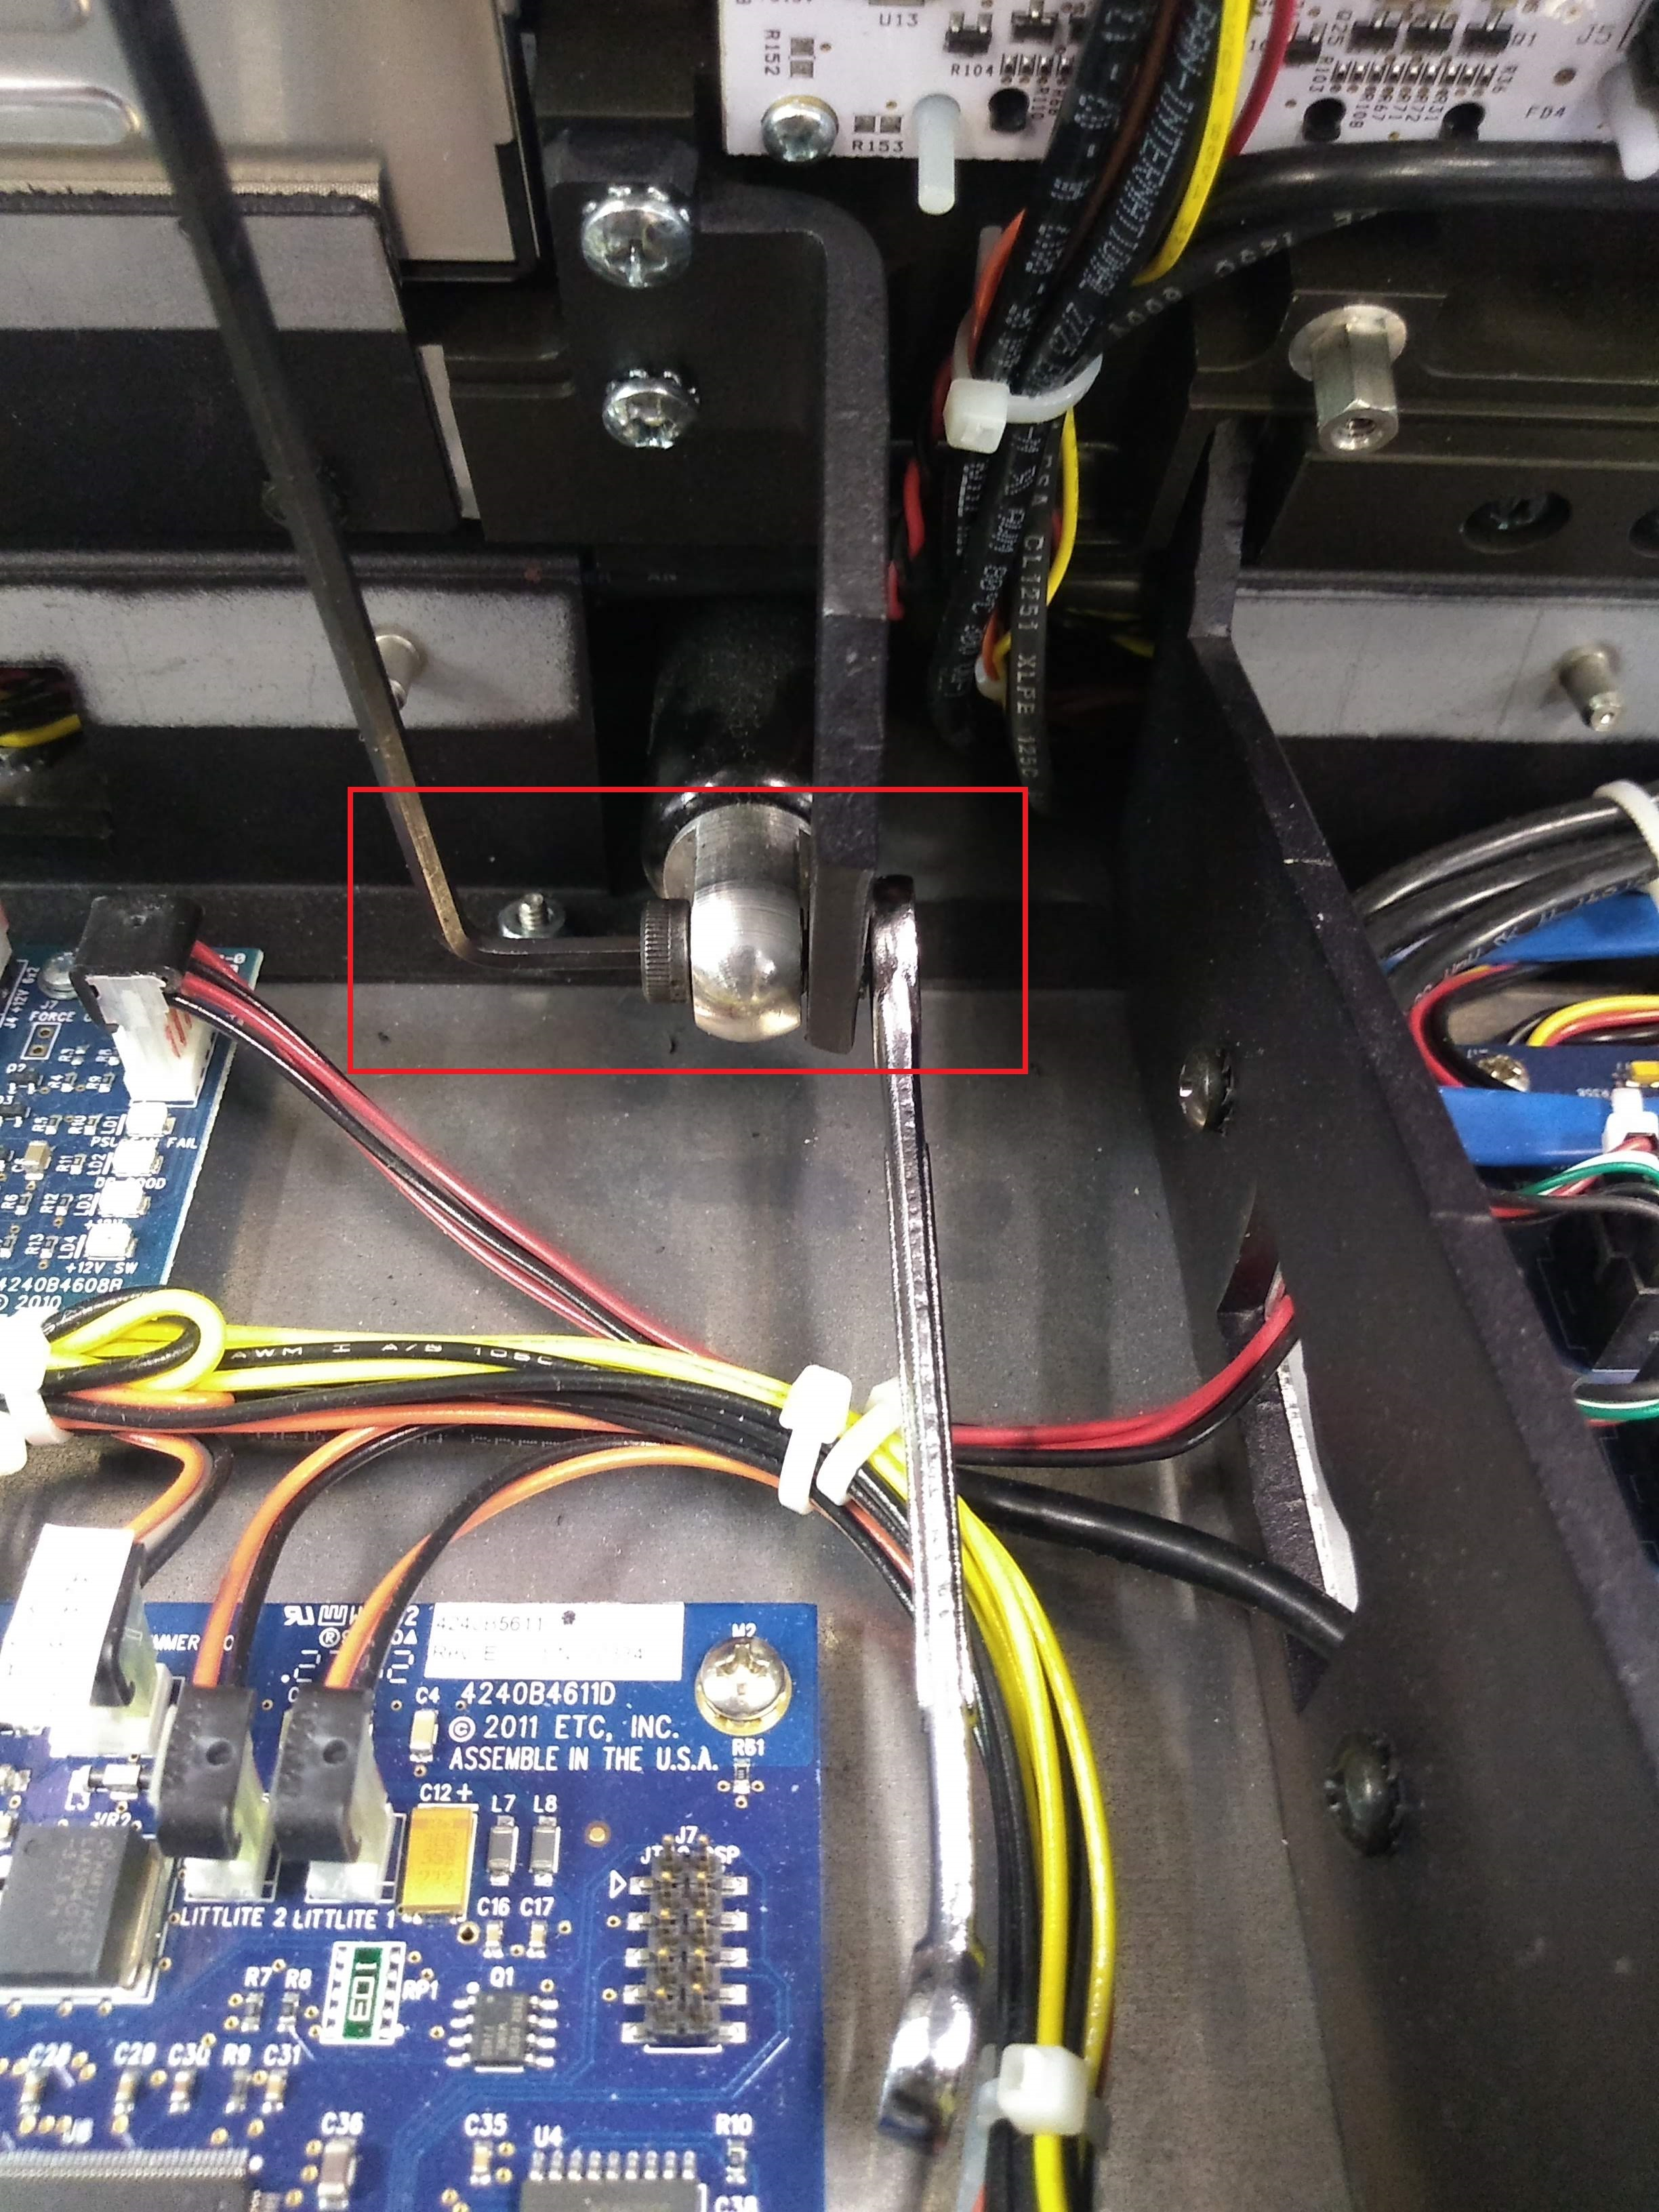
- Gio only: Disconnect the lift piston from the display panel bracket using the 3mm Allen key and 5/16" or 8mm wrench. Push the display towards the front of the console as far as it will go. It will usually stay here without issue, but if you're concerned that it may fall, use tape to hold the panel in this position.
- Remove the back panel cover for the display panel using a #2 phillips.
- Ti only: Remove the silver panels covering the back of the LCD screens. Be careful not to strip the phillips head of these screws as it is easy to do so.
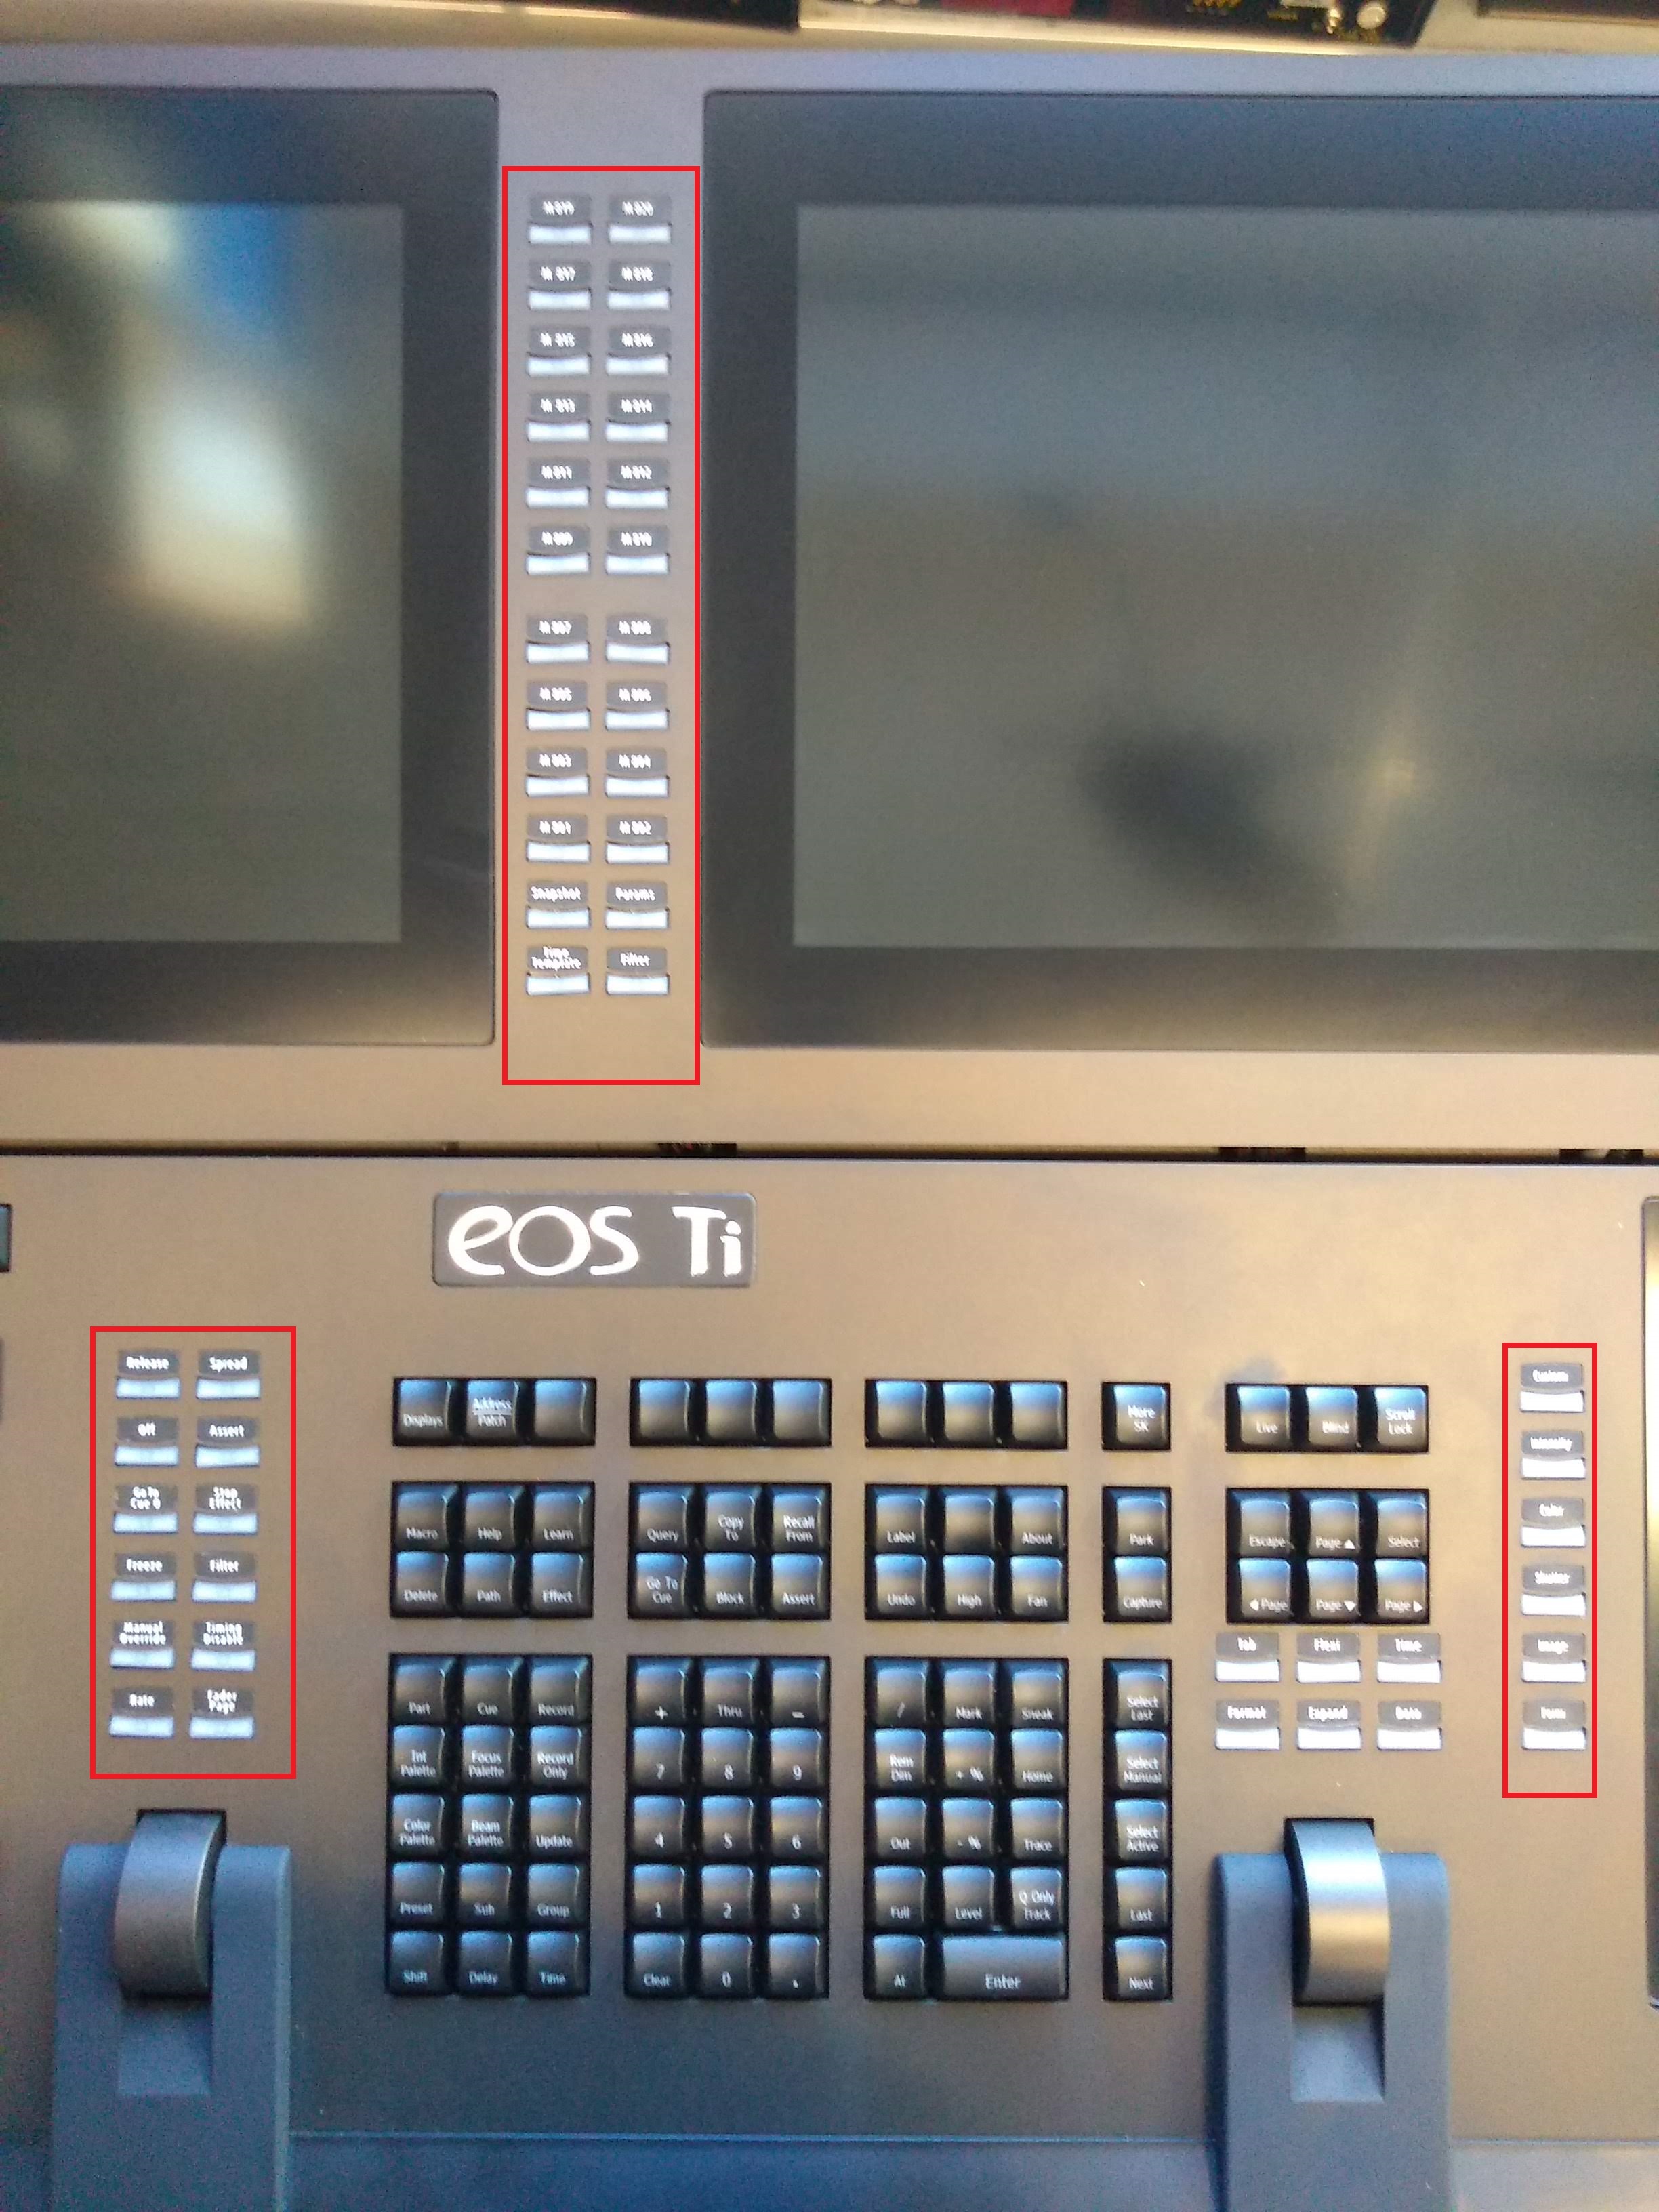
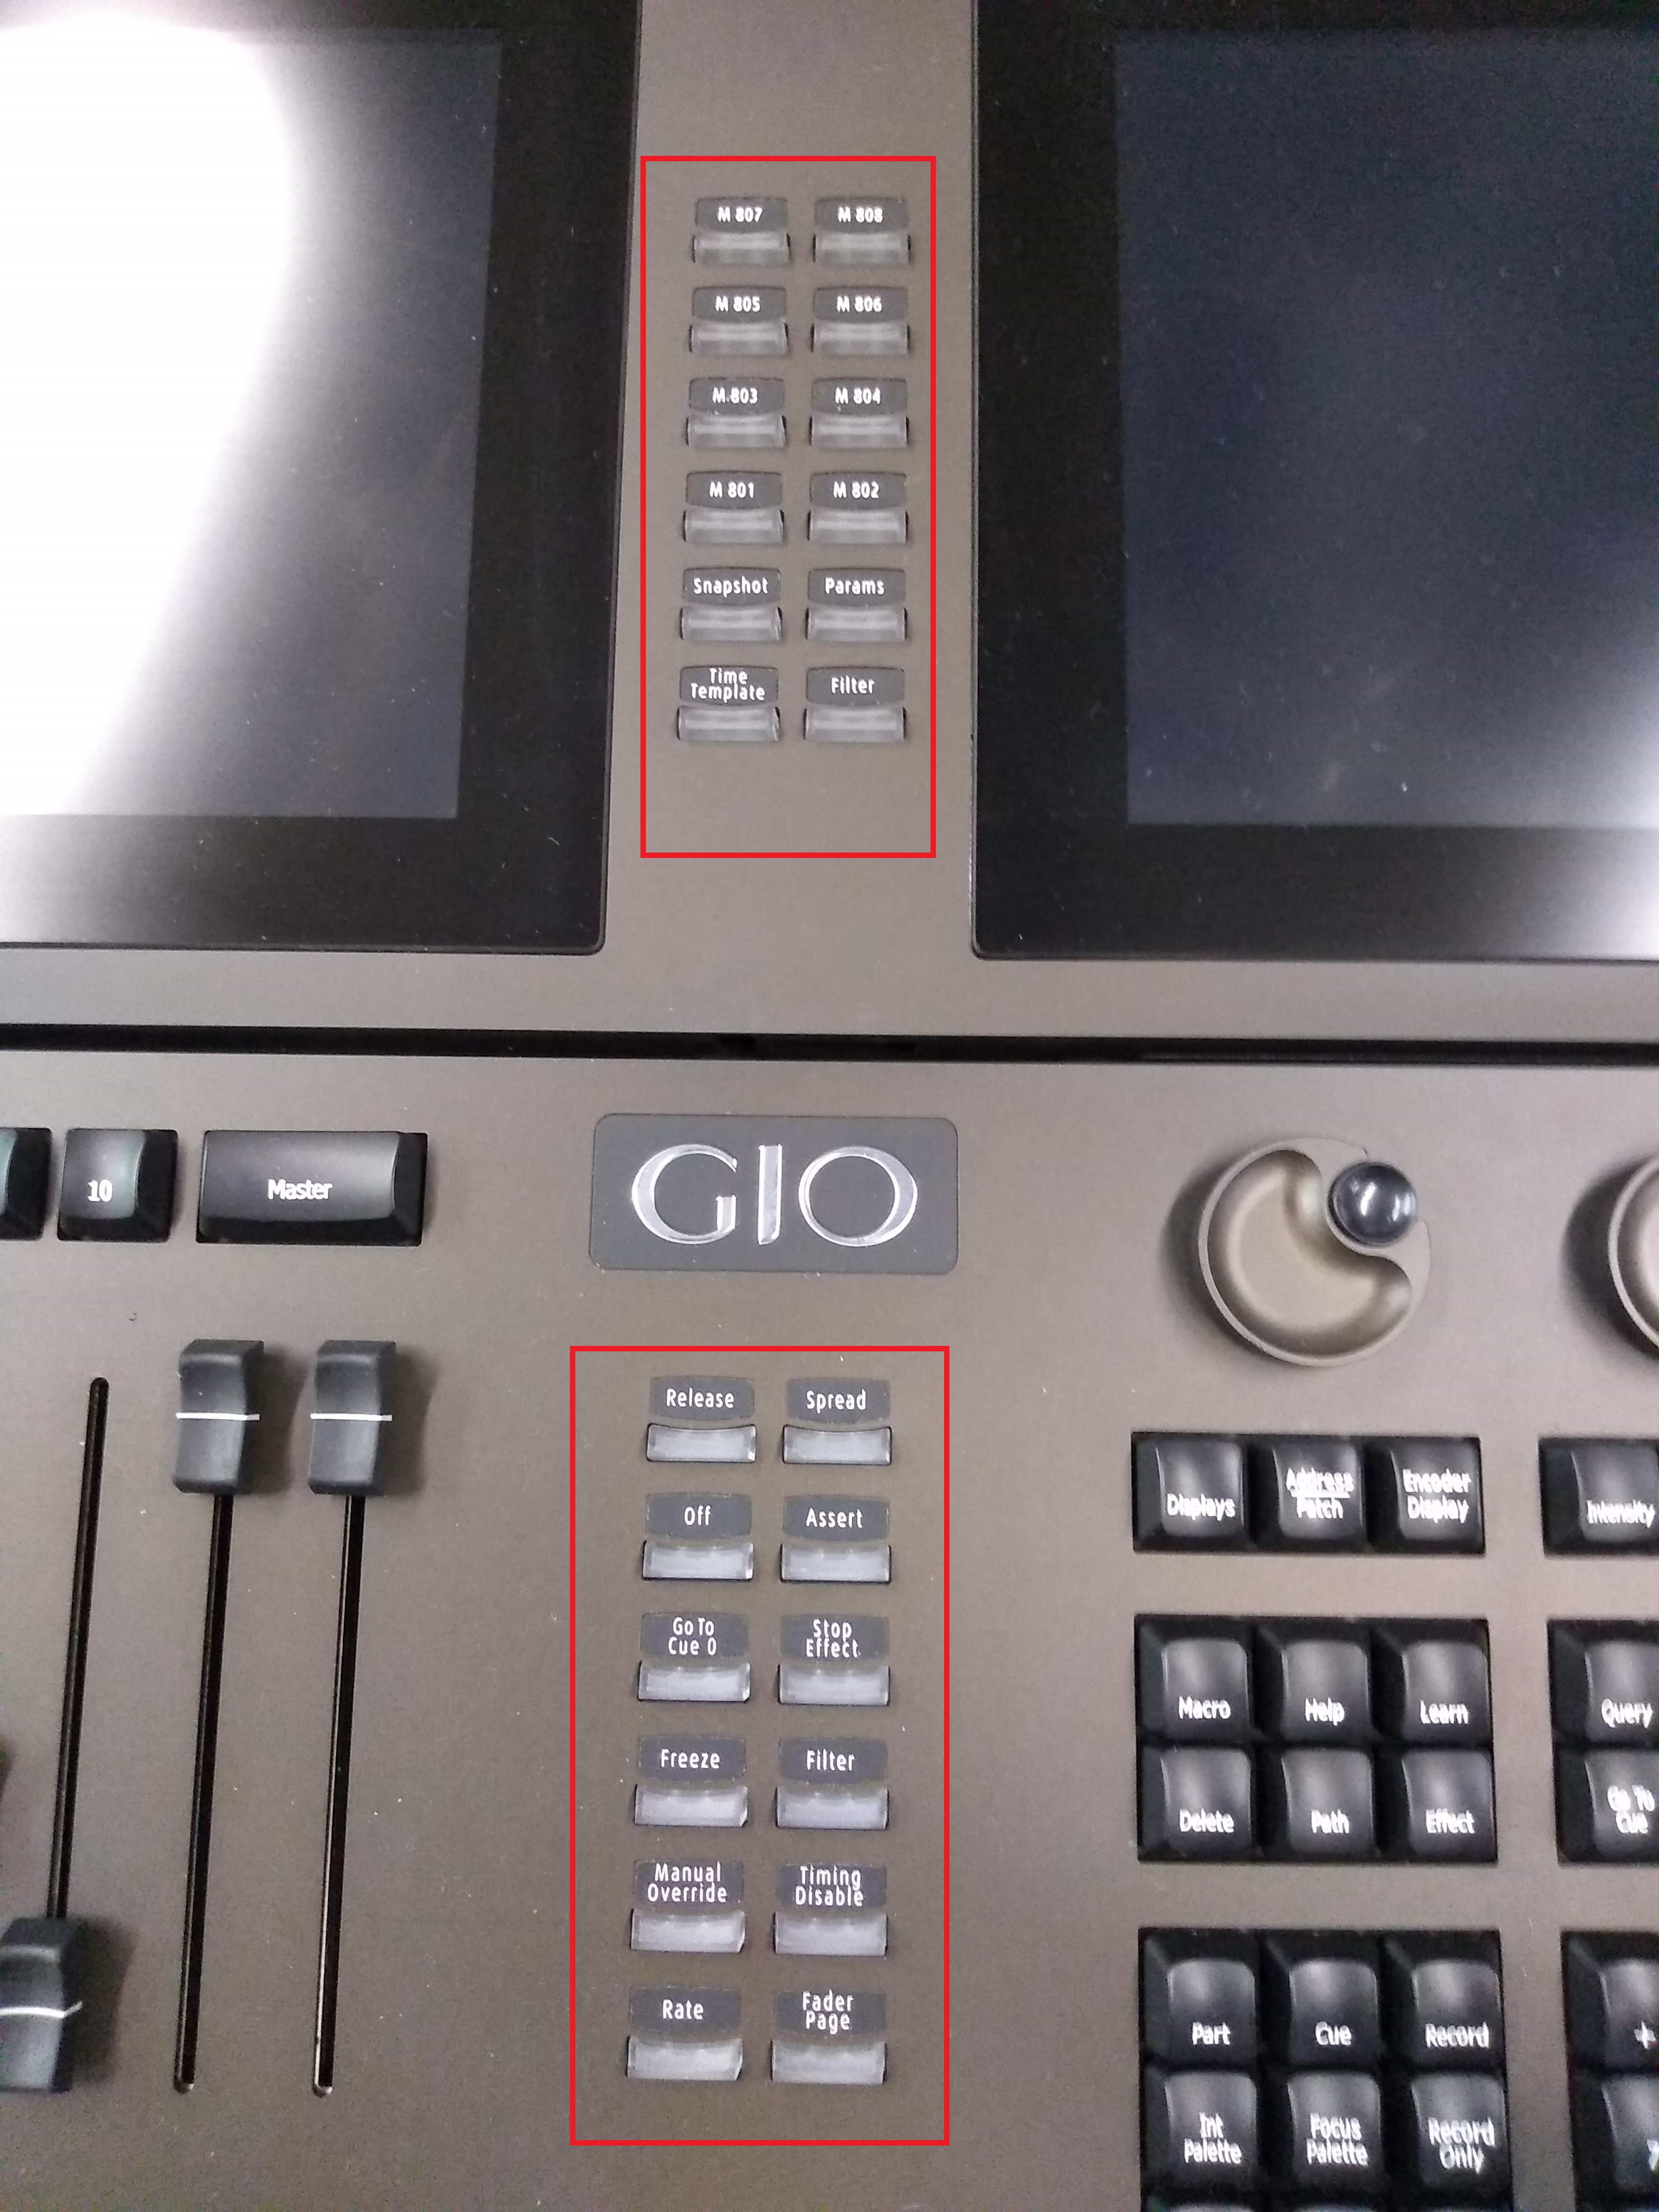
- Locate the 6x2 board/s (Ti has 2 of them, Gio only 1) in the middle and remove all connectors, clipping the zip ties where necessary.
Gio:
Ti:
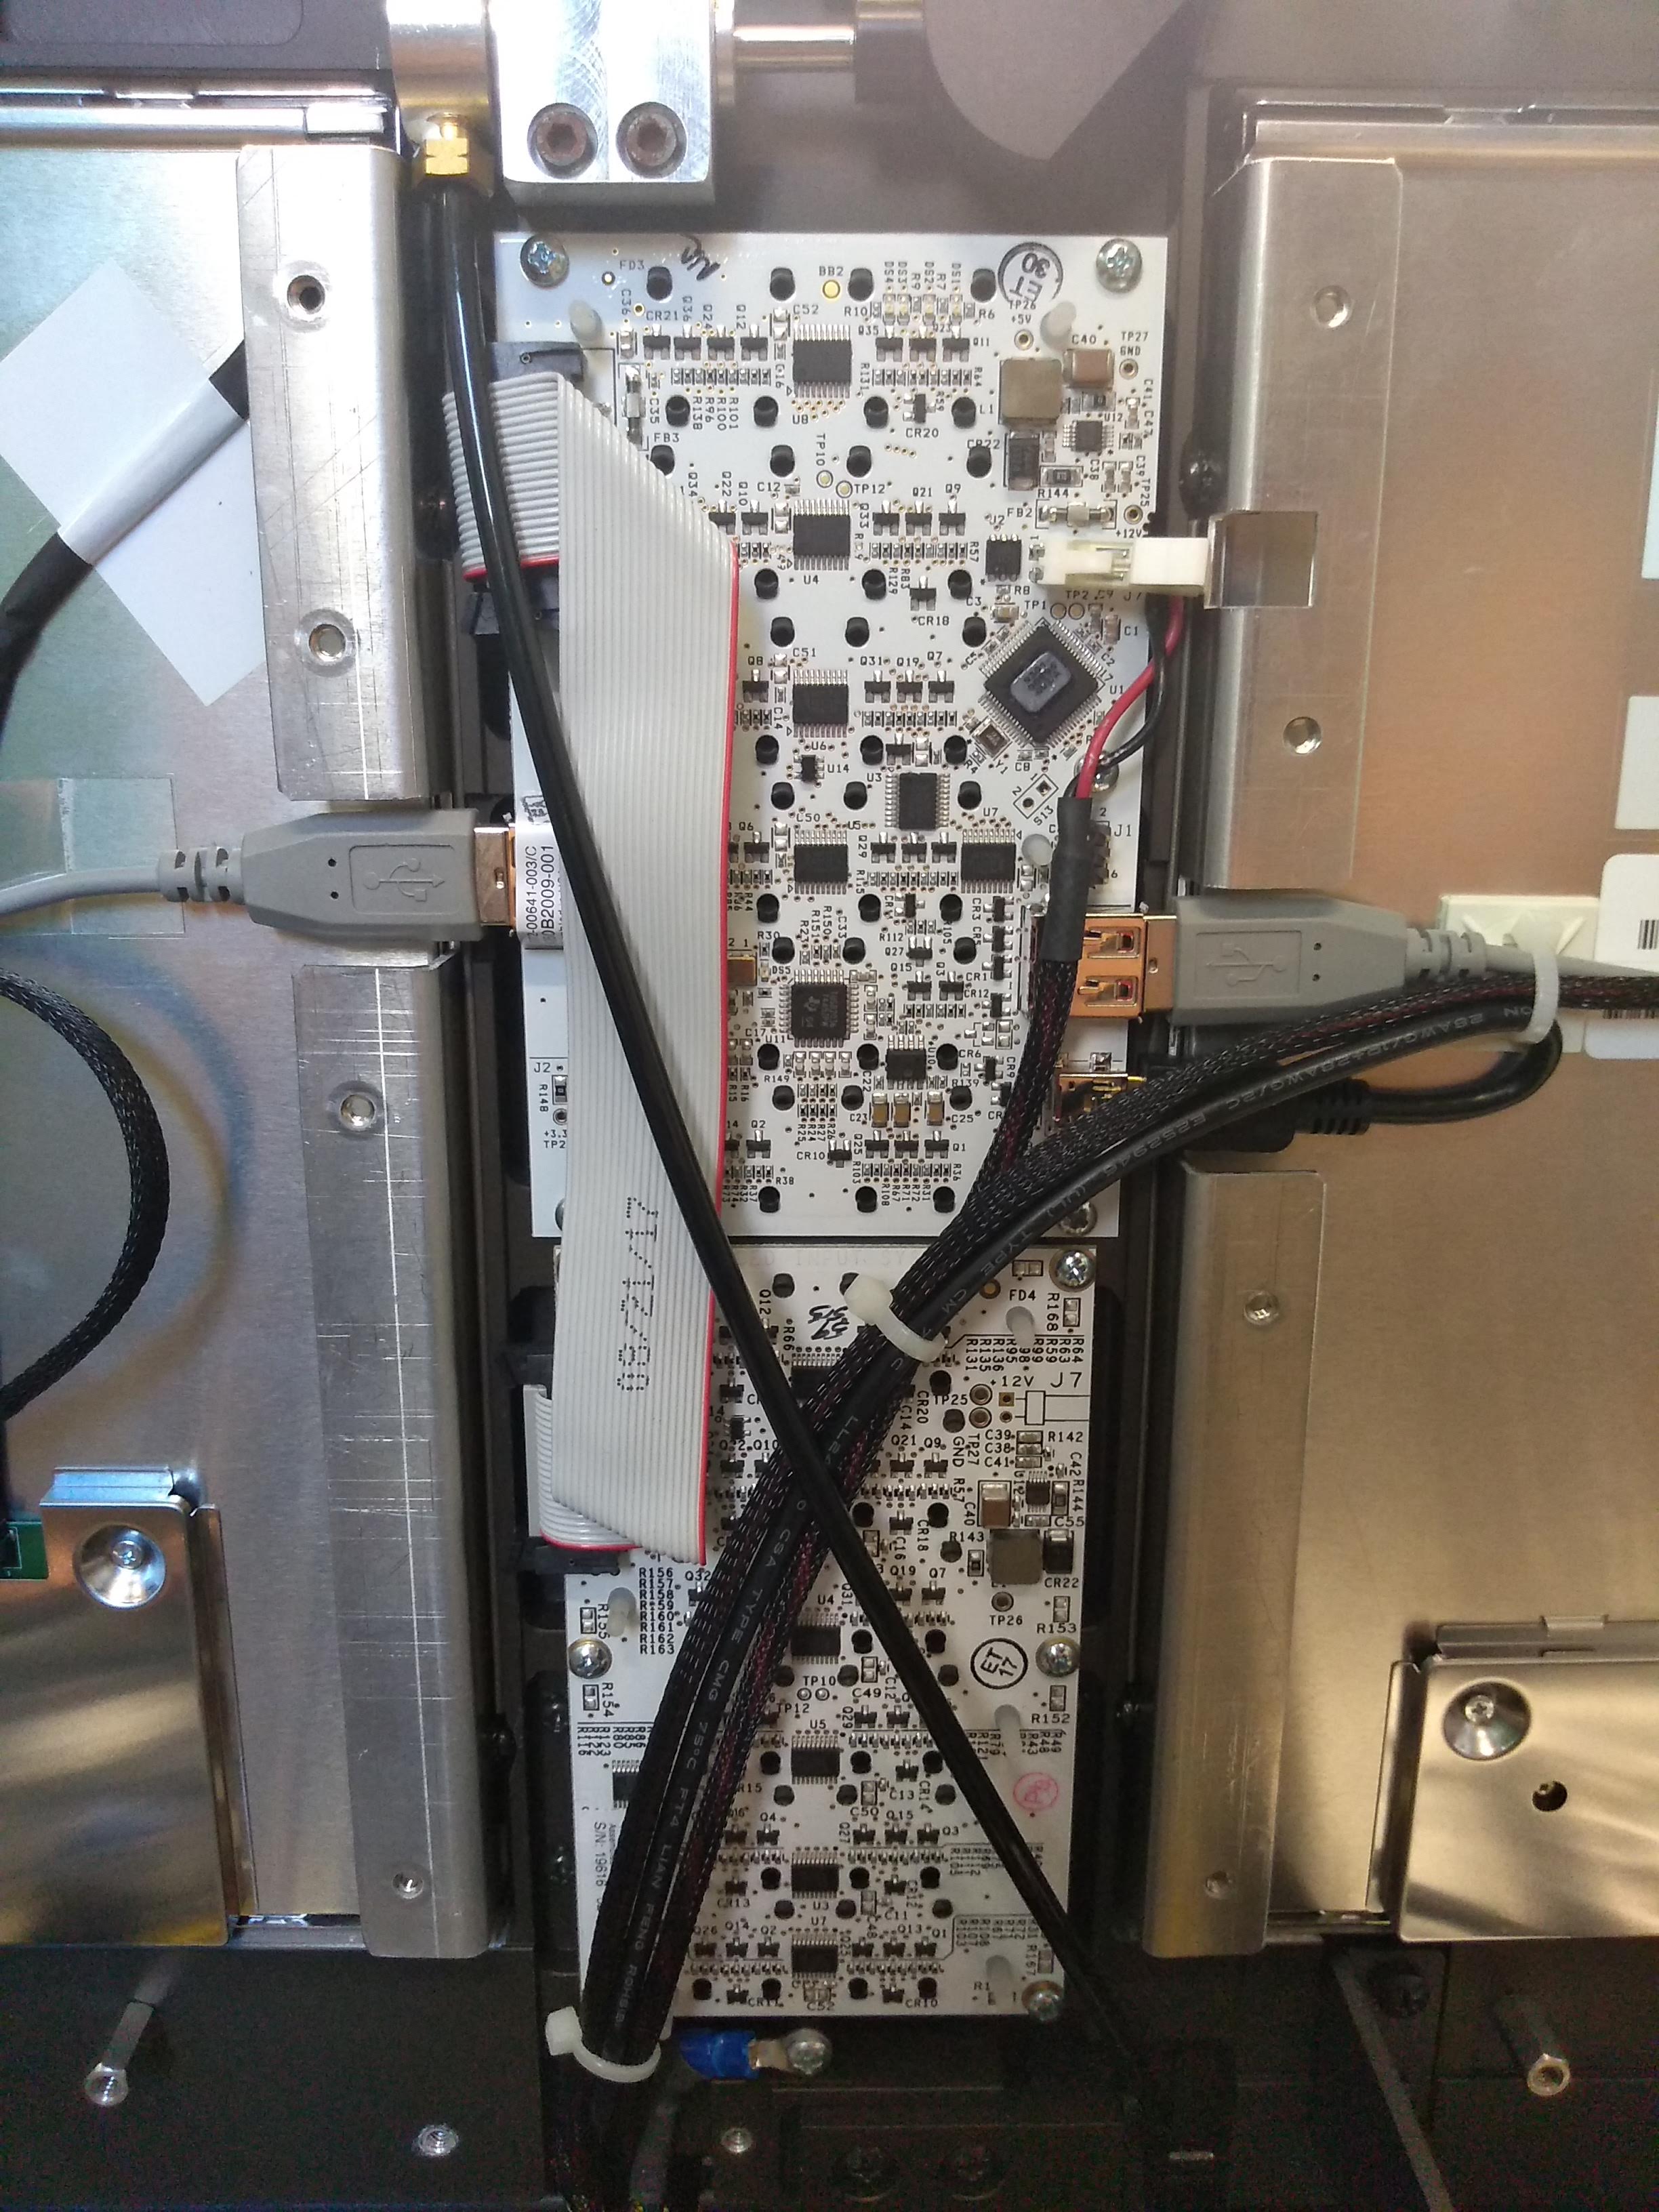
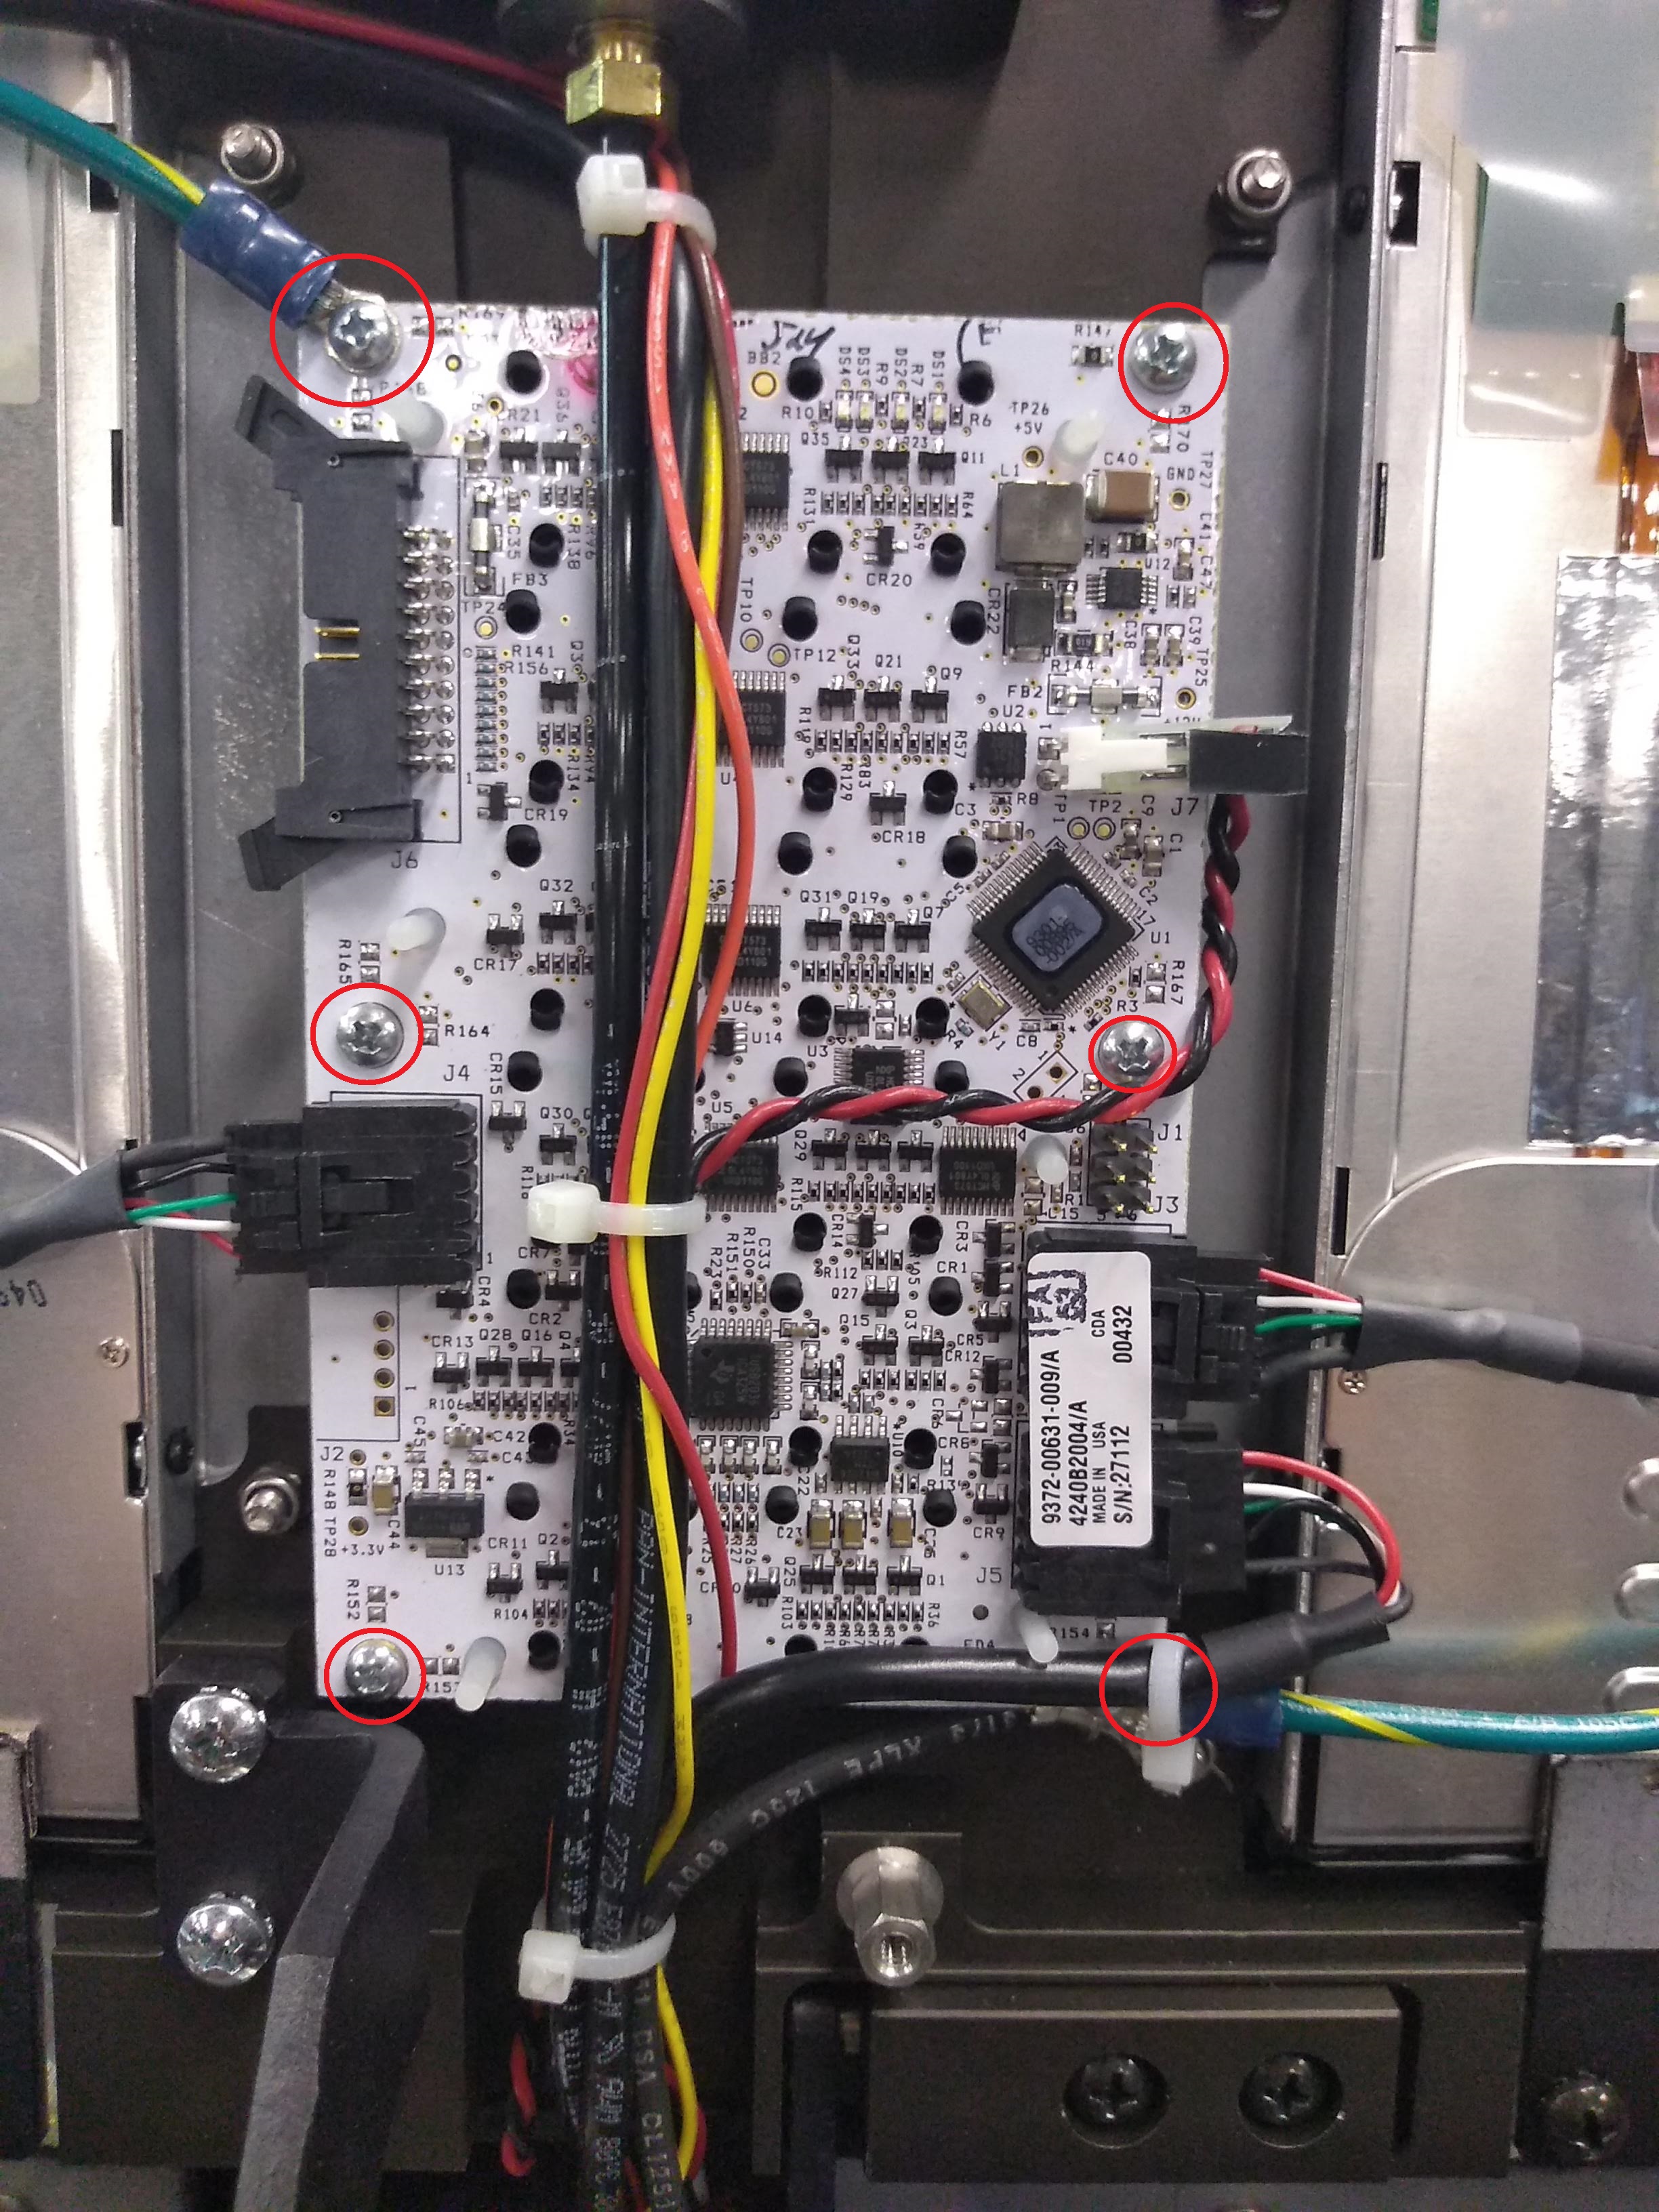
- Remove the 6 screws attaching each board using a #1 phillips and remove the board/s.
- Gio only: The USB cables will need to be changed for the new boards. Remove the 2 USB cables routed to the screens as well as the main USB cable going to the motherboard. You will have to open the front panel as described in the next step to completely remove the main USB cable.
- Go to the front of the console and open the control panel by turning the 2 locks on the bottom of the chassis using a flat head screwdriver or coin. Lift the control panel until it settles over the display. It should hold here without moving as long as it isn't bumped, but you can use tape again to hold it open.
- Remove the 6x2 here as you did in the display panel. If you have a Ti, remove the 1x6 board to the left of the small screen as well.
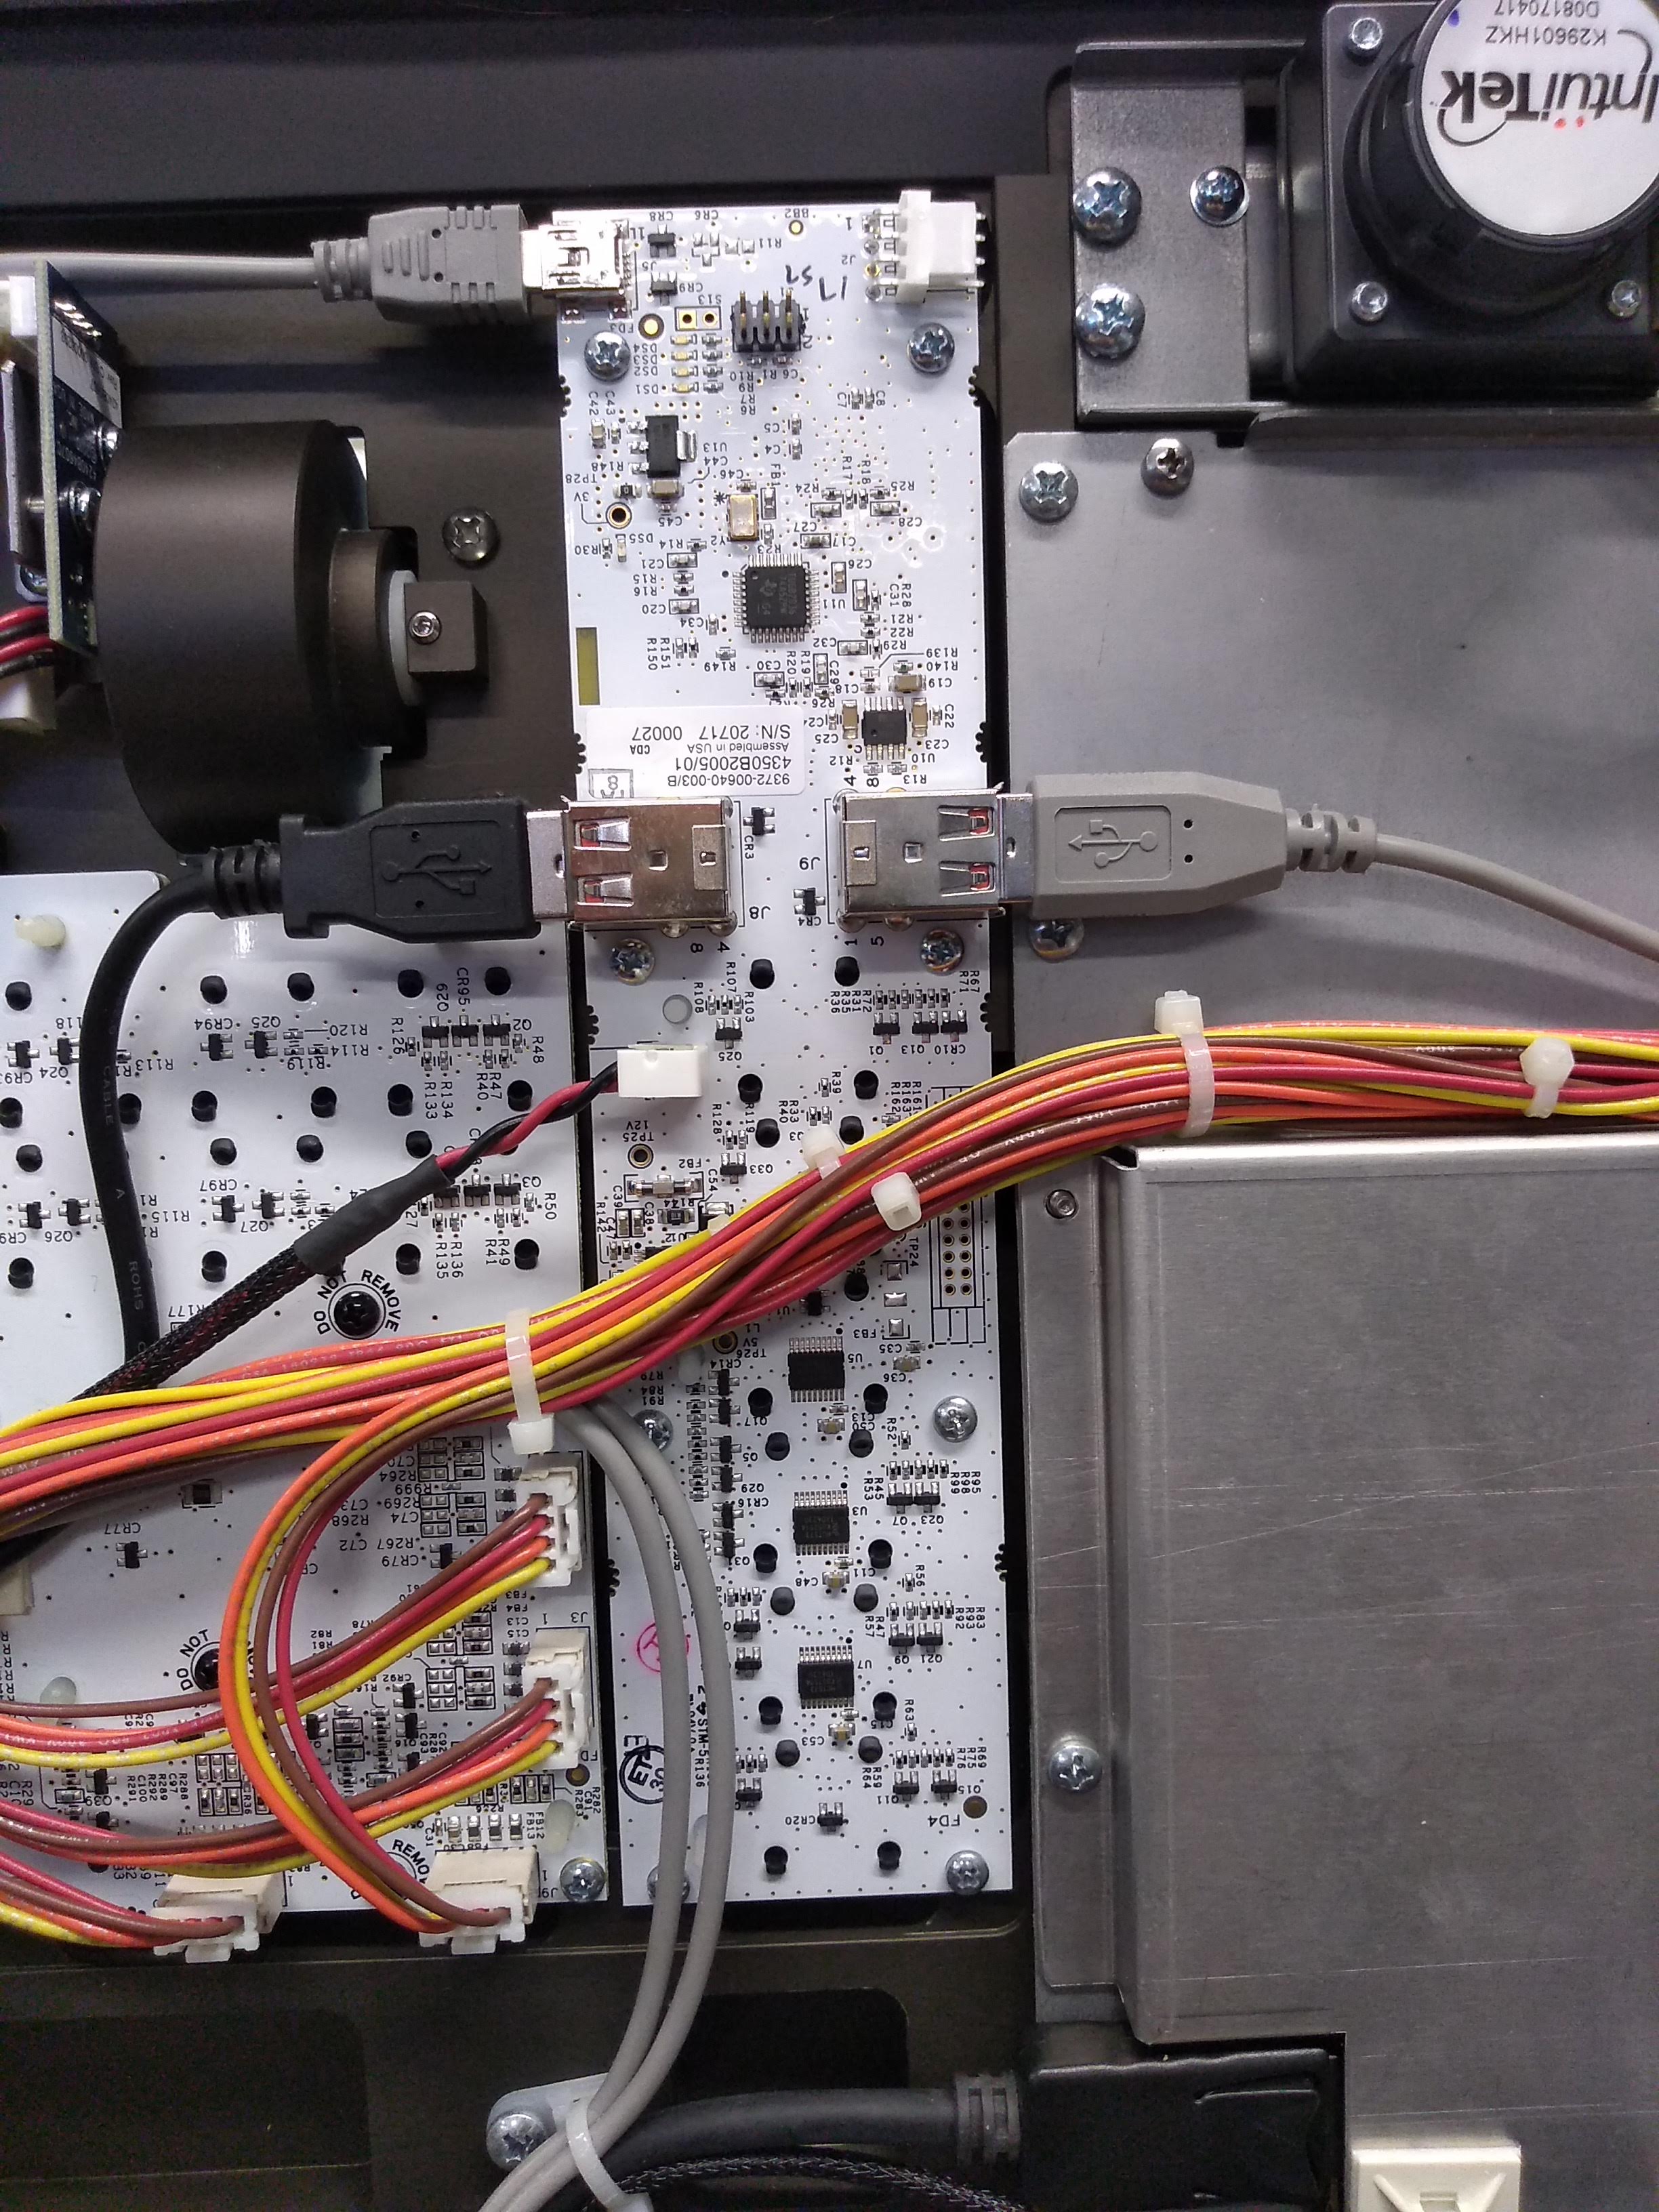
Gio/Ti:
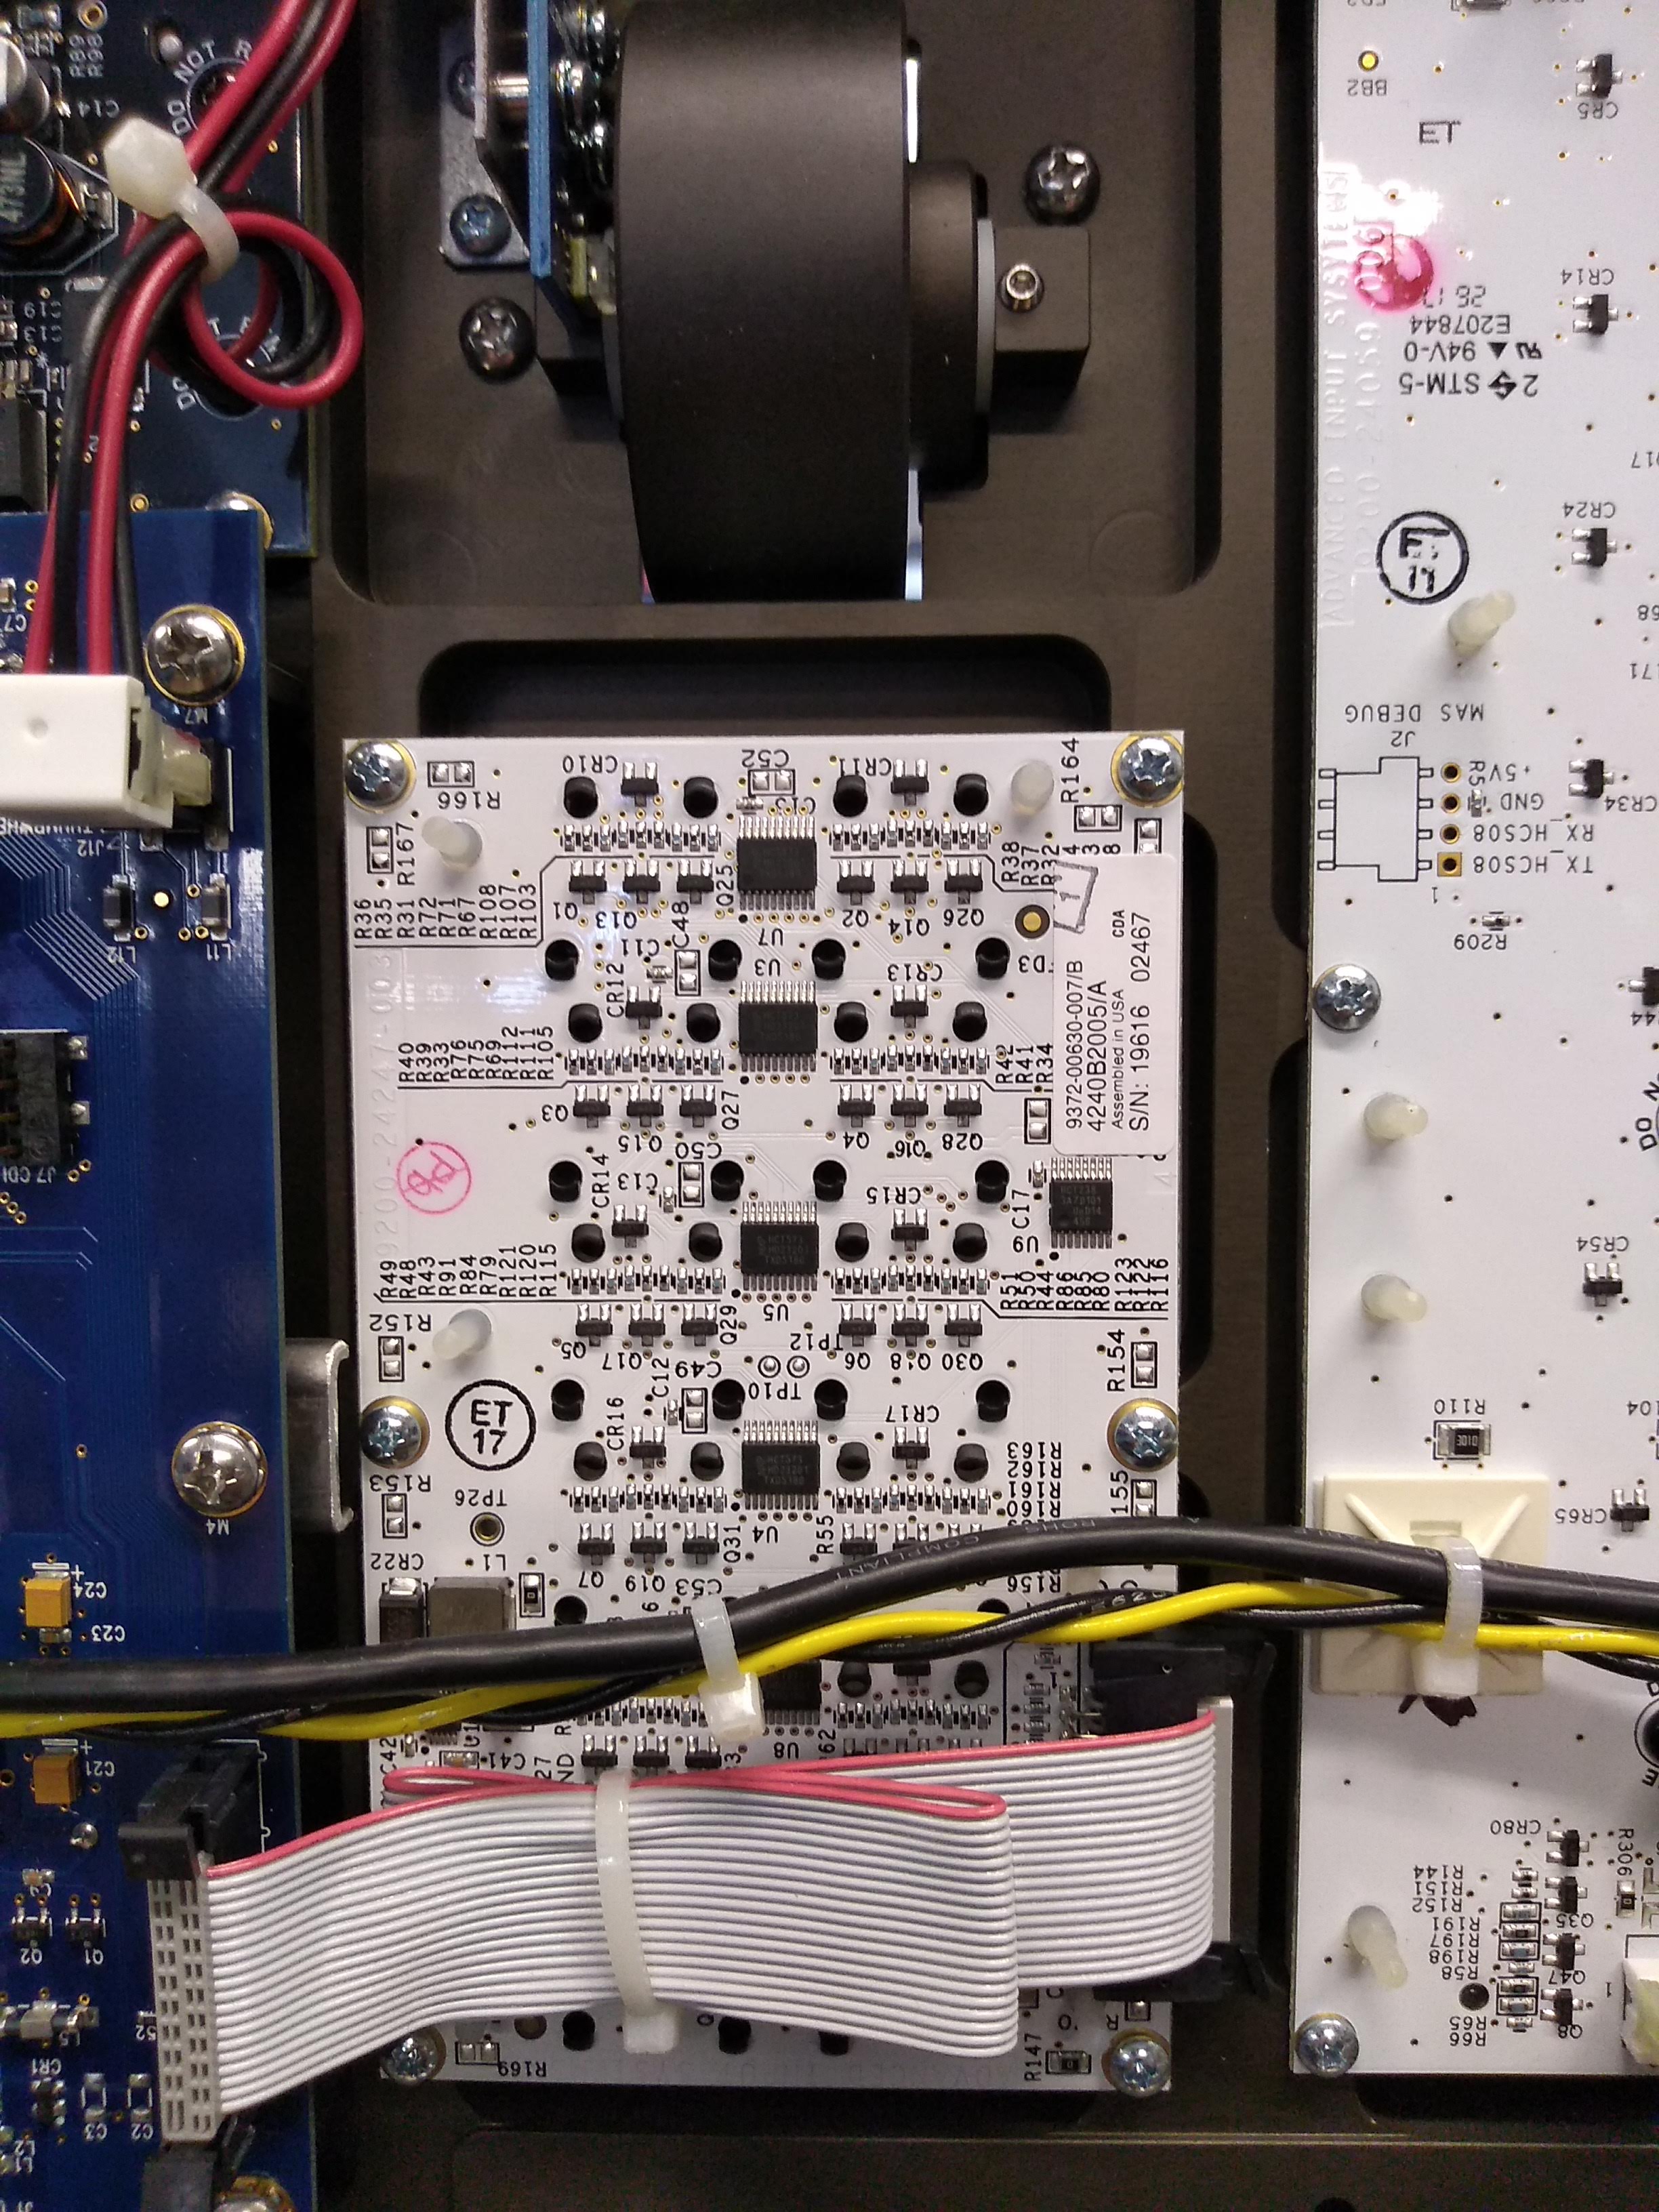
Ti 6x1:
Installing the new boards:
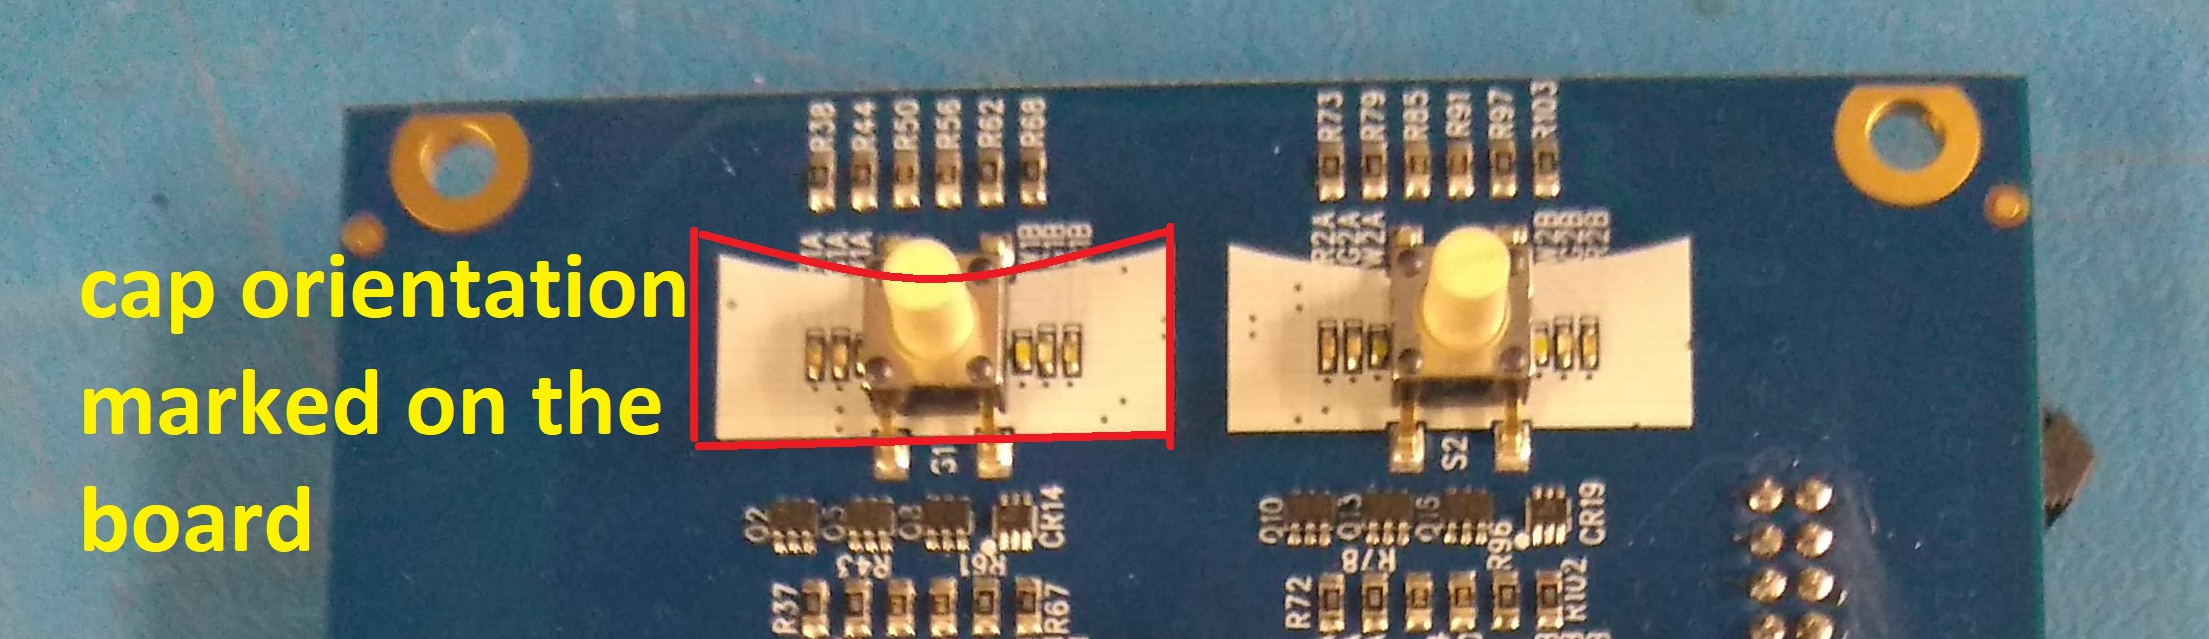
- Install the new keycaps included onto the new 6x2 board/s. The printing on the board indicates proper orientation. Make sure that the black, foam light blocker is affixed to the board as well.
- Install the new boards by just starting the screws at first only enough to hold the board, then check the other side to make sure that the caps are aligned properly in the face panel. If working on a Gio, don't forget to reinstall the display ground cables with the lower right and upper left screws. Then start with the middle screws and tighten it down. The board will flex with pressure from the foam, but it should be fine once tightened down fully. Be careful not to strip the screws.
- Gio only: Replace the display and main USB cables removed in step 9 above. Your kit should include similar cables except with USB A connectors on one end that mate with the new 6x2 board. Route them the same as they were before and replace any zip ties that were removed.
- Restore all connections and zip ties removed in step 7 above.
- Close up the console in the same way it was opened.
Related Links/References