How to Replace DMX Driver Chips in an Ion
Overview
This support post contains instructions for removing and replacing the DMX chip within your Ion
console. DMX driver chips may fail when subjected to excessively high voltage. This can be caused by a
power event such as a lightning strike. You may need to replace the DMX driver chip if the console is not outputting DMX, lights flicker, or if the chip appears burnt or damaged.
Tools Needed
- #1 Phillips Screwdriver
- #2 Phillips Screwdriver
- Dual In-Line (DIL) Chip puller
- DMX Driver Chip, IC 75BC182 (ETC Part #Z1458-F)
Procedure
- Disconnect power and other connections from the console before performing any service work.
- Remove the face panel from your console. Steps to do this can be found in this support article.
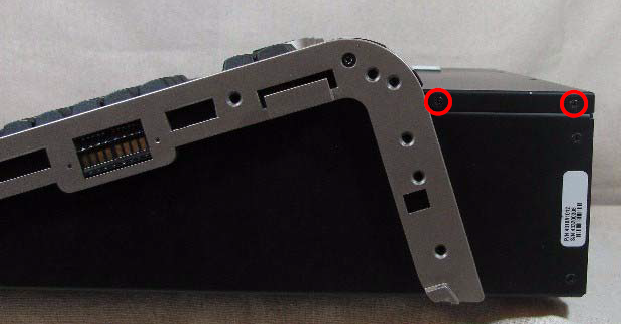
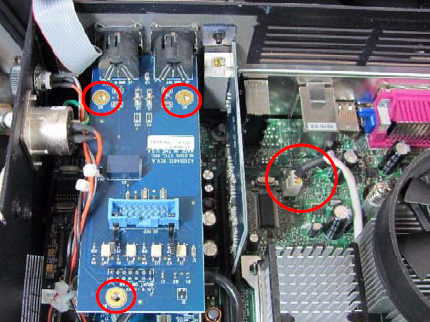
- Remove the (2) circled screws holding on the back cover. Repeat on opposite side.
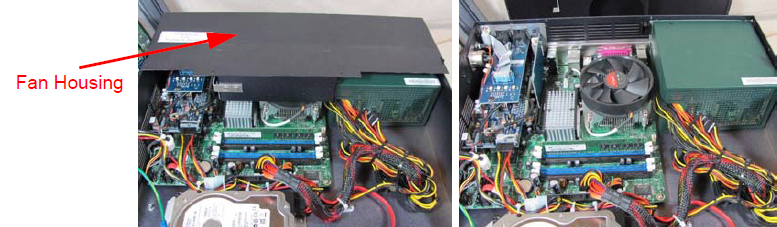
- Remove the fan housing.
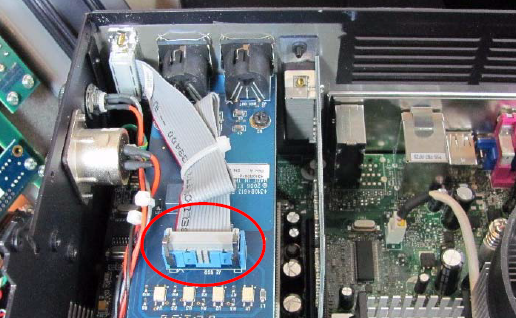
- Remove the circled connection.
- Remove the (3) circled screws, then remove the MIDI PCB.
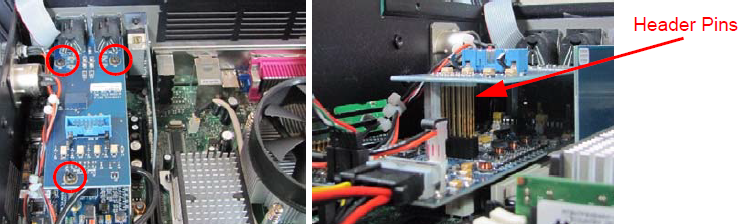
There are long header pins that connect to the PCB below, use care when removing this card.
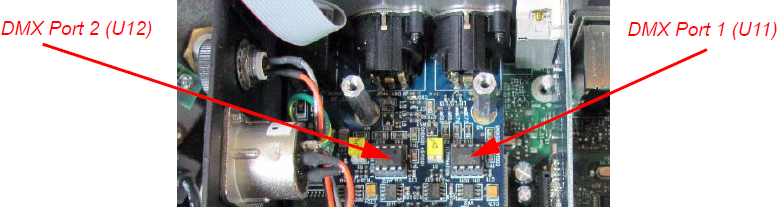
- Locate the DMX Chip on the control card.
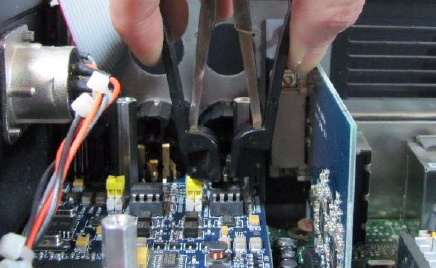
- With your chip puller, gently remove the DMX Chip.
- Inspect the PCB for any damaged or burned components.
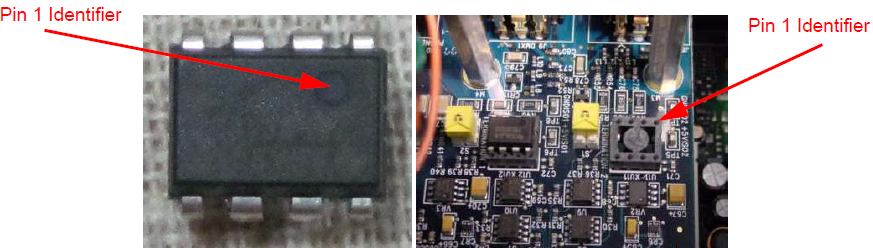
- Insert the replacement chip into the socket so that pin one is in the correct location.
- Replace the MIDI PCB, taking care to align the long header pins into the socket below.

- Replace the (3) circled screws and (1) circled connection.
- Replace fan housing and the (4) screws on the outer edges.
- Follow the steps in the "How to Open an Ion" support post in reverse to re-attach the face panel.