Electronic Theatre Controls Inc

Half of Standard Fader Wing 40 Unresponsive

Important-Icon.png

The information in this post is provided to assist in troubleshooting. Perform work at your own risk. ENSURE ANY POWER FROM DEVICES HAS BEEN DISCONNECTED BEFORE SERVICING ANY EQUIPMENT. If you do not feel comfortable performing the work, please contact us or your local service center. Be aware that ETC and its Affiliates are not responsible for any damage or injury caused by service of our products by anyone other than us or our authorized service providers, and such damage is excluded from the product’s warranty.

Symptoms

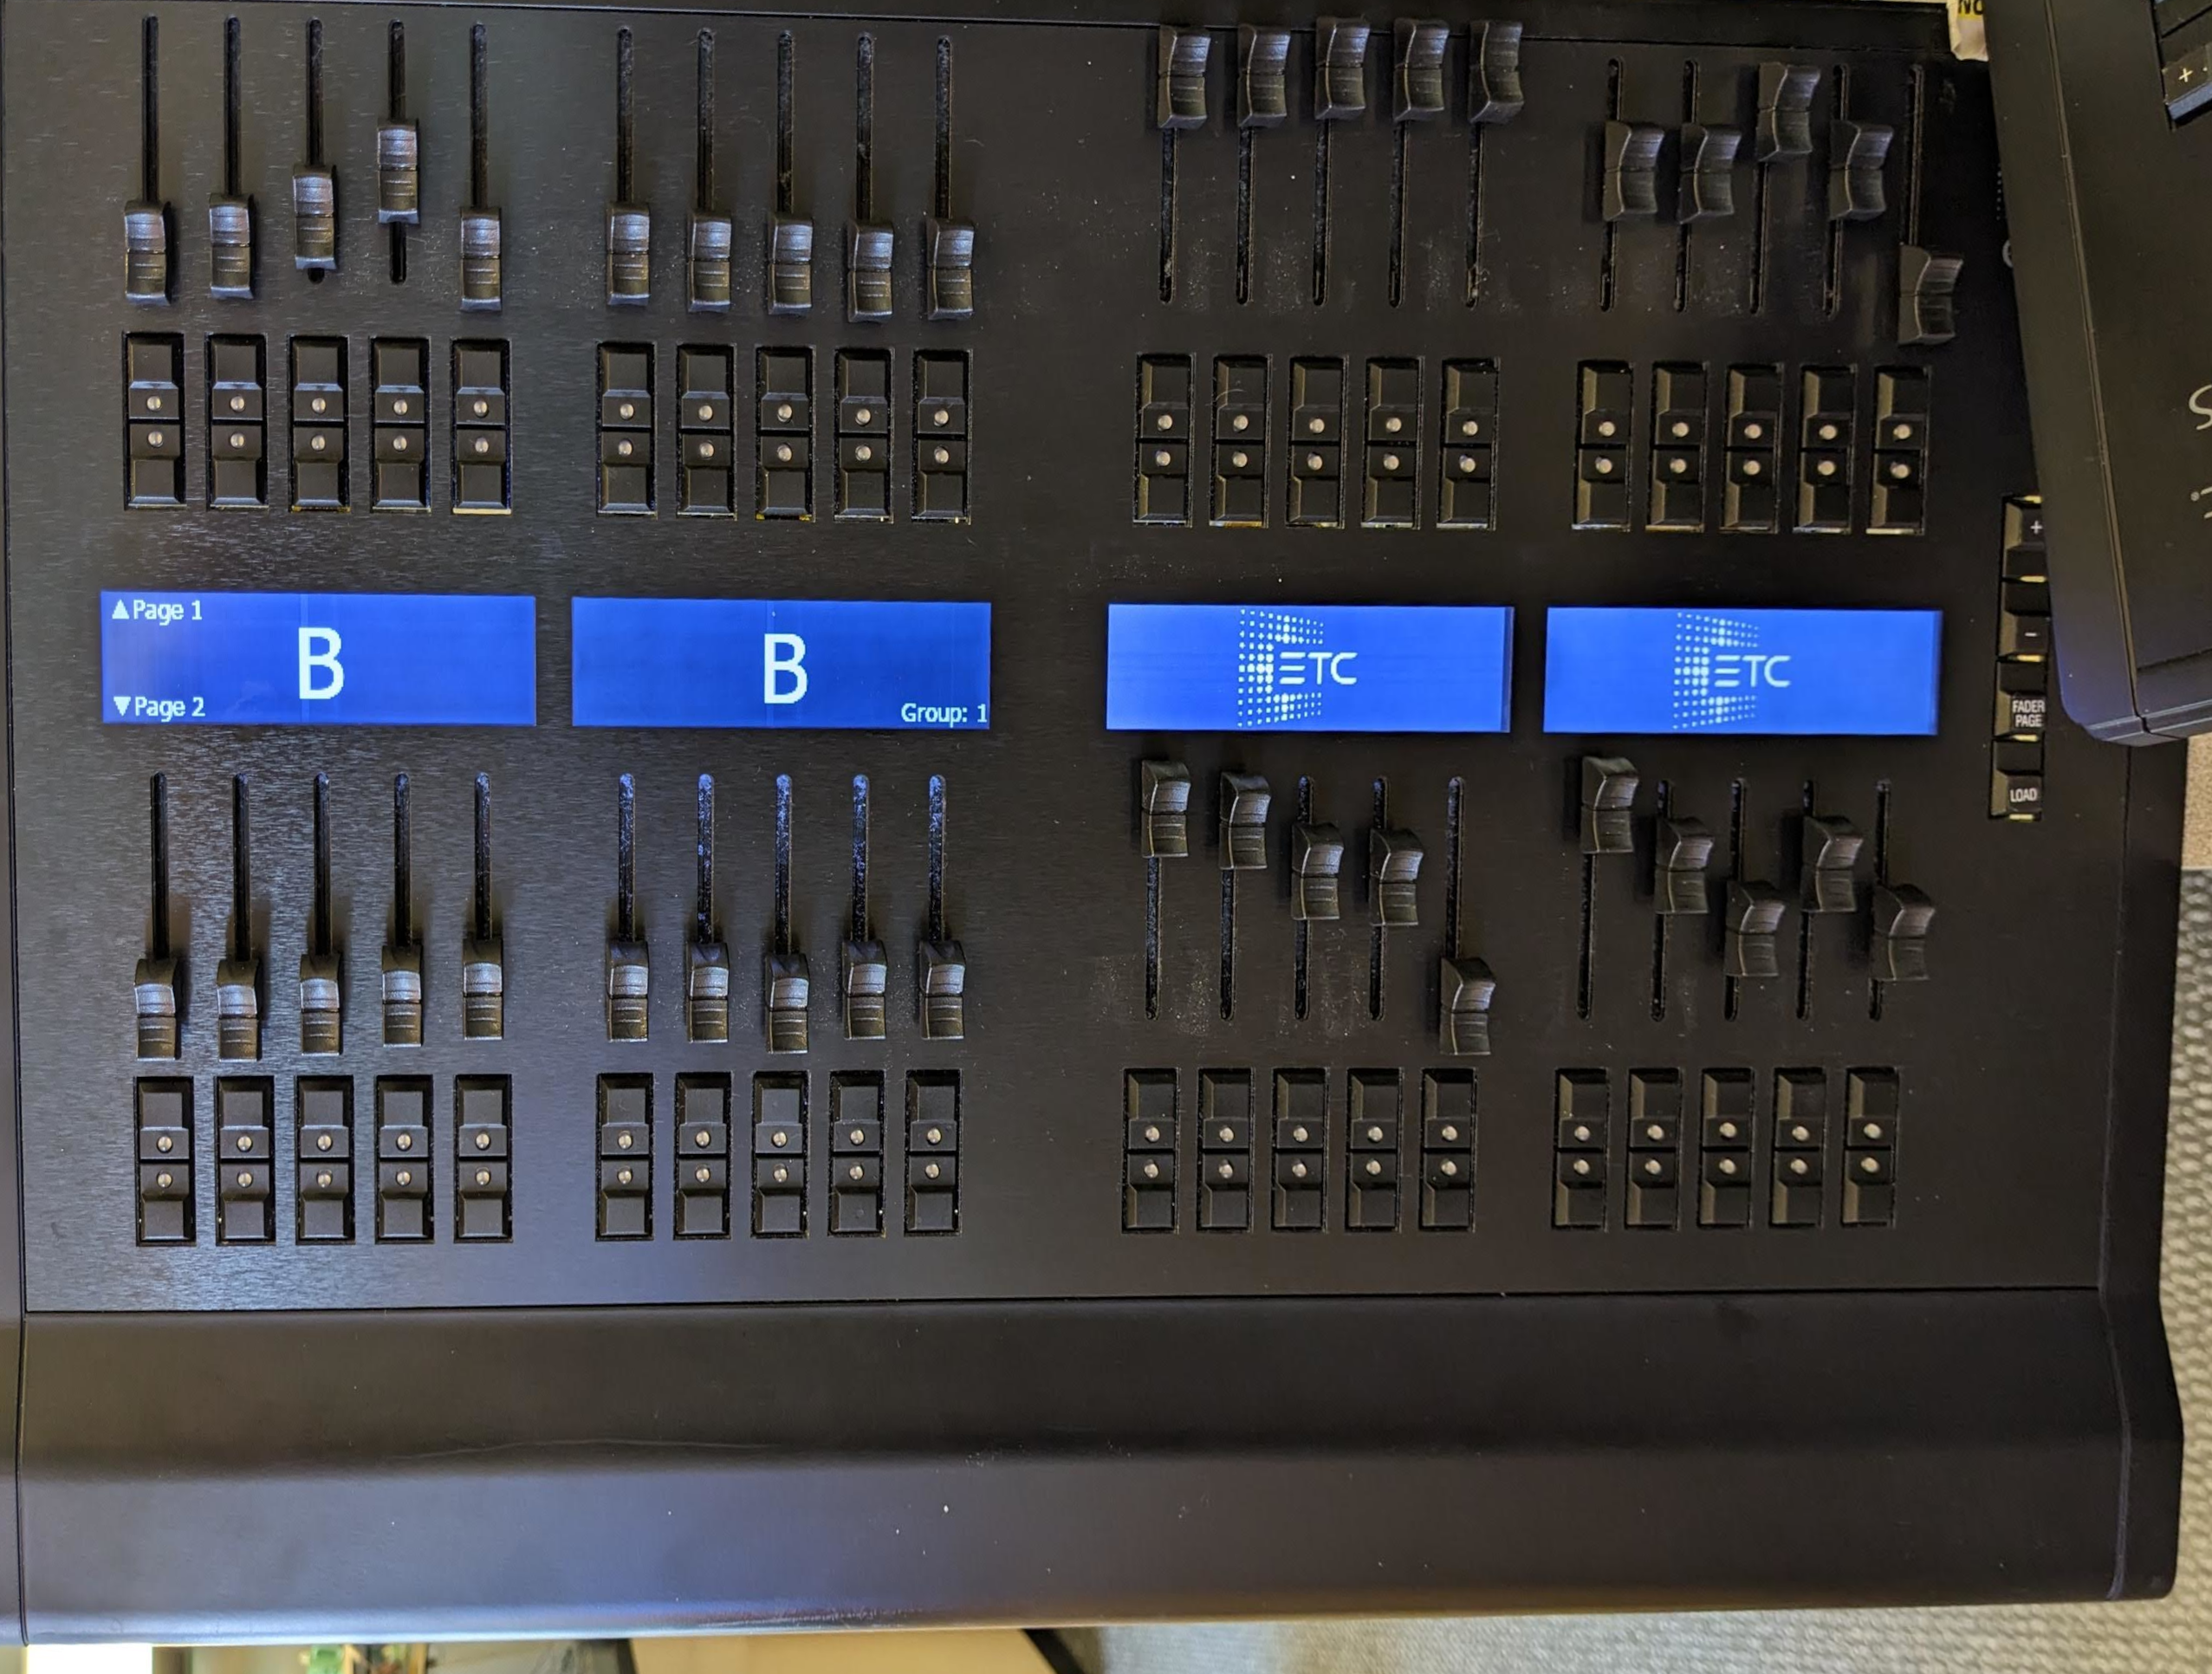
Either the right or the left hand half of the faders on the Eos Standard Fader Wing 40 are unresponsive. Their displays only show the ETC logo and do not display fader information.

The LED indicators on the fader bump buttons may show the same indications as the LEDs on the working side of the wing. However, under Detected Modules in the Maintenance tab of the settings in the console shell, the console displays two fader wings, and firmware for both halves of the wing can be successfully updated.

clipboard_eee8412c14b3e53ed3e78be51197ac3ae.png


Description

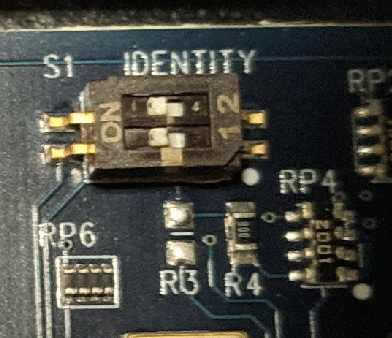
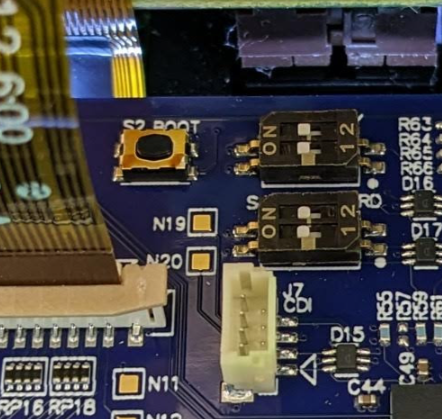
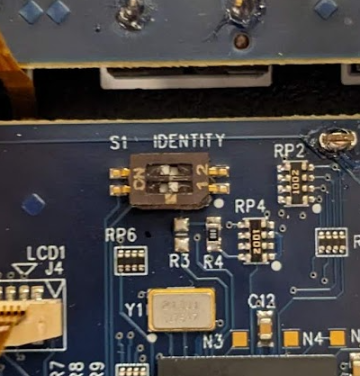
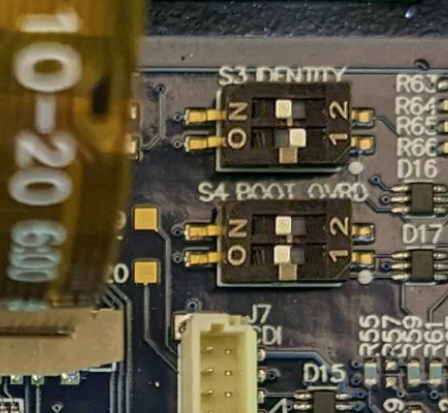
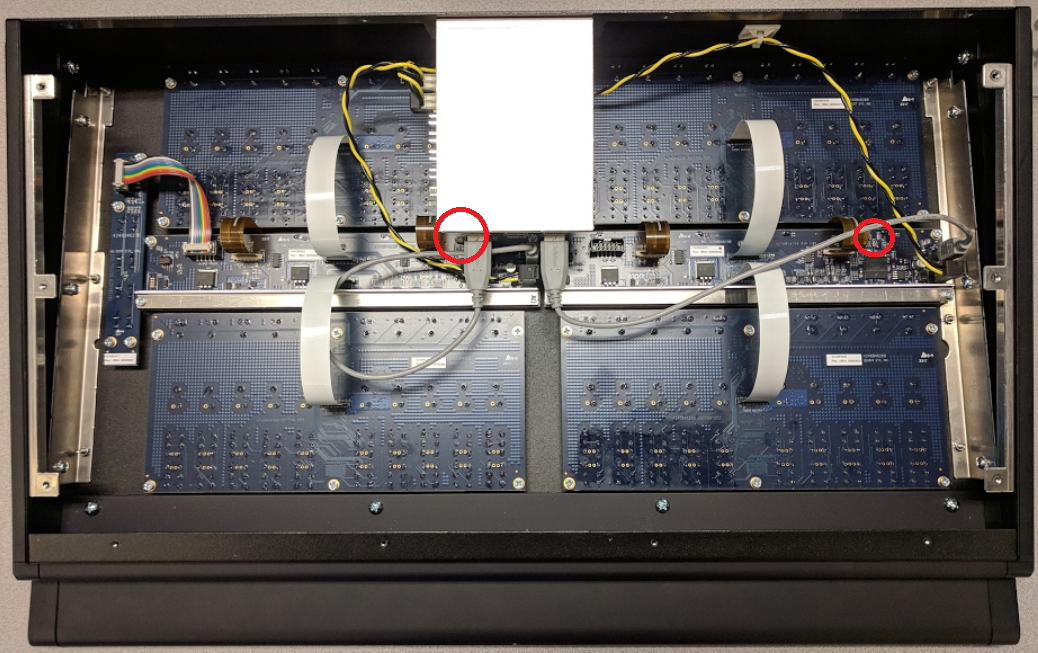
The Standard Fader Wing 40 has two fader controller boards, which may be addressed incorrectly via internal DIP switches. If the DIP switches are not set correctly, you will see the above conditions.

Solution

  1. Remove only the screws circled below on the underside and the rear of the fader wing.

clipboard_ea15e0adbe45d0c6f7fc698faf6aa7cbd.png

fader wing rear.png

  1. Remove the panel on the underside of the wing. This will reveal the circuit boards inside the wing.
  2. The circles in red indicate where the DIP switches are located.  Depending on the generation of Fader Wing, there may be one or two sets of DIP switches at the circled locations.


Note-Icon.png

Caution: be sure that the wrist rest is facing towards you for the next step to set the DIP switches correctly.


fader wing guts.png
  1. The top set of DIP switches on the on the left should be set as follows:


2 - ON
1 - ON

Older generation with one set of DIP switches:

fader wing dips left.png

Newer generation with two sets of DIP switches:

clipboard_e6e055858b2b79d81119733e5c6709e17.png

Note that for newer generation devices with two pairs of DIP switches, the S4 "BOOT OVRD" switches should both be set ON.

  1. The top set of DIP switches on the on the right should be set as follows:


2 - ON
1 - OFF

Older generation with one set of DIP switches:

clipboard_e75e6d8862f24eaf09133498d4dc12a2f.png

Newer generation with two sets of DIP switches:

clipboard_e6bc59a3a50a33cd1b8a88a281929b0d9.png

Note that for newer generation devices with two pairs of DIP switches, the S4 "BOOT OVRD" switches should both be set ON.

  1. Close the unit and test for functionality.
 
  • Was this article helpful?