Intensity channel in SmartFade
 or
or 

Intensities are piled-on to the output of the console in an HTP manner (Highest Takes Precedence). Intensities may be sourced by a channel fader, a memory fader or the Stack.They are limited by the Master fader and Black out button.
Intensity mimic
The bump button under each fader will light up proportionally to the actual intensity of the corresponding outputs, regardless of the position of the fader. It will do so even if there are no outputs patched to the fader.
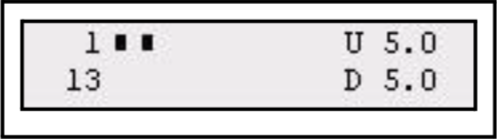
The LCD will show the current output of the selected fader mode, with bar graphs.
Bumping channels
The bump buttons will bump instantly to the level of the BUMP fader. If SOLO mode is active the other intensity channels will be temporarily muted.
Matching values
Since the faders are used for several functions, there will be situations where the physical position of the fader does not match the output of the fader. When you move an unmatched fader, the bump button will blink until the actual level is matched by that of the fader.
Set all intensities to zero
Use the CLEAR button to selectively turn lights off. Press CLEAR four times in rapid succession to get a blackout on stage. See “Clear.”
Live or Next mode
Intensities can be set Live or blind (NEXT mode).
Live mode
Normally Intensities are set directly in the Live fader of the Crossfader. The result of this fader is piled on to the output of the other faders. If a crossfade is run manually or with the Go button - the levels will fade to zero, or to the next step in the Stack of the Crossfader.
Next mode

When NEXT mode is activated, all faders will set intensities in the Next fader of the Crossfader - which means that these levels will be output after the next crossfade. This allows you to preset levels manually and fade into them like in a traditional single-scene manual lighting console. See “Single Scene Crossfading”.
Adjust Channel Range
It’s possible to select any channel range and adjust proportionally in the Channels menu.
Step 1: Open the Adjust Channel Range menu:
Menu>Channels>[Adjust Channel Range]
Step 2: Use the wheel to select start channel.
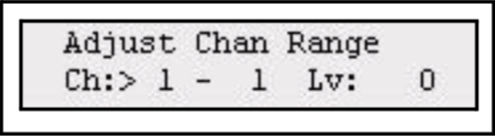
Press (MENU) to confirm and move to end channel.
Step 3: Use the wheel to select end channel.
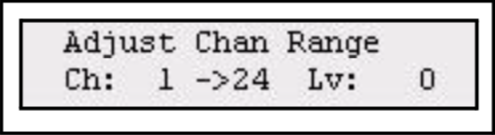
Press (MENU) to confirm and move to the level.
Step 4: Use the wheel to adjust the levels for the selected range. The level displayed is the value of the first channel in the selected range, other channels will be altered proportionally from their starting values.
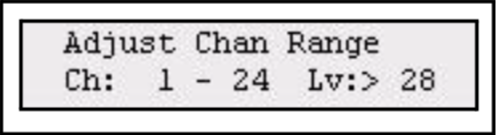
Press (MENU) to set a new start channel or exit.
Set Channel Range
It’s possible to select any channel range and set a level in the Channels menu.
Step 1: Open the Set Channel Range menu:
Menu>Channels>[Set Channel Range]
Step 2: Use the wheel to select start channel.
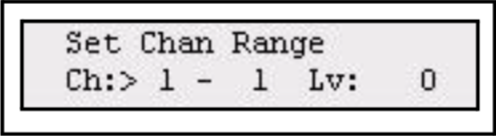
Press (MENU) to confirm and move to end channel.
Step 3: Use the wheel to select end channel.
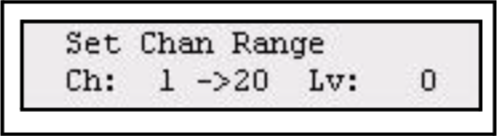
Press (MENU) to confirm and move to the level.
Step 4: The level displayed is the value of the first channel in the selected range, as the wheel is moved other channels will be forced to this value and then all will be altered in parallel to the same dialed value
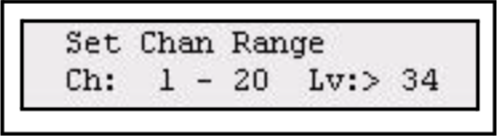
Press (MENU) to set a new start channel or exit.