Stack & Crossfader in SmartFade
General Crossfader Controls
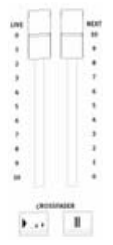
The Crossfader consists of a Live (A) and Next (B) fader, plus the Crossfade transport buttons. A crossfade is done by moving the crossfaders from the down position to the up position. This can be changed, See “Crossfade faders.”
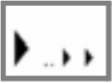
The Crossfade transport buttons are these:

| Action | Console | Feedback |
|---|---|---|
| Start a crossfade | |
Starts a crossfade. The button will blink during the fade. |
| Pause a crossfade | |
The current crossfade is paused. It can be resumed with GO, or reversed with PAUSE. |
| Go Back | and |
Hold PAUSE and press GO to fade to the pre- vious step (only when STACK is active). |
| Go to first step |  and and |
Hold CLEAR and press GO to clear the output of the Crossfader. If STACK is active it will jump to the first step of the Stack. |
Note: DIPLESS: SmartFade provides dipless crossfades as long as both faders are moved in parallel. This means that active channels which remain unchanged in both scenes will not 'dip' to 50% of their level as you move the crossfaders from one scene to the next, making for much better-looking scene transitions. To create a blackout between two steps, move only the Live fader to it’s end position.
Stack functions
By pressing STACK, the Stack is activated (lit at full) and connected to the Crossfader controls.The cue stack is loaded onto the Crossfader at step 0 (a non-existent step before step one) so that pressing GO, or starting a manual fade, will fade to step 1.

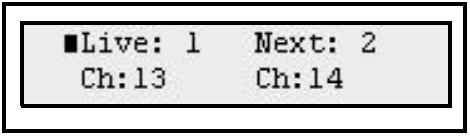
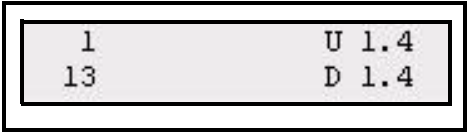
The LCDs will show the current state of the Stack.
If STACK is off the Crossfader operates only the Single Scene Crossfading function (except when in Backup Mode). See “Single Scene Crossfading” on page 63.
If there is nothing stored in the Stack, the button will be off completely when not activated. otherwise it will be dimmed.
Jump to step
It’s possible to go directly to any step of the Stack with this function.
| Action | Console | Feedback |
|---|---|---|
| Activate GOTO mode | (held) |
As long as the button is held, the display will allow you to scroll to any step.
Let go of STACK to transport the whole sequence to this step in Next - ready for the next crossfade. |
Rate & Fade for the Stack
The RATE button can provide Rate and Fade override for the Stack. This will affect the playback of the whole Stack temporarily. When a Rate or Fade override is cleared the original times are retained.
Fade
Activate RATE and press STACK.
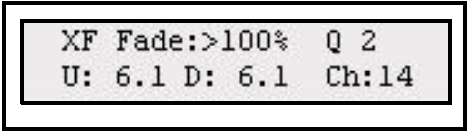
Use the wheel to set a Fade % that will scale the fade times of the whole Stack. Fade 0% means no fade. Original fade timing is not lost and may be recovered by clearing the Fade %.
Rate
Activate RATE and press STACK. Then hold RATE.
Use the wheel to set a Rate % that will scale the total time of the whole Stack. Original timing is not lost and may be recovered by clearing the Rate %.
Reset Rate& Fade
| Action | Console | Feedback |
|---|---|---|
|
and  |
The rate and fade settings for the Stack will be selected and shown in the display. |
|
and |
The rate and fade settings for the currently selected stack/sequence will be reset and will default back to its original times. |
Tap Mode for the Stack
Tap Mode allows the recording of actual elapsed time for each step of the Stack by means of the GO button. It should set to OFF at all times unless a timed recording is being made.
Step 1: First record a Stack in the normal way
Step 2: Open the Sequences menu:
Menu>[Sequences]
Step 3: Use the wheel to select the Stack (XF).
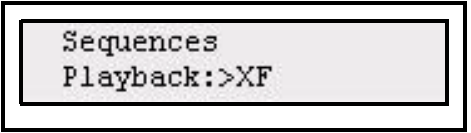
Press (MENU) to confirm.
Step 4: Select Tap mode
Menu>Sequences>Playback>Step Timing>[Tap mode]
Step 5: Use the wheel to set On.
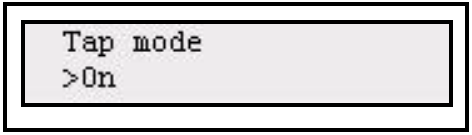
When TAP mode is on an asterisk is displayed in the bottom right position of the LCD.
Step 6: Press GO for each stack step at the appropriate time and the wait time is stored for subsequent playback, independently for each of the steps. Only wait times are affected by Tap mode.
Step 7: Once a recording has been timed in this way Tap mode should be turned off to play back with the recorded times.

Step 8: Press EXIT to confirm and exit.
Note: You can reset all wait times set with Tap to zero. See “Global Time for all steps."
Single Scene Crossfading
When STACK is off and NEXT is on, SmartFade is set up to run like a single-scene crossfading console. When Next is on the green channel bumps are lit with the levels to be output to stage on the next Crossfade, when Next is Off the lights indicate the actual stage levels. Next may be turned on and off to toggle between these two displays

| Action | Console | Feedback |
|---|---|---|
| 1. Activate Next mode |  |
The intensity faders no longer contribute to the live output. |
| 2. Set intensities |
|
Set up any intensities manually with the intensity faders. They will not be output. |
| 3.Crossfade manually | Crossfaders | Move the Crossfader pair from bottom to top. As soon as both crossfaders reach the end of the current fade, the intensity channels are released from the Live fader for setting the next look. |

 or
or 

To fade endlessly between Live and Next: hold PAUSE before reaching the end of a crossfade - this will prevent the release of the intensity channels. Let go of PAUSE to terminate the crossfade.
Fade with Times
You can activate set the default Up/Down times with the wheel. Press GO to execute a crossfade using these times.