How to Change IP Address on Windows 10 for Use with ETC Networks
Explanation
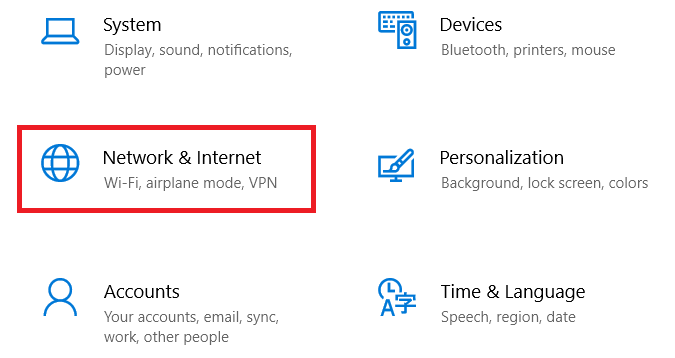
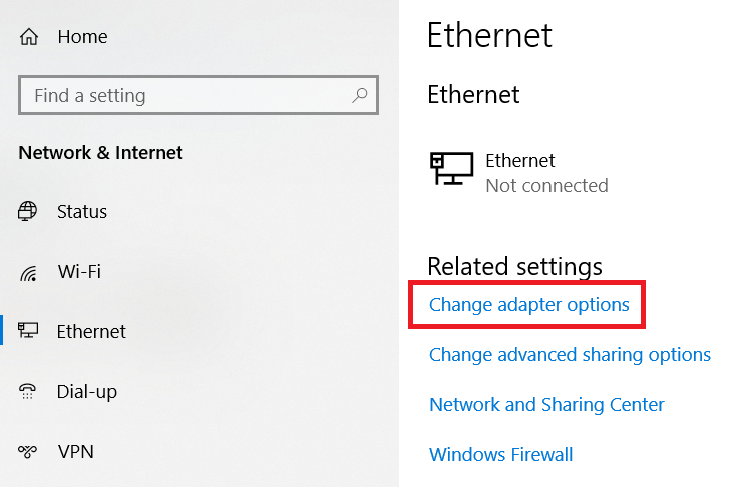
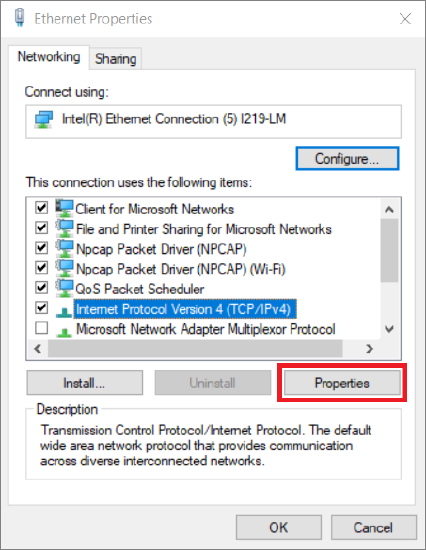
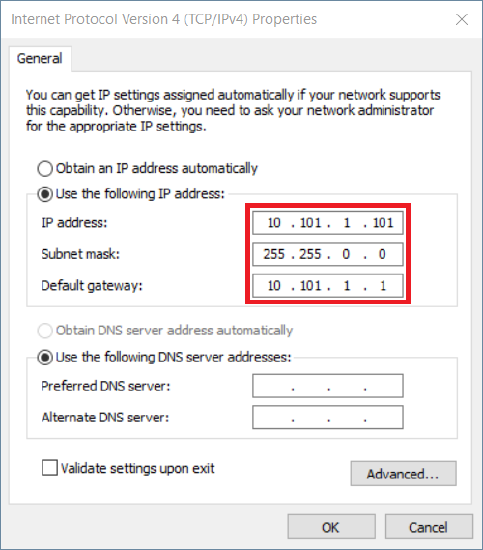
If you are using ETCnomad or Mosaic Designer on Windows and there is not a DHCP server running on your network, you may need to manually set a static IP address for your computer in order to communicate with your lighting network. The steps below will walk you through this.
The process below was last updated with Windows 10 version 1803
Steps to Solution
|
|
||
|
|
||
|
|
||
|
|
||
|
|
||
|
|


Related Links/References