Opening a Selador Fixture for Service
This article goes over the process of opening a Selador unit for service, using an 11" unit as an example.
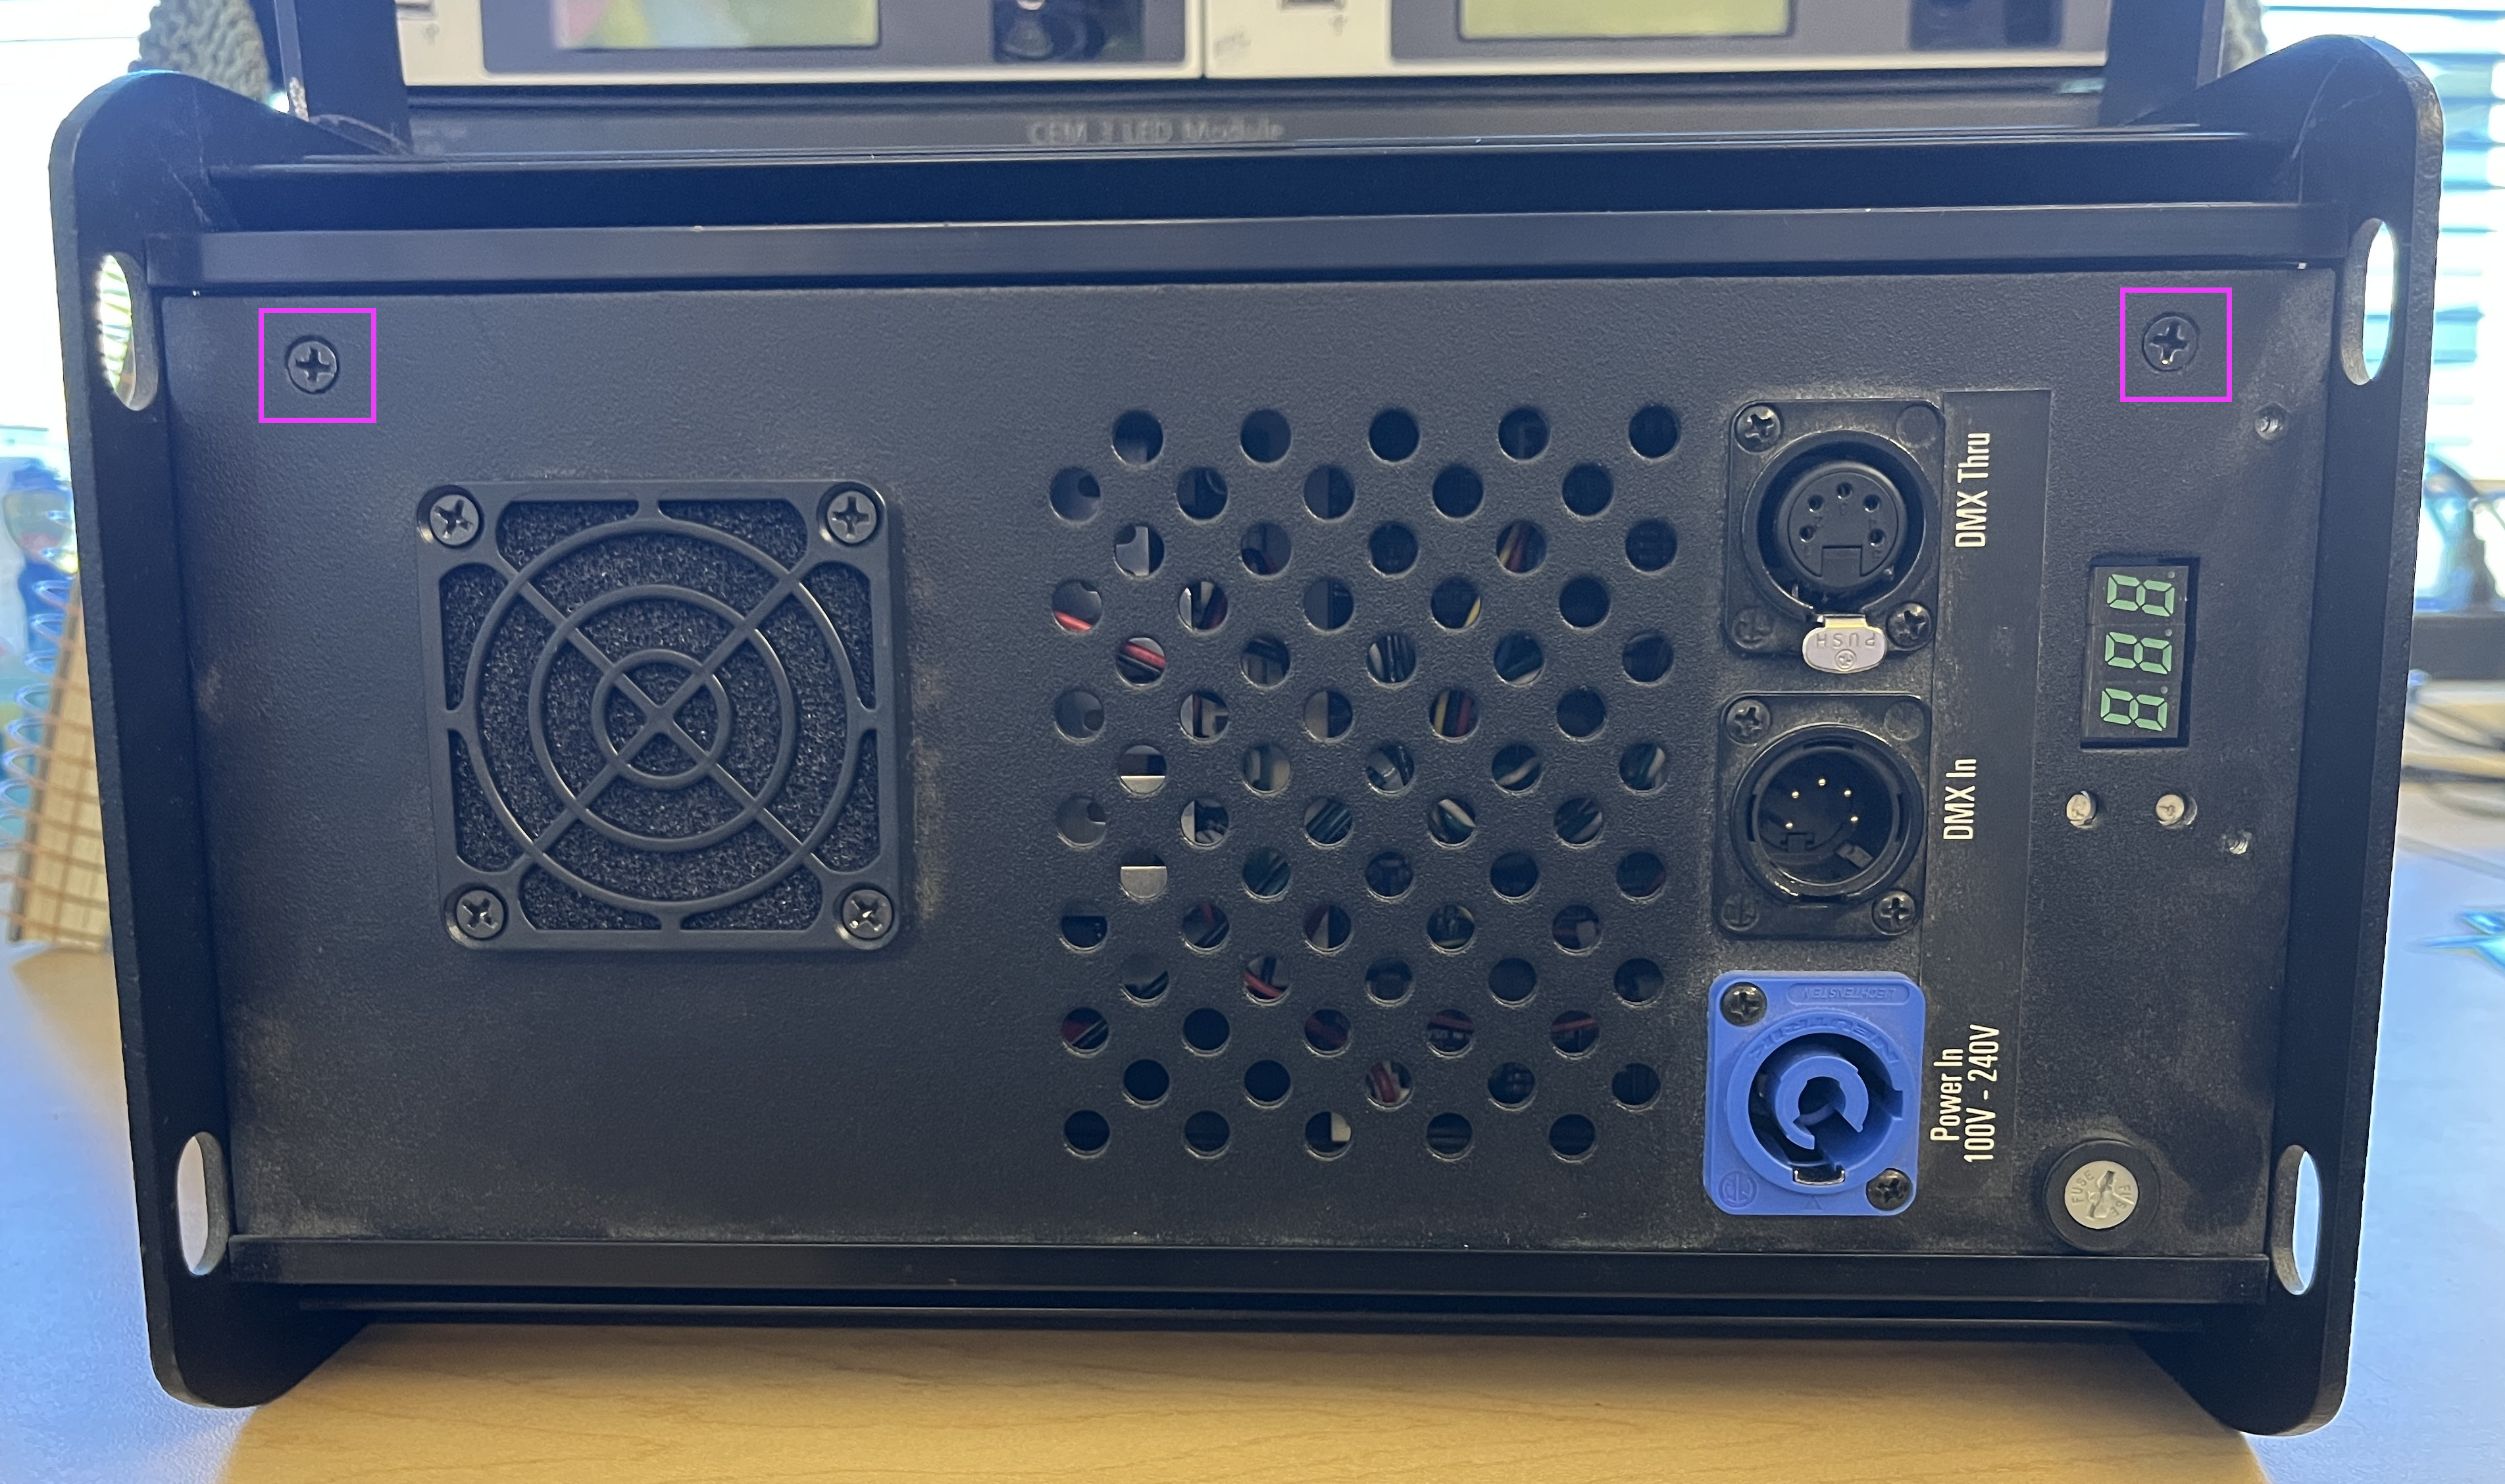
- Remove the two screws highlighted in the boxes of the image below. These are the only screws that need to be removed to get inside the unit.
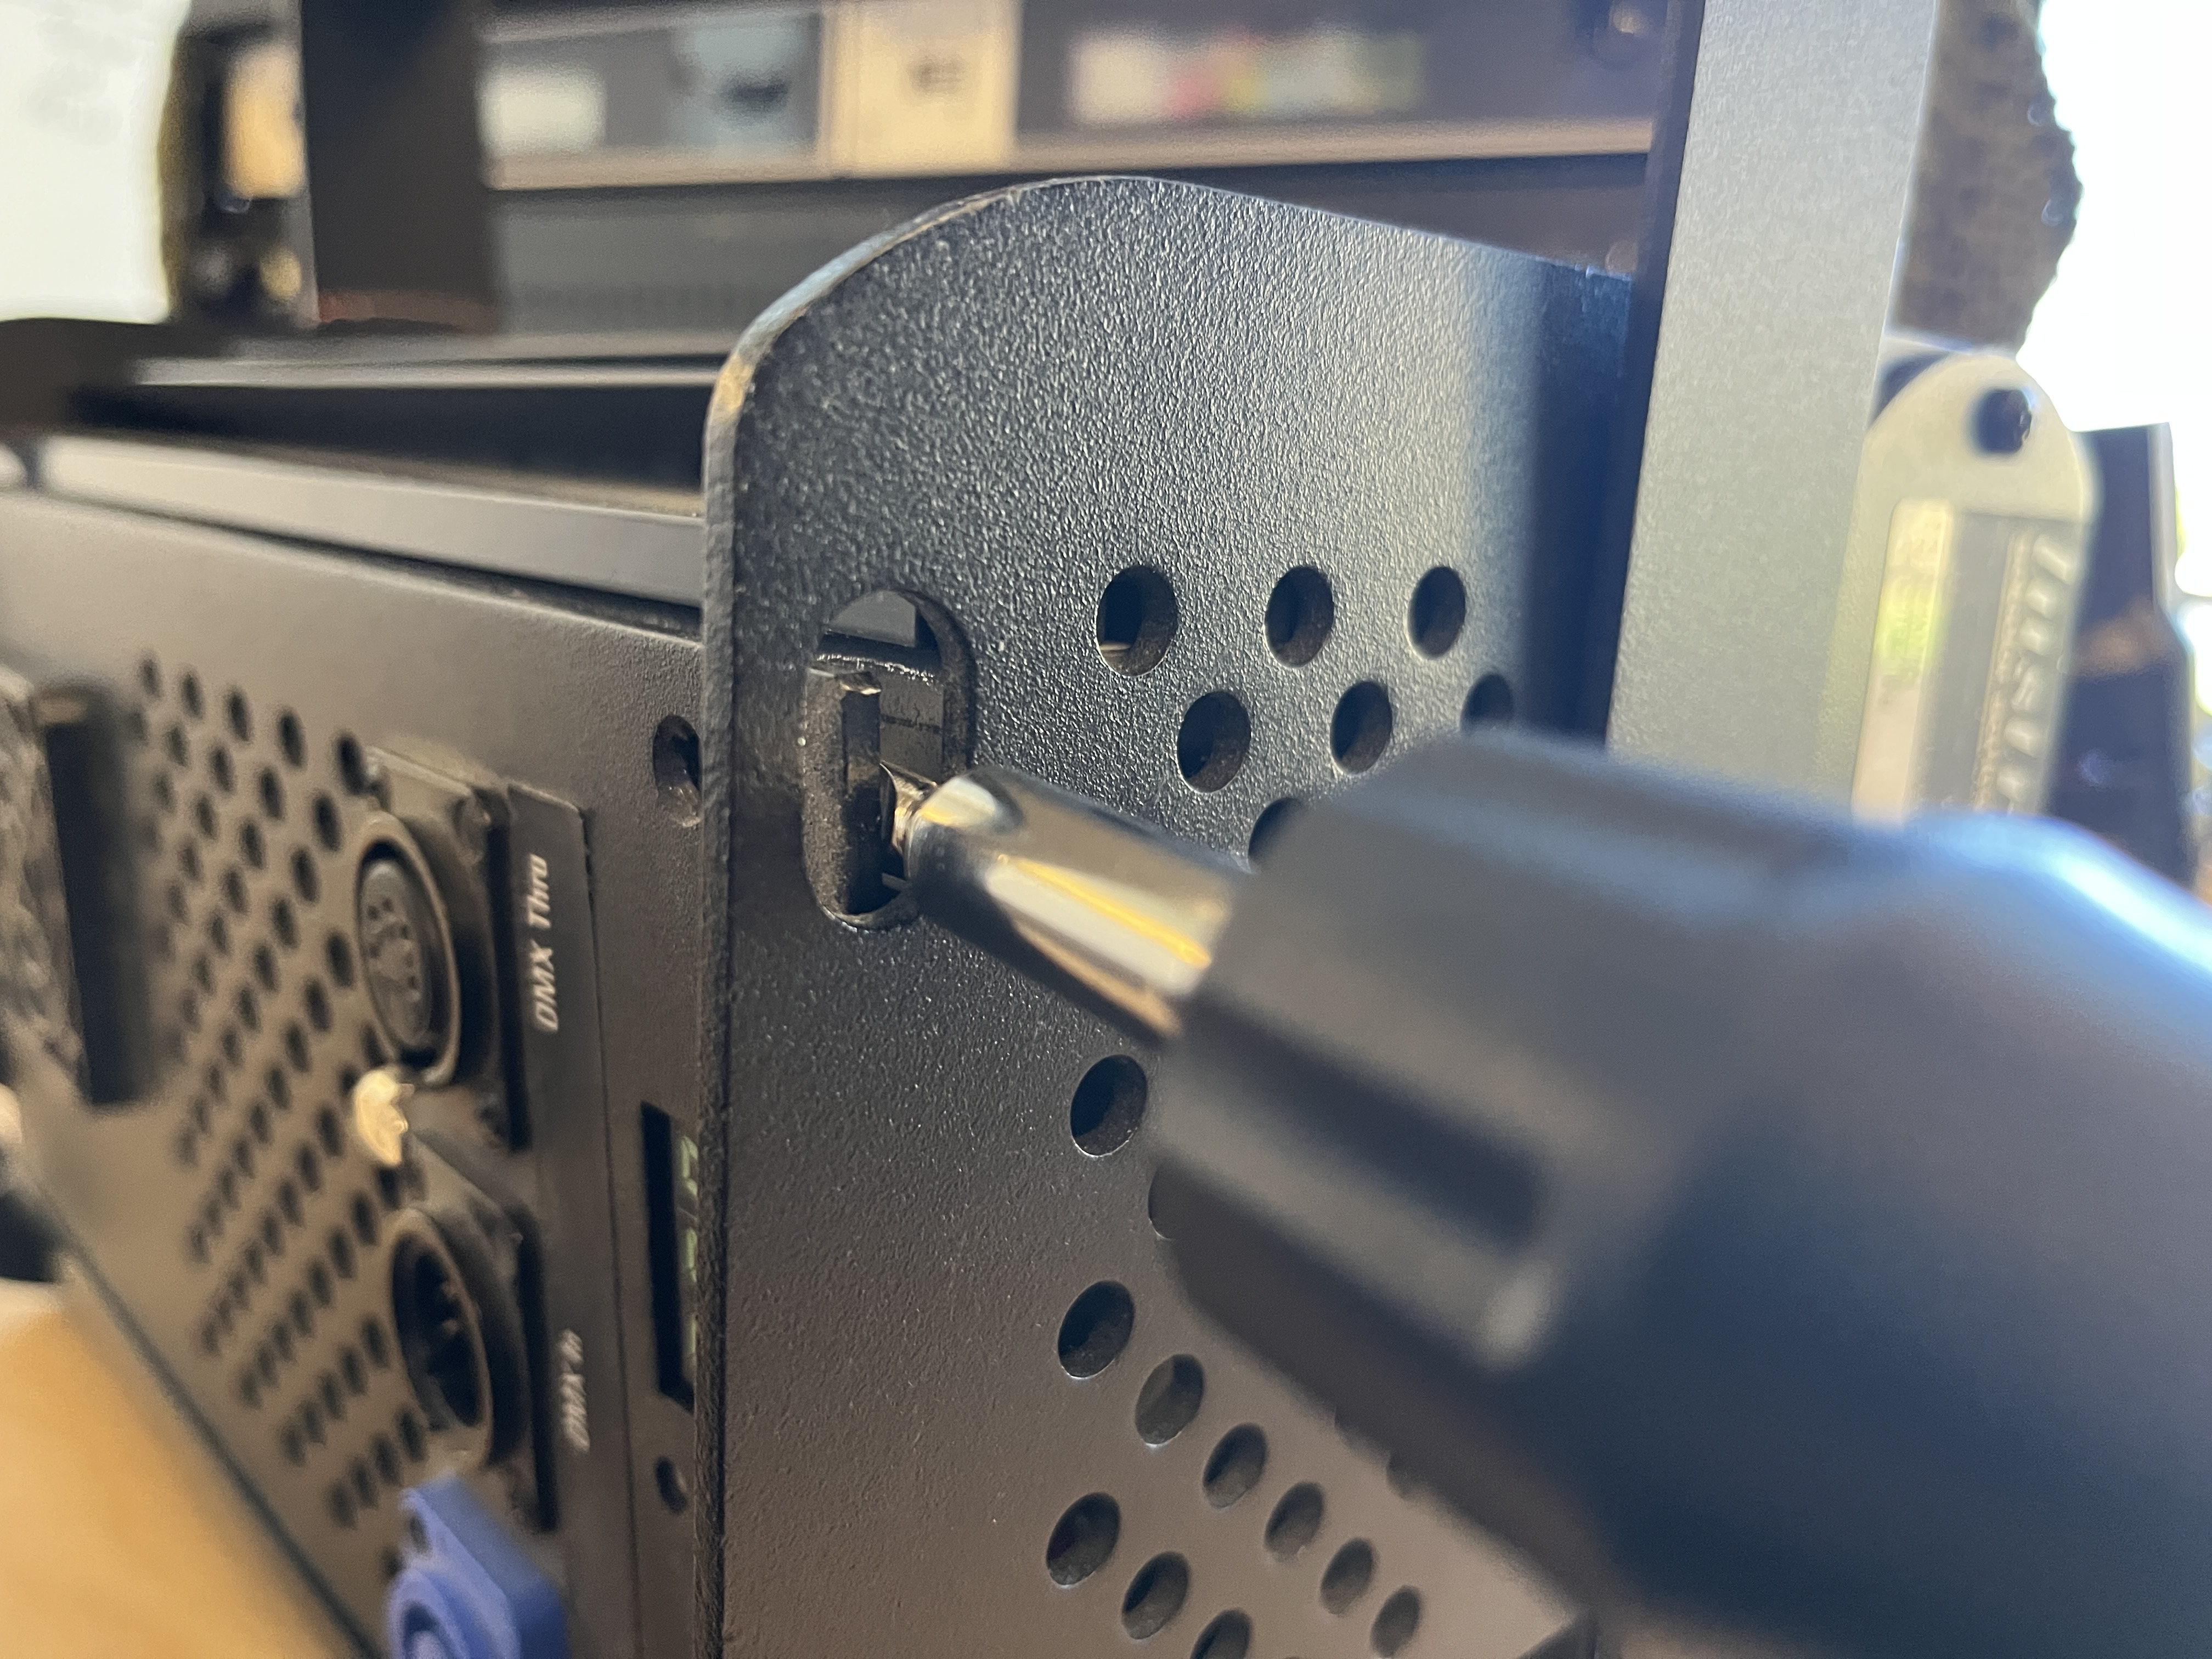
- Pull the back plate away from the fixture along the top edge that the screws were removed from. A bit of leverage with a flat-blade screwdriver may be required pry it open for the first time, approaching it from end through a hole in the side plate as shown in the image below.
- Once the backplate is separated from the fixture body at the top, pull up on the plate to lift it out of the ridge where the bottom of the plate is sitting. Be careful not to pull too hard or too far from the fixture body, as there are wires connecting the ports on the backplate to the internals.
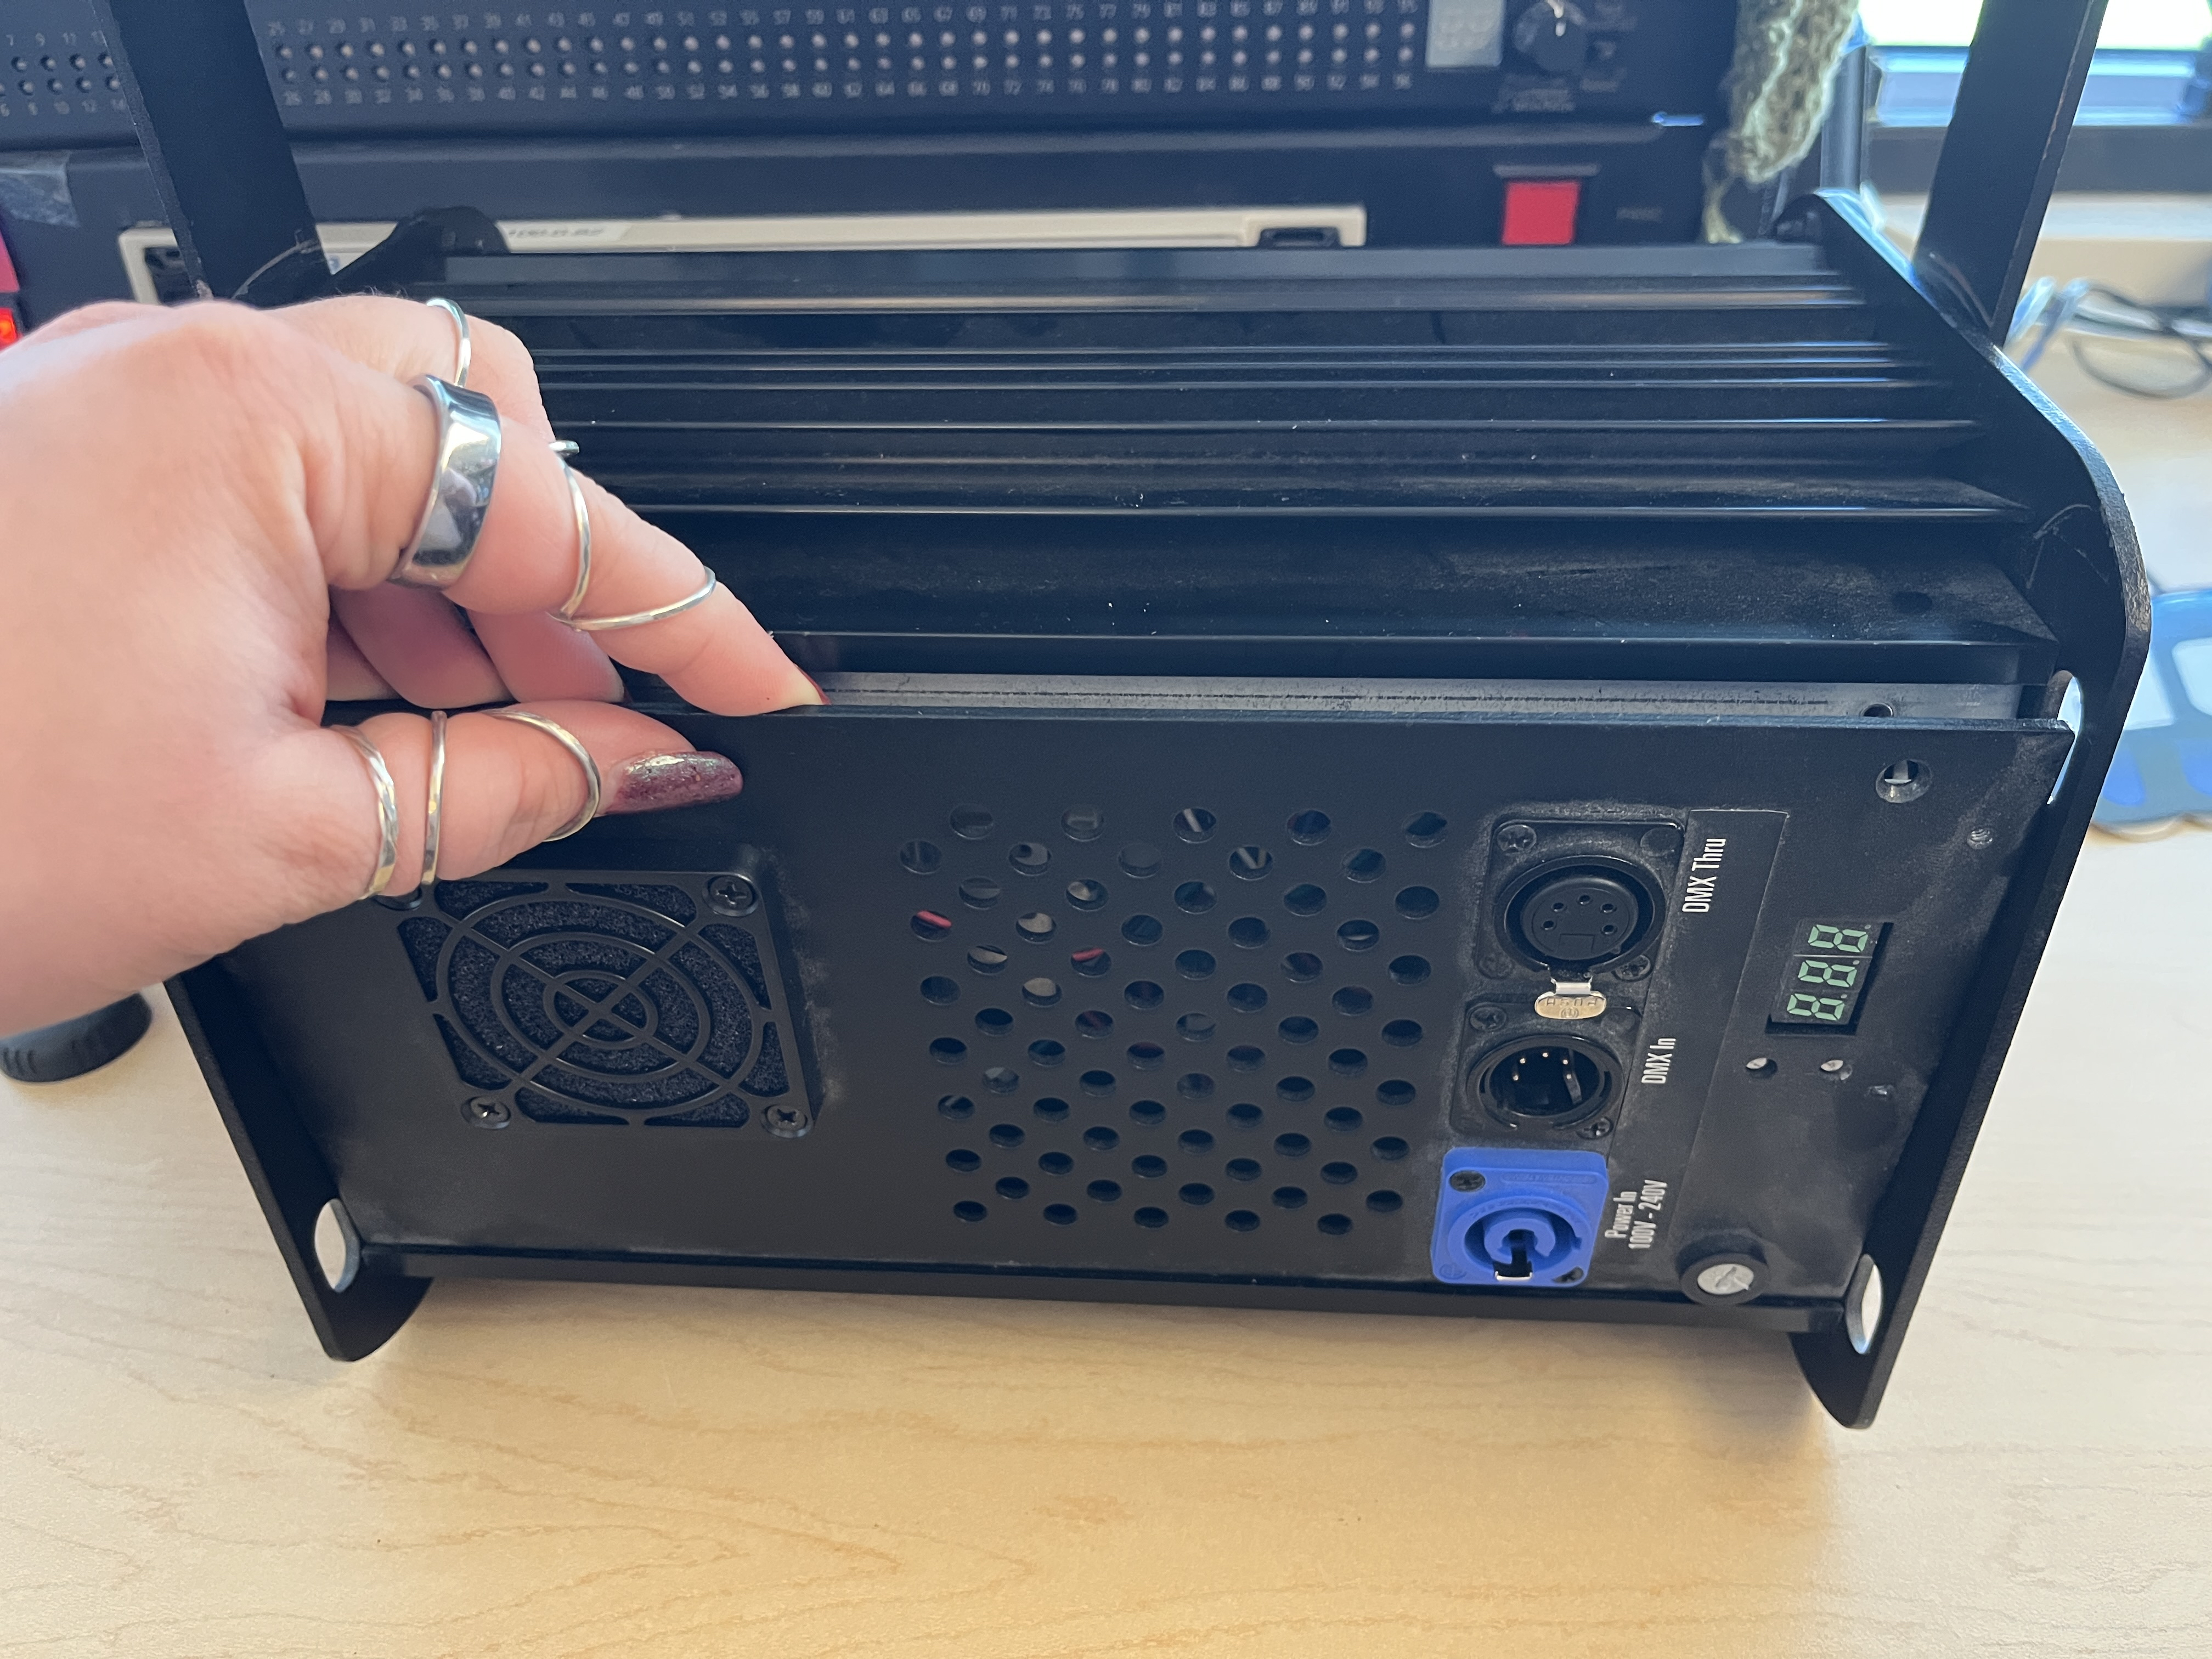
- Now you've got it open! Just be sure not to tug on the internal wiring here.
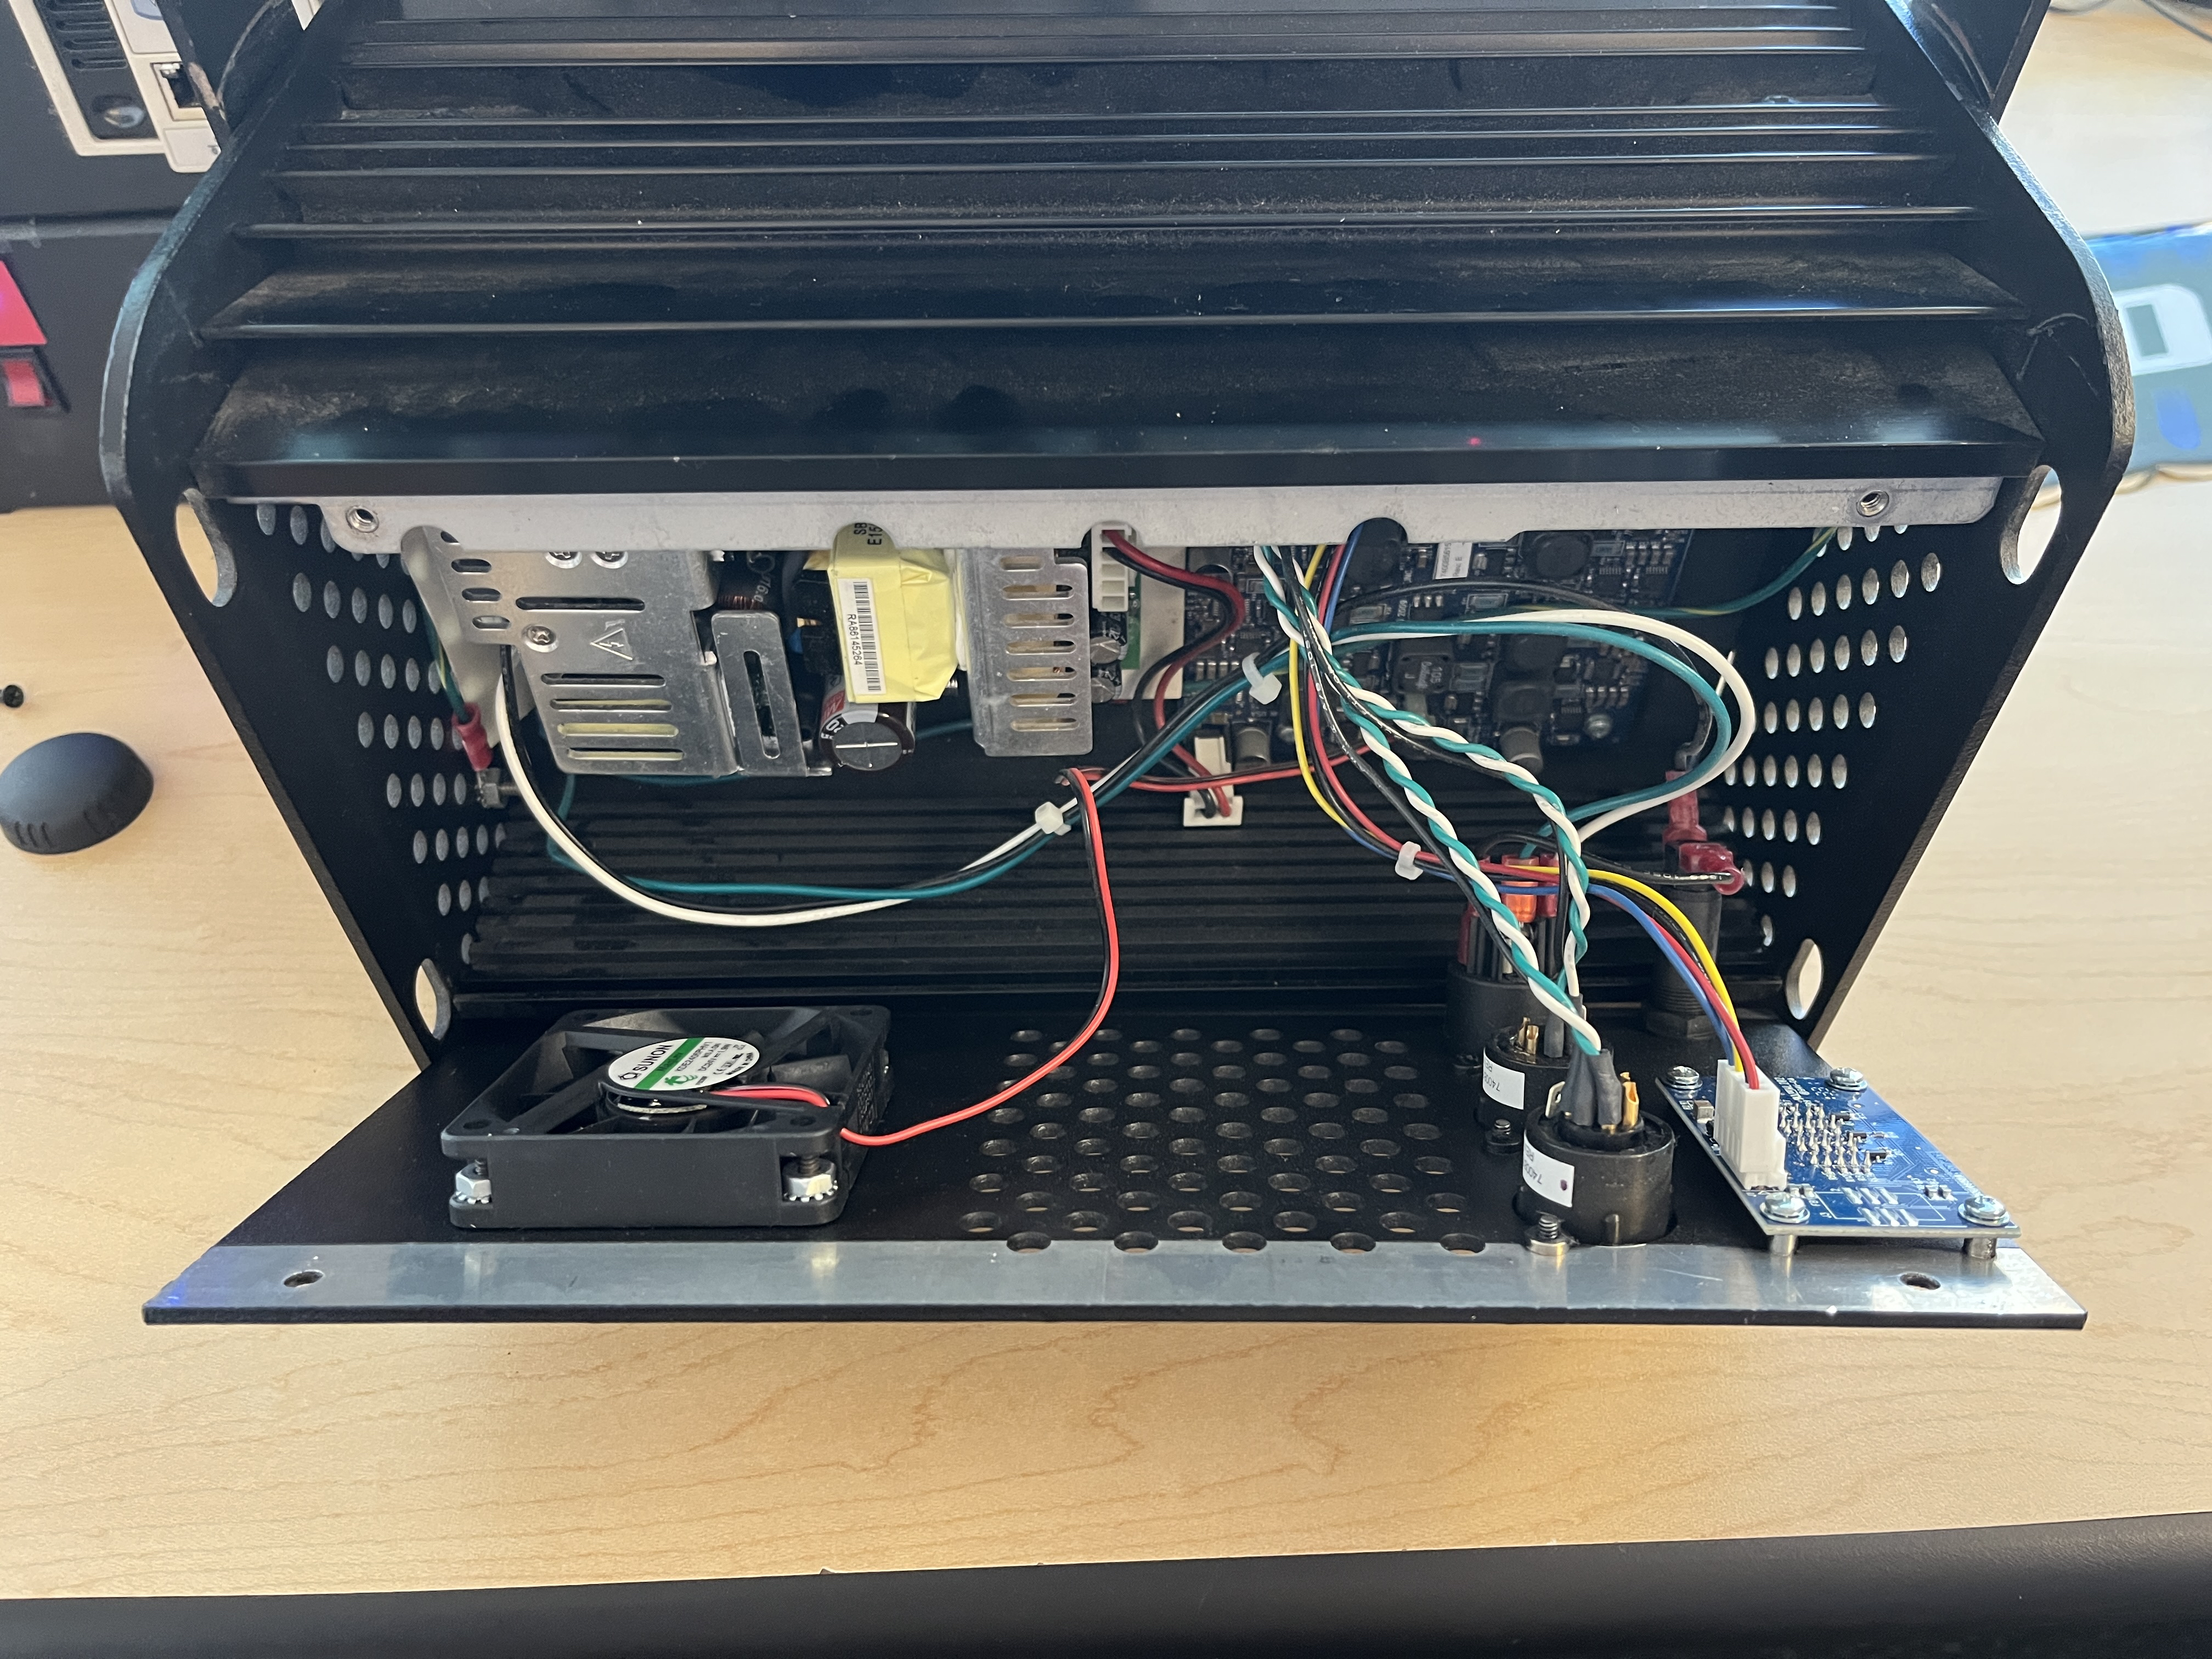
- Now the unit can be cleaning or other service performed, such as replacing the fan or PSU. To get those part numbers, please reach out to your preferred ETC Authorized Dealer for purchasing.
- To put it back together, follow the same directions in reverse order, making sure that the bottom of the backplate sits in its designated groove in the fixture body.