Swapping the DMX Chip in a Foundry Mini Panel (UFMP)
Issue
My Unison Foundry Mini Panel (UFMP) no longer responds to DMX control, but it does still have power. There is good signal on the line, but the panel is flashing the Signal indicator.
Explanation of Issue
This is often indicative of a failed DMX chip. Both the 4 and 8 circuit models of UFMP have a spare chip on board, so this can usually be resolved in the field.
Solution
The information in this post is provided to assist in troubleshooting. Perform work at your own risk. ENSURE ANY POWER FROM DEVICES HAS BEEN DISCONNECTED BEFORE SERVICING ANY EQUIPMENT. If you do not feel comfortable performing the work, please contact us or your local service center. Be aware that ETC and its Affiliates are not responsible for any damage or injury caused by service of our products by anyone other than us or our authorized service providers, and such damage is excluded from the product’s warranty.
- Shut off all circuits feeding the panel.
- Loosen, but do not remove, the 4 screws in the corners of the panel. (note: if your panel is flush-mounted, you will need to fully remove the screws.)
- Slide the cover sideways to alighn the keyholes, then lift it off the panel.
- Remove the two screws securing the high-voltage cover.
- Lift the high voltage cover off using the lift pin on the side of it.
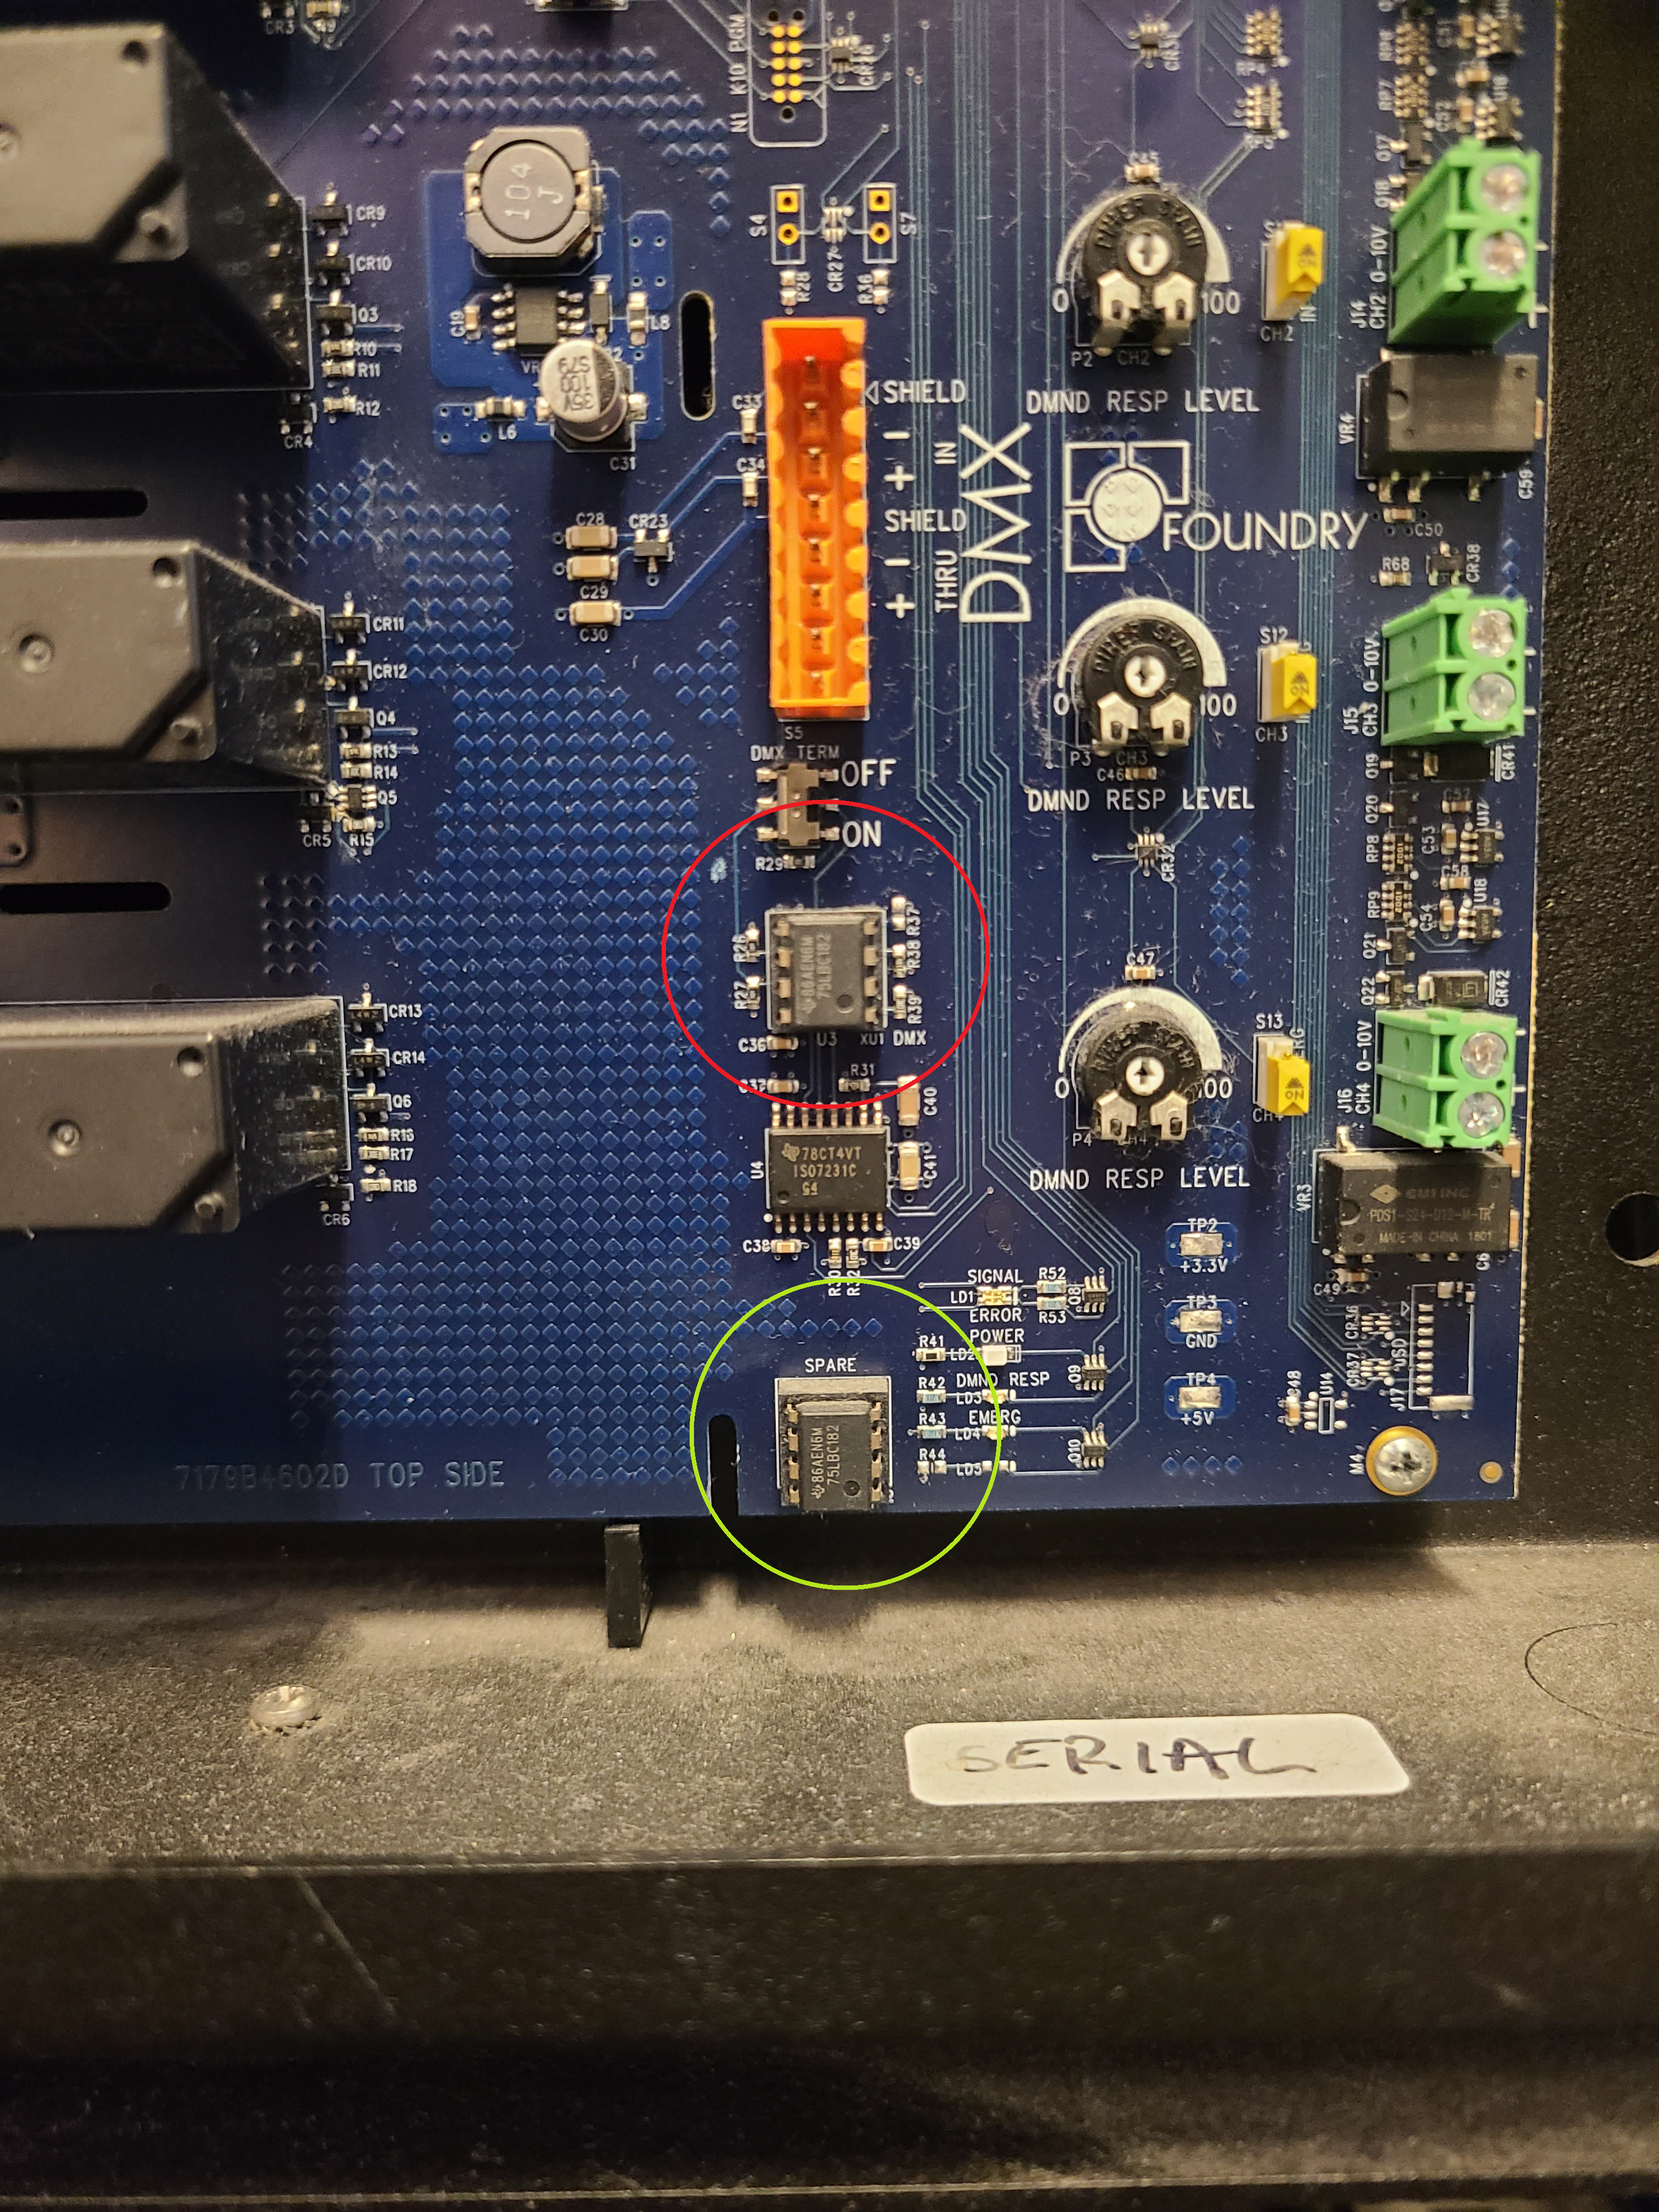
- Swap the DMX chip (labeled U3, circled in red) with the spare (labeled SPARE, circled in green). Ensure the small indentation indicating pin 1 remains in the bottom-right corner. It is also worth taking note of the serial number, which is on a white label on the inside bottom of the enclosure.
- Put the covers back on, power up, and test the panel for functionality. If you continue to have issues, contact ETC technical services for next steps.