How to Replace a Power Cube in a Sensor Dimming Module
Tools Required
- A replacement power cube for your selected module type (example: p/n Q141 for a D20 module) These instructions do NOT apply to D20SW Sine Wave dimmers.
- A #2 Philips Head screwdriver
- A pair of needle nose pliers
Before we Begin
Do not remove any dimmer module while a rack is powered on.
All dimmer racks must be fully powered OFF before a module can be removed.
Once power has been turned off to the dimming rack, remove the dimmer module by placing your hands on the front lip of the module and pulling the dimmer module away from the rack. Place the module on a flat work service and proceed to the next step.
Replacing a Power Cube
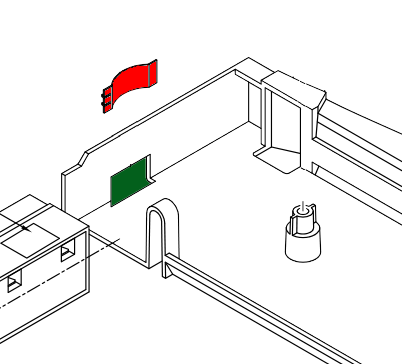
- Using a Phillips head screwdriver, remove the power cube retention screw located on the left side of the module.
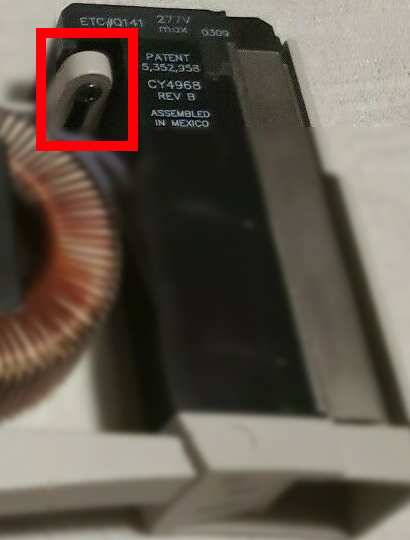
- Grip the power cube and lift up and away from the module tray.
- Remove the spade terminal connections from the power cube by lightly gripping the spade terminal with a pair of needle nose pliers.
- Re-connected the spade terminals to the new power cube, being certain that they are connected in the correct spots.
- The left most choke lead will connect to the bottom terminal on the power cube.
- The right most choke lead will connect to the top terminal on the power cube.
- Before placing the power cube into the module tray, be certain that the copper ground plate is still in place.
The convex side of the grounding plate should face away from the from the power cube.
- Place the power cube into the module tray and replace the Phillips head screw making sure to fully tighten the screw.
- Return the module to the dimmer rack, energize, and test.
Related Links/References: