ROSA 3 Firmware Update
Firmware Update
RAYN Growing Systems recommends using UpdaterAtor software to manage firmware versions update to the Luminaire.
To update firmware you will use ETC UpdaterAtor and either an ETC gadget II (USB Device) or an ETC Network Gateway (cat5 Network device).


ETC gadget II Network Gateway
1) Download and install ETC UpdaterAtor if you have not done so already.
etcconnect.com/Products/Networking/Software/UpdaterAtor.aspx
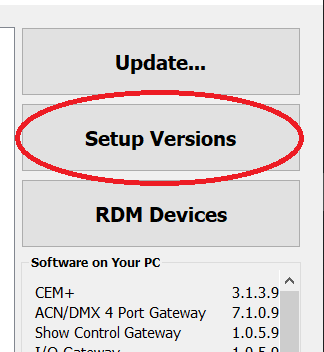
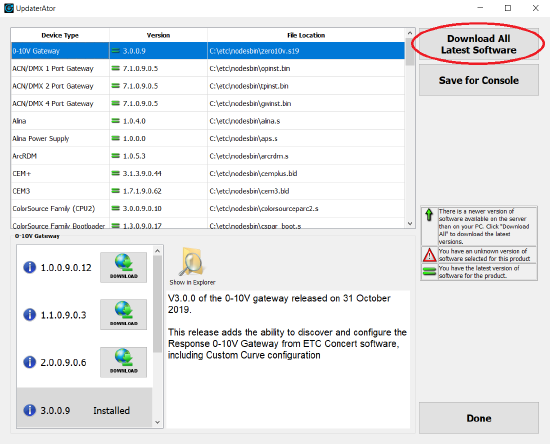
2) To get all the latest version of software for UpdaterAtor, make sure you computers connected to a network with internet access and click setup Version in upper eight corner. Then click the Download all latest Software button on right hand side. Press done when upload is complete.
3) Direct connect the laptop network port with an Ethernet cable to APS network port
Using a ETC gadget II:
(Note If you are updating multiple fixtures with gadget II this will be a very slow process and not all the fixtures may take the code.If you are doing multiple fixtures, I would suggest using a gateway.)
1) When you plug in your gadget II you will get a window that says USB/DMX device detected.
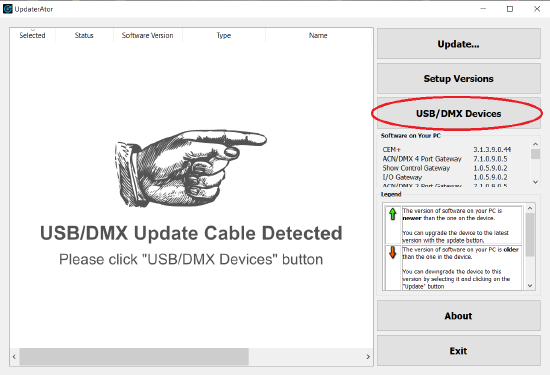
2) The click on the USB / DMX Devices button on the right-hand side.
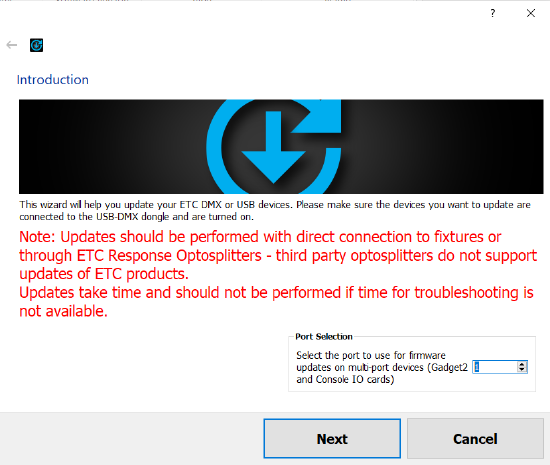
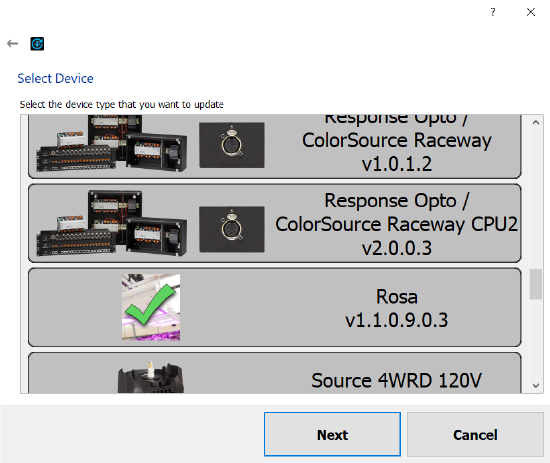
3) A notification come up that discusses that fact that this will update one or more fixtures on a line and we do not support non ETC Opto’s. Press Next.
4) Then pick the Rosa3 firmware update file and click the next button
5) Now you will get a progress bar.
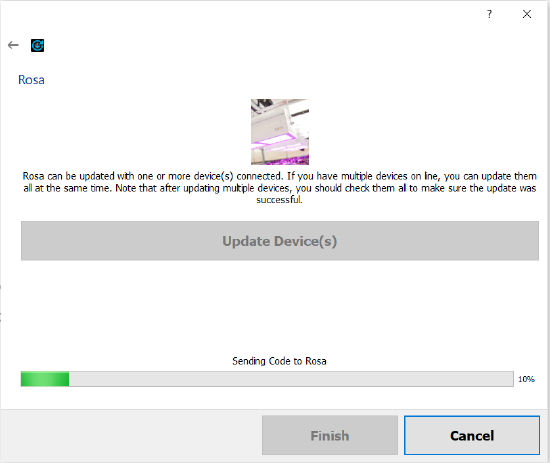
When finished, press Finished Button at bottom of screen.

If using a network gateway:
1) Check IP of gateway, If it’s in the 10.101.50.x range, with subnet of 255.255.0.0 great. Note: If you are on a larger network with an Network address server (DHCP), the addresses of the Gaterway and the laptop should automatically be assigned to the range of the DHCP server which will be different. For this your network setting should be on automatic as well. If not, you will have to determine an IP address manually.
2) Change computers IP to be in the local Address in the 10.101.1.x range.
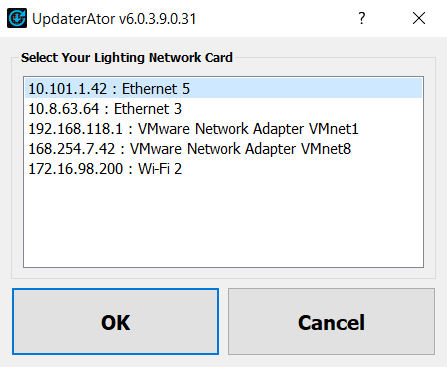
Open UpdaterAtor and choose the appropriate network card.
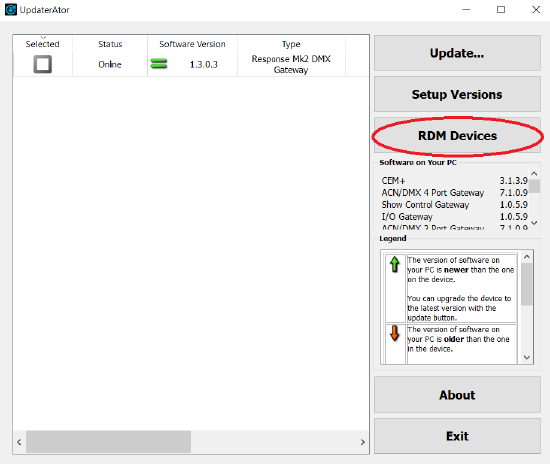
Once booted UpdaterAtor should show you the gateways that are online.
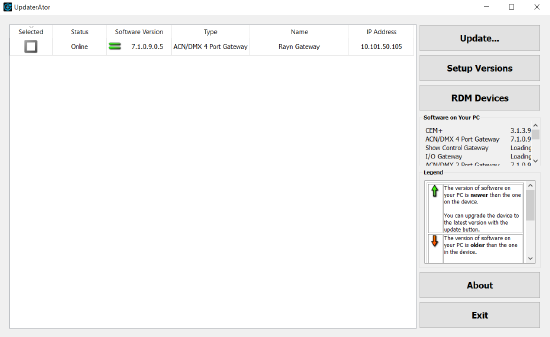
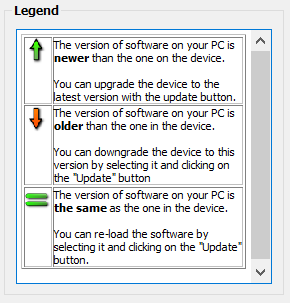
Note: you may see either and green equals (software in computer matches gateway device) or Green up arrow (software in computer new that gateway device) or orange down arrow (software in computer older that gateway device), you do not have to update code in gateway in order to load code in to the RDM Fixtures.
Click the RDM Devices button on the Right-hand side.
This will give you a popup window to select Software version.
Then pick the Rosa3 firmware update file and click the next button.

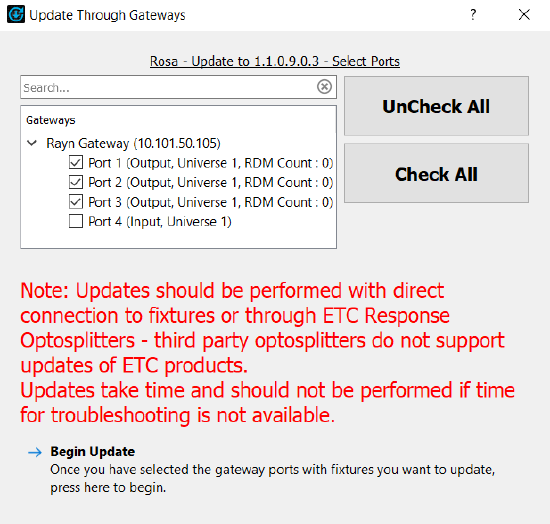
A new of the popup Window will come up to chooses the gateways you wish select to use for sending code. Then click Begin update at bottom of the popup Window.
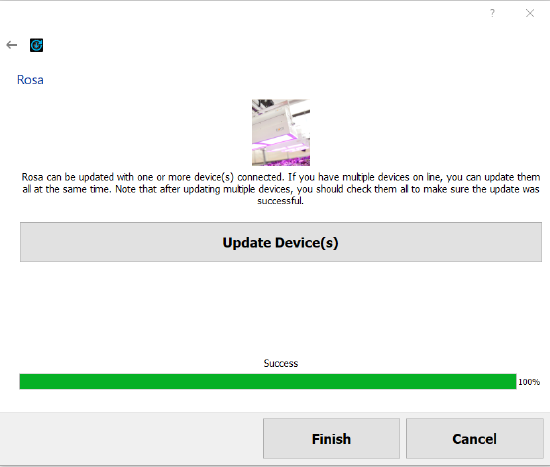
You will then get a progress bar as software loads.

When finished, press Done at bottom of screen.
For more information on UpdaterAtor, see the UpdaterAtor Software Quick Guide, which you can download for free from: