Edit Sequences and Stack in SmartFade
There is also a way to edit any Stack step directly, without entering the edit menus. To delete all Sequences and the Stack. See “Erase Functions."
The functions available for modifying Sequence & Stack steps are Edit, Delete, Insert and Change. For the stack there is also the option of recording up to 9 point Q’s between each step.
Edit the content of a Step
A sequence or Stack step can contain a reference to a memory in a specific page, or a single channel intensity. The Stack can have a unique Stack memory state as well.
Memories can be edited in the memory fader, or in the step. Steps that reference a single intensity channel can not be edited, you have to use change instead to change to a different single intensity channel. Unique Stack steps are edited as described, just like memories.
Step 1: Open the Sequences menu:
Menu>[Sequences]
Step 2: Use the wheel to select Sequence (1-24) or Stack (XF).

Press (MENU) to confirm.
Step 3: Use the wheel to select Modify Steps.

Press (MENU) to confirm.
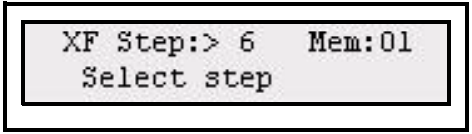
Step 4: Use the wheel to select Step:#.
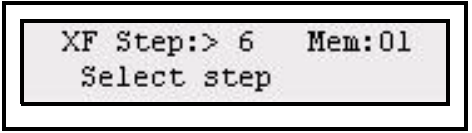
Press (MENU) to confirm.
Step 5: Use the wheel to select Edit (channels can only be changed).
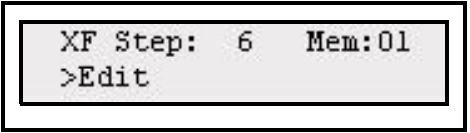
Press (MENU) to confirm.
Step 6: Use the channel faders to edit the contents.
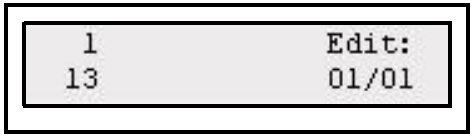
Press EDIT MEM to confirm and exit or CLEAR to abort.
Delete a Step
Step 1: Open the Sequences menu:
Menu>[Sequences]
Step 2: Use the wheel to select Sequence (1-24) or Stack (XF).
Press (MENU) to confirm.
Step 3: Use the wheel to select Modify Steps.

Press (MENU) to confirm.
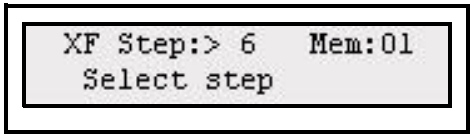
Step 4: Use the wheel to select Step:#.
Press (MENU) to confirm.
Step 5: Use the wheel to select Delete.
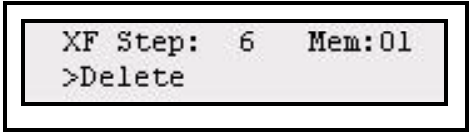
Press (MENU) to confirm.
Step 6: You will be asked to confirm this command.
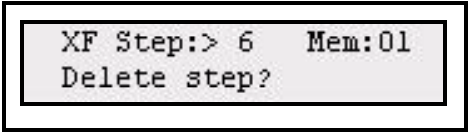
Press (MENU) to confirm. You can press UNDO to skip and revert to the data previous to this action.
Insert a Step
Step 1: Open the Sequences menu:
Menu>[Sequences]
Step 2: Use the wheel to select Sequence (1-24) or Stack (XF).
Press (MENU) to confirm.
Step 3: Use the wheel to select Modify Steps.

Press (MENU) to confirm.
Step 4: Use the wheel to select Step:#.
Press (MENU) to confirm.
Step 5: Use the wheel to select Insert.
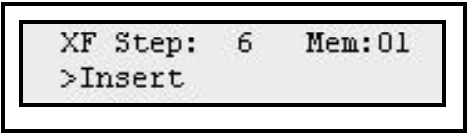
Press (MENU) to confirm.
Step 6: You will be asked to insert by pressing a bump for a channel or memory fader.
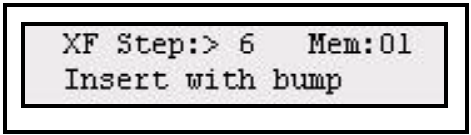
Press (MENU) to confirm. The new step will be inserted after the selected step. You can continue selecting steps and inserting steps. You can press UNDO to skip and revert to the data previous to this action.
Insert a PointQ
Step 1: Open the Sequences menu:
Menu>[Sequences]
Step 2: Use the wheel to select Sequence (1-24) or Stack (XF).
Press (MENU) to confirm.
Use the wheel to select Modify Steps.
Press (MENU) to confirm.
Step 4: Use the wheel to select Step:#.
Press (MENU) to confirm.
Step 5: Use the wheel to select Ins PointQ.
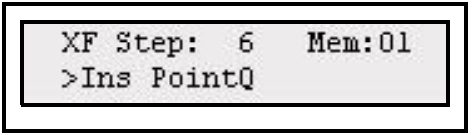
Press (MENU) to confirm.
Step 6: You can select point 0.1-0.9 with the wheel. You will be asked to insert by pressing a bump for a channel or memory fader.

Press (MENU) to confirm. The new step will be inserted after the selected step. You can continue selecting steps and inserting steps. You can press UNDO to skip and revert to the data previous to this action.
Change the content of a Step
Use this function to change the memory or channel content of a step to another content. This is the only way to edit a step referencing to a single channel.
Step 1: Open the Sequences menu:
Menu>[Sequences]
Step 2: Use the wheel to select Sequence (1-24) or Stack (XF).
Press (MENU) to confirm.
Step 3: Use the wheel to select Modify Steps.
Press (MENU) to confirm.
Step 4: Use the wheel to select Step:#.
Press (MENU) to confirm.
Step 5: Use the wheel to select Change.
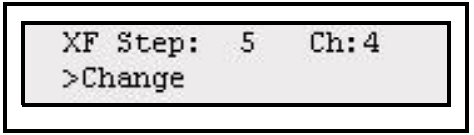
Press (MENU) to confirm.
Step 6: You will be asked to change by pressing a bump for a channel or memory fader.
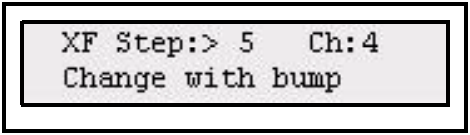
Press (MENU) to confirm. You can continue selecting steps and inserting steps. You can press UNDO to skip and revert to the data previous to this action.
Edit the content of a Stack Step directly
A Stack step can contain a reference to a memory in a specific page, or a unique Stack memory state can be edited directly with the EDIT MEM function. Steps containing single channels must be edited with the normal editing functions.
Step 1: Press EDIT MEM

Step 2: Select Sequence by pressing a bump button, or press STACK. The content of the current step will be selected for editing.

Step 3: Use the intensity faders to edit the memory. Press EDIT MEM to confirm.
Copy a Sequence
| Action | Console | Feedback |
|---|---|---|
|
 |
This button lights up. All buttons with content will blink at full (press CLEAR to exit). |
|
|
When this button is pressed, all possible tar- gets for this copy operation will blink. Empty ones blink at full, occupied ones are dimmed. |
|
|
As soon as the button is pressed, the source sequence is recorded. The console will automatically return to it’s previous fader mode. |
 ...
...  or
or ...
... 
 ...
... Run Modes
There are three run modes for a Sequence: Manual, One Shot and Loop (default). The Stack run mode is determined by the wait times recorded in the Stack steps, if a non-zero wait time is recorded on the last step the Stack will loop back to step 1. Run modes are set from the Sequences menu.
Step 1: Open the Sequences menu:
Menu>[Sequences]
Step 2: Use the wheel to select Sequence (1-24).
Press (MENU) to confirm.
Step 3: Use the wheel to select Run Mode.

Press (MENU) to confirm.
Step 4: Use the wheel to select run mode: OneShot, Manual or Loop.
| Menu choice | Console | Feedback |
|---|---|---|
|
Loop |
Wheel |
The Sequence will loop from the last step back to the first, endlessly. |
|
Manual |
Wheel |
Sequences in this mode use the bump button to advance to the next step. |
|
OneShot |
Wheel |
Runs sequences through one full cycle only. The seq will stop and hold the last step. To prevent the last step persisting on stage record it as a blackout by using an empty memory. |
Step 5: Press (MENU) to confirm. Continue from Step 2 with another Sequence or exit the menus.
Sequence & Stack Times
Each Sequence step can have three times, Up, Down and Wait. In addition to these times there is an overall Rate and Fade time that affect the whole Sequence. These times are set/ changed during playback.
Default Fade Times
Step 1: Open the Set Sequences menu:
Menu>[Sequences]
Step 2: Use the wheel to select a Sequence (1-24) or the Stack (XF).
Press (MENU) to confirm.
Step 3: Use the wheel to select Step Timing.

Press (MENU) to confirm.
Step 4: Use the wheel to select Default Times.
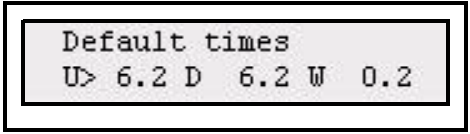
Use (MENU) to step between choices, and wheel to set a value.
| Menu choice | Console | Feedback |
|---|---|---|
|
U> |
Wheel |
Default Up times |
|
D> |
Wheel |
Default Down times |
|
W> |
Wheel |
Default Wait times |
Step 5: Use EXIT to end and exit.
Rate
The RATE button can provide Fade controls for the Stack. This will affect the playback of the whole Stack.
Press RATE (with STACK active).
Use the wheel to set a balance between the fade and the wait time for all steps. Fade 0% means no fade.
Edit step times blind
It is possible to edit the times blind, for each step of a Sequence or Stack. This is done with the Step Timing - One Step function in the Sequences menu.
Step 1: Open the Set Sequences menu:
Menu>[Sequences]
Step 2: Use the wheel to select a Sequence (1-24) or the Stack (XF).
Press (MENU) to confirm.
Step 3: Use the wheel to select Step Timing.
Press (MENU) to confirm.
Step 4: Use the wheel to select One step.
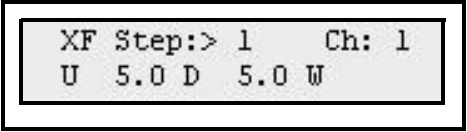
Use (MENU) to step between choices, and wheel to set a value.
| Menu choice | Console | Feedback |
|---|---|---|
| Step:> | Wheel | Select step |
| U> | Wheel | Up time |
| D> | Wheel | Down time |
| W> | Wheel | Wait time |
Step 5: Done. Press EXIT to exit.
Global Time for all steps
It is possible to edit Up, Down or Wait times globally for all steps of a Sequence or Stack. All previous timing information is replaced and cannot be undone.
Step 1: Open the Set Sequences menu:
Menu>[Sequences]
Step 2: Use the wheel to select a Sequence (1-24) or the Stack (XF).
Press (MENU) to confirm.
Step 3: Use the wheel to select All steps.

Press (MENU) to confirm.
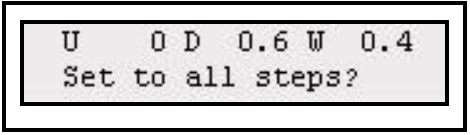
Step 4: Set Global Timing for all steps of the selected Sequence or Stack.

Use (MENU) to step between choices, and wheel to set a value. The “----” means these times will not be affected by the global edit.
| Menu choice | Console | Feedback |
|---|---|---|
| U> | Wheel | Global Up times |
| D> | Wheel | Global Down times |
| W> | Wheel | Global Wait times |
Step 5: Press (MENU) to store.
Press (MENU) to confirm
Step 6: Done. Press EXIT to exit.