Custom Magic Sheet Fixture Symbols
Step-By-Step using Inkscape
- Open Inkscape to start creating a new SVG image
- File>Document Properties... to open the document properties dialog
- Click on the Background color swatch, and set the background color to solid black

- Set the document size to 80.0 x 100.0 px
- Close the document properties dialog
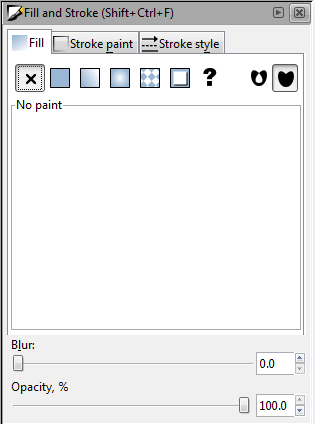
- Object>Fill and Stroke to expose the Fill and Stroke color properties pane
- View>Zoom>Page to zoom to fit the whole document
- Layer>Rename Layer... and rename the current layer to Base
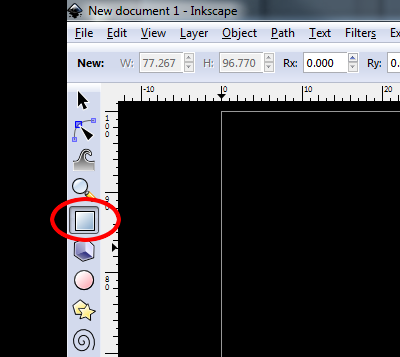
- Select the Rectangle tool from the tool bar on the left
- Click-and-Drag to create a rectangle that fills most of the document
- With the rectangle still selected, select the Fill tab in the Fill and Stroke properties pane
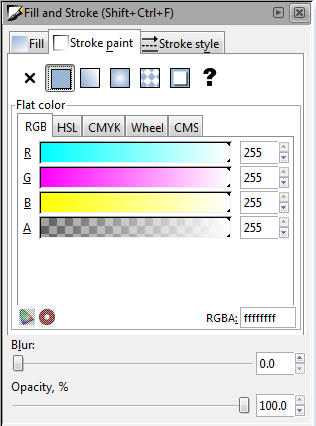
- Set the Fill color to the following solid color

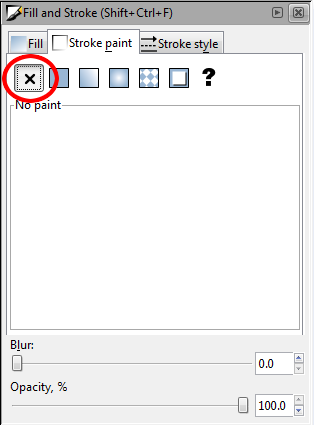
- Select the Stroke paint tab, and set the the stroke to none
- Edit>Copy to copy the selected rectangle
- Layer>Add Layer... to add a new layer named "Outline" (Above current), click [Add]
- Edit>Paste-In-Place to add the same rectangle to the new Outline layer
- Set the Fill color to none
- Set the Stroke color to solid white
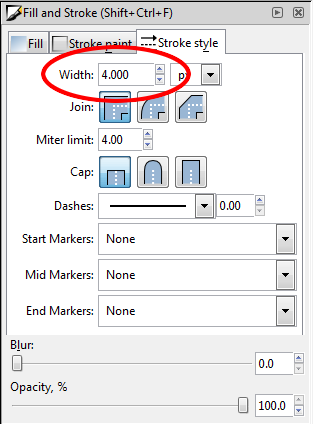
- Select the Stroke style tab, and set the stroke Width to 4.0
- You should end up with something like this

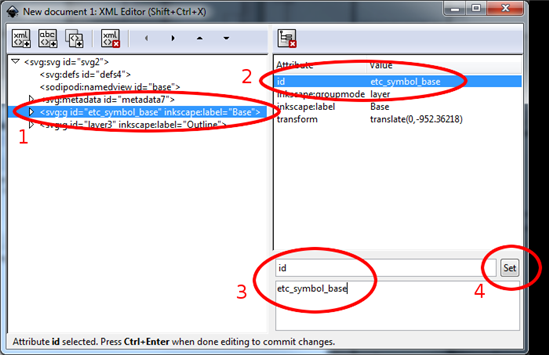
- Now, we need to tag each layer for Eos... Edit>XML Editor...
- In the XML node editor, select the "Base" layer
- In the XML attribute editor on the right, select the id attribute
- Below the attribute editor, change the value of the id attribute to etc_symbol_base and click the [Set] button
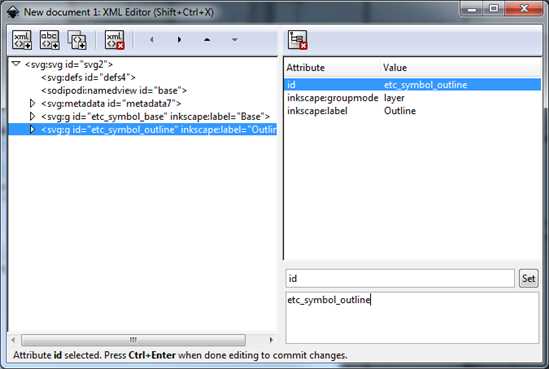
- Select the "Outline" layer and rename its id attribute to etc_symbol_outline
- Close the XML Editor dialog, then Edit>Deselect to clear the selection
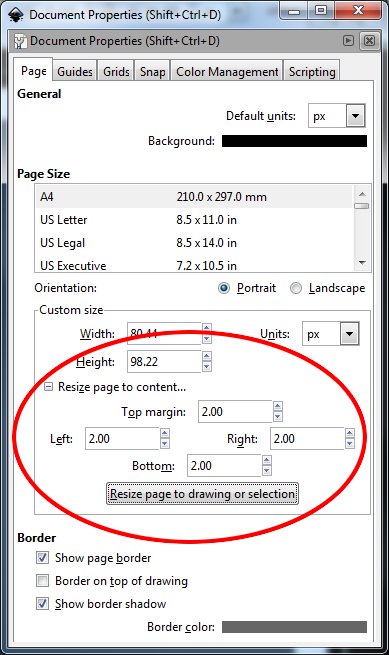
- File>Document Properties... and expand the Resize page to content section
- Set each margin to 2.0 px, and click the [Resize page to drawing selection]
- File>Save and import into Eos!
Advanced
- The only requirement is that you have one root layer tagged etc_symbol_outline and one root layer tagged etc_symbol_base. Anything that is part of either layer will be drawn in the appropriate color. For example, you could add another solid rectangle to the outline layer to show the selection better. (example 2) You can also flip the outline and base layers, if you want the whole fixture to show selection instead instead of the outline. (example 5)
-
The outline section needs to be tagged as etc_symbol_outline0, etc_symbol_outline, and / or etc_symbol_outline2. The base section needs to be tagged as etc_symbol_base0, etc_symbol_base, and / or etc_symbol_base2.
-
Tags can be layered, and they will render in the order listed below:
- etc_symbol_base0 - uses fill color intensity link (not color)
- etc_symbol_base - uses fill color and intensity link
- etc_symbol_base2 - uses fill color intensity link (not color)
- etc_symbol_outline0 - uses outline intensity link (not color)
- etc_symbol_outline - uses outline color and intensity link
- etc_symbol_outline2 - uses outline intensity link (not color)
-
Tags that only link to intensity will cause the base or outline to dim based on the channel’s intensity.
Note: hiding layers in Inkscape will cause them to be hidden in Eos as well
Example Images (click to download)
Example 1 (very simple, result of Step-by-Step tutorial)

Example 2 (larger selection indicator)

Example 3 (alternate dot selection indicator)

Example 4 (Fixture outline, where you can link the fill color to the channel color)

Example 5 (entire fixture shows selection state, can you can link outline color to channel color)

Related Links/References
- Support Article: "How to Import an Image or Symbol into an Eos Magic Sheet"