Setting Up a Loaner CEM3 Processor
CEM3 processors require a configuration to function.
Ensure that power to the rack is disconnected before removing any components. Failure to do so can result in damage to your equipment or personal injury.
Check Functionality
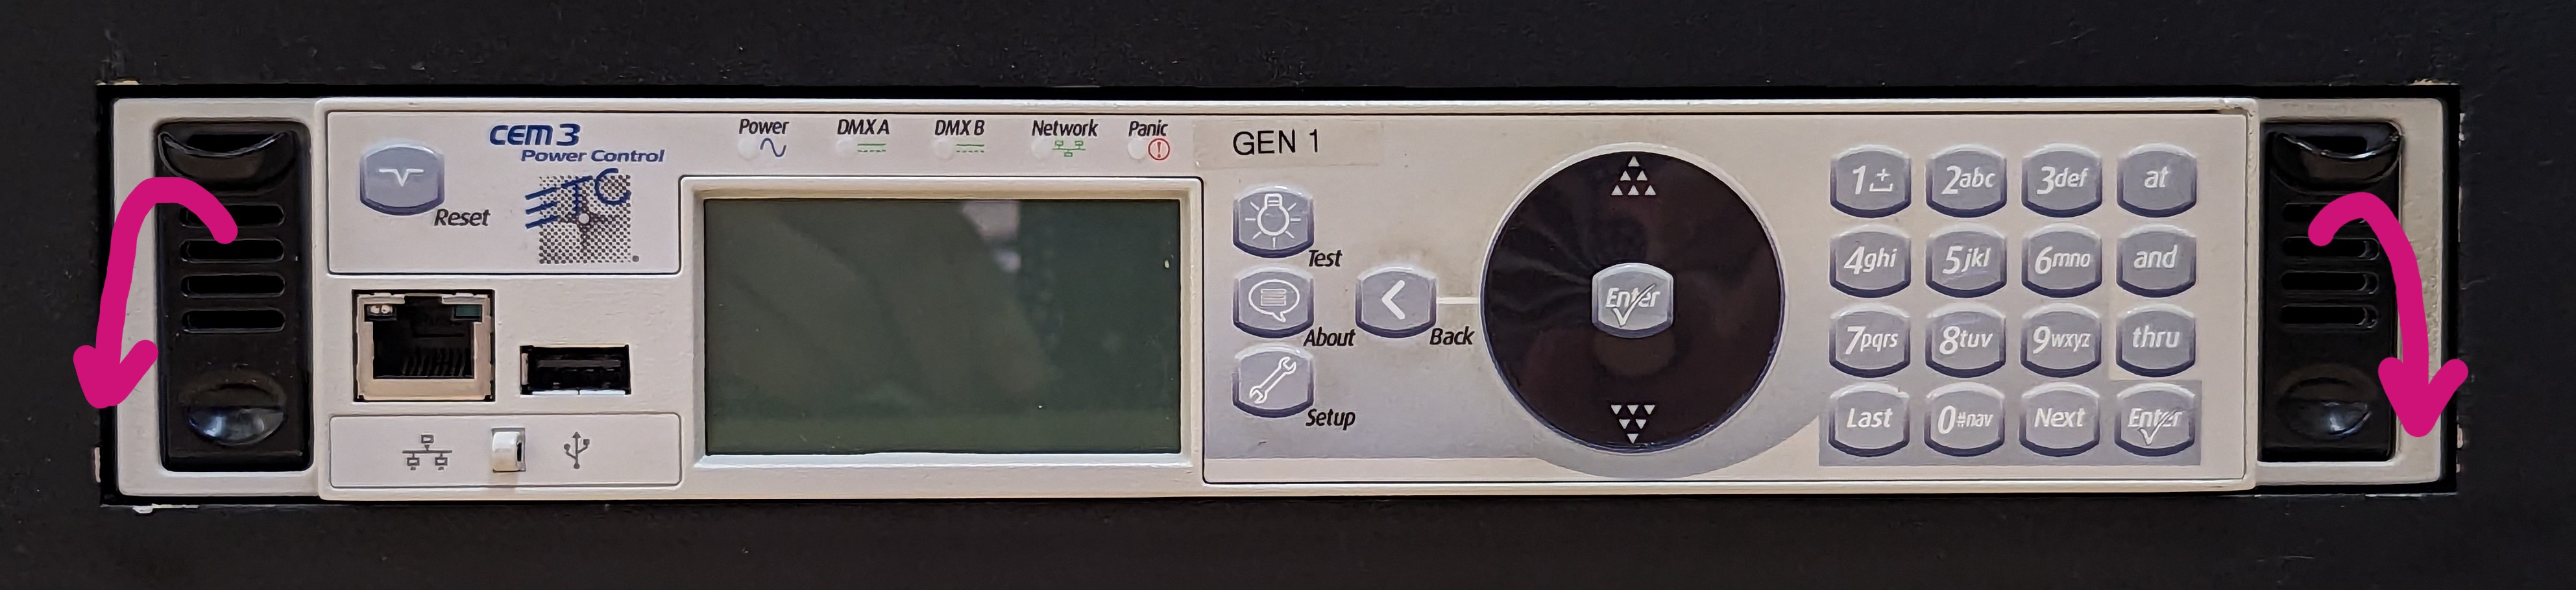
There's a good chance that ETC Technical Services is ahead of the game with a CEM3! If we had a configuration on file or were able to get enough information to build one, ETC may have loaded it to your loaner already. After powering down the rack, simply remove your CEM3 by pulling down on the two tabs on either side and then pull it straight out of the rack. Install the loaner processor in the rack, power it back up, and test for control of your dimmers. If your system works as expected, no further action is required.
Load from Backplane
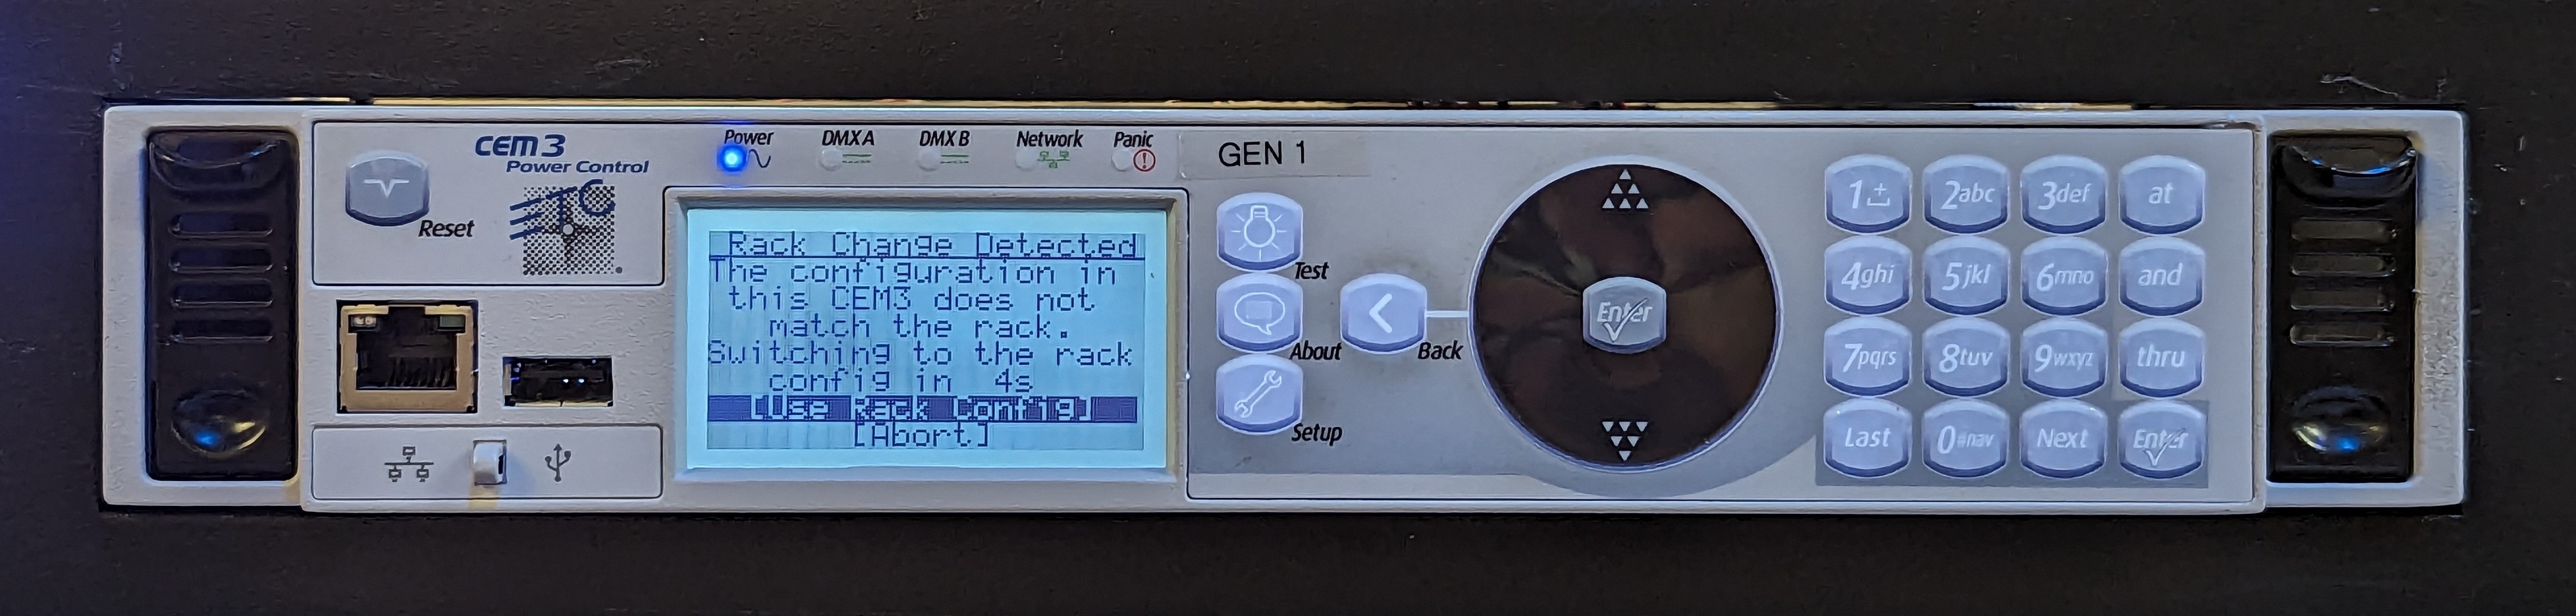
The rack's backplane stores a backup copy of the CEM3 configuration. When the loaner is installed, it should automatically read this configuration and present a countdown before overwriting the CEM3's internal configuration with the backup copy stored in the rack. Simply let the countdown tick down to zero or select [Use Rack Config].
Load from USB
If the CEM3's ability to communicate with the backplane is compromised or there is no backup copy stored in the rack, this message may not appear. In this case, you can load the configuration from USB if you have a backup. Follow the instructions in How to Save and Load a Configuration to a CEM3 Processor.
Quick Rack Setup
If you cannot load a configuration from the backplane or via USB, you will need to perform a quick rack setup to write a new configuration from scratch.
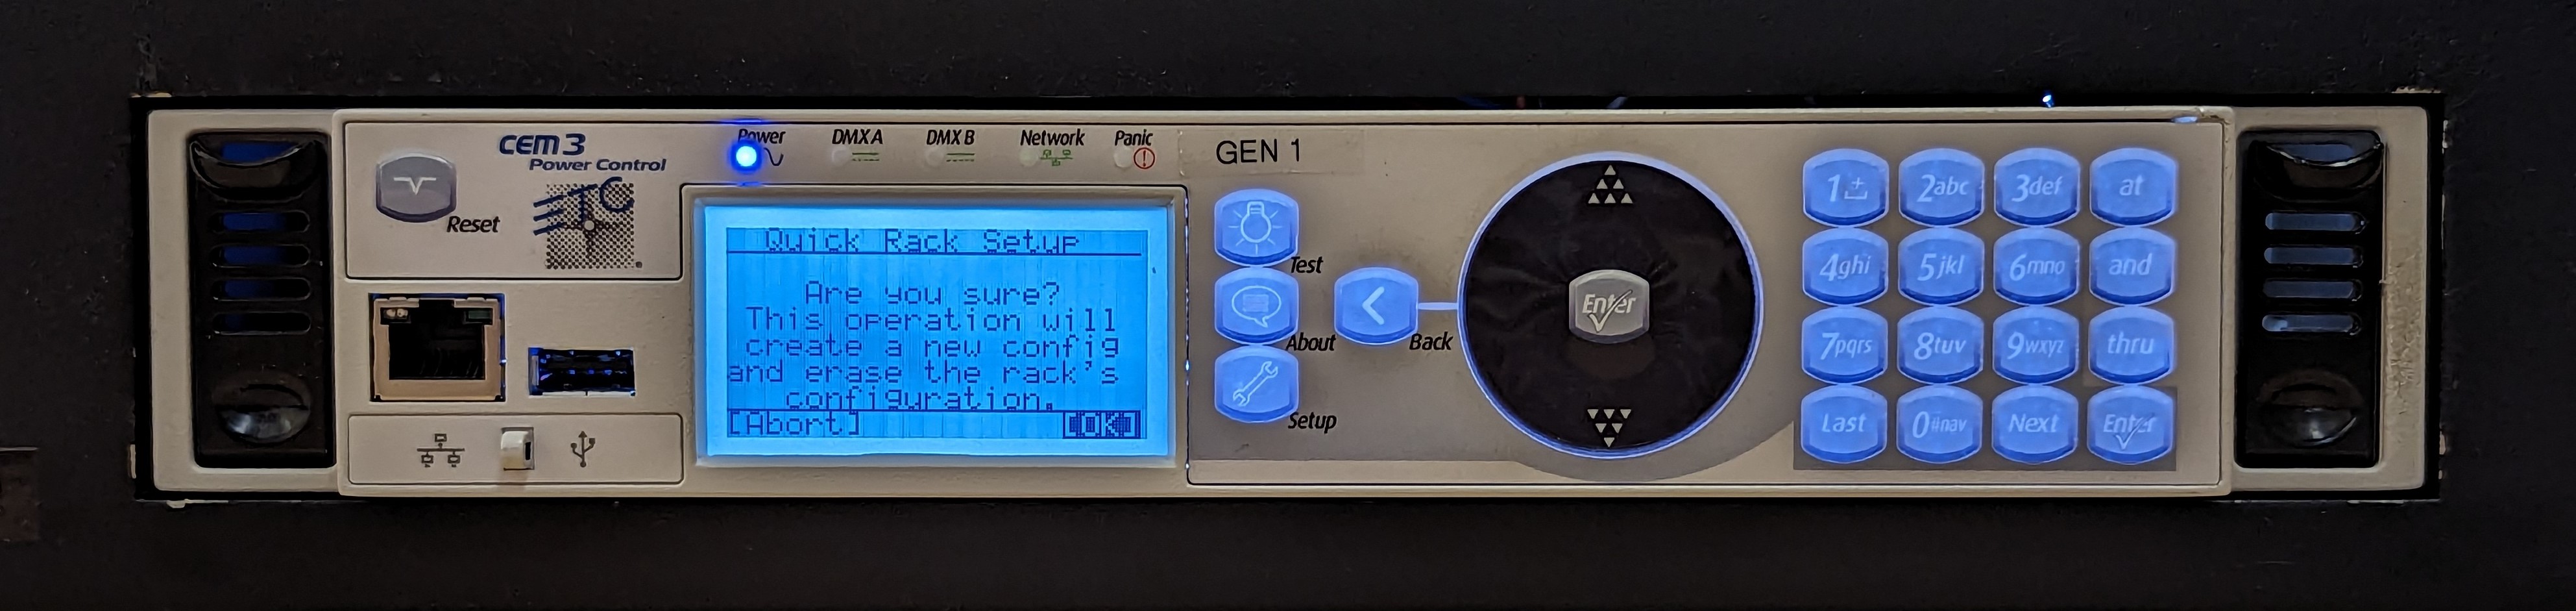
Press [Setup], then navigate to [Rack] > [Quick Setup]. Select rack type, module type, balance and patch according to your system. If you have multiple module types, select the most numerous type, as the rest can be changed after completing the quick setup. At the end of the quick setup dialog will be a prompt to overwrite the existing config with the new one. Select [OK].
Advanced Rack Setup
If your rack has multiple module types, these will need to be assigned after completing a quick rack setup. Press [Setup] and navigate to [Dimmers]. Use the number keys, [And] and [Thru] to select the dimmers you wish to modify. Change their module type to match what is in the rack. Other settings such as firing mode can also be changed on this screen if necessary.
If you have multiple systems of Sensor3 racks, you may need to set the system number of the rack following a quick rack setup. This setting can be found in [Setup] > [Rack] > [System Number].
Other Situations
If you have a situation not described above, or you need help following these steps, please contact ETC Technical Services.