Configuring the Expert Touch Application
Requirements
Adding a Touch Interface
Add a Touch App interface by clicking the 'Add' button in top right of the Canvas area, select Devices, the choose Touch App.

Place the interface within the space you wish to control.
An interface located in a parent space has control over all its subspaces; however, an interface located within a subspace can only control that subspace.
Configuring the Interface
As soon as an interface is placed, the configuration wizard will launch.
- First choose a theme, the theme defines the overall layout of the interface.
- Next, choose a skin, the skin defines the appearance of the buttons for the theme.
- Now choose the pages you wish to appear on the interface.
- Page selection is based on the available controllable spaces. Each space will exist as it's own individual page, with space specific controls for Scenes, Intensity, Overrides, CCT, and Color Control.
Space Controls
Specific space controls can allow for a multitude of control options.
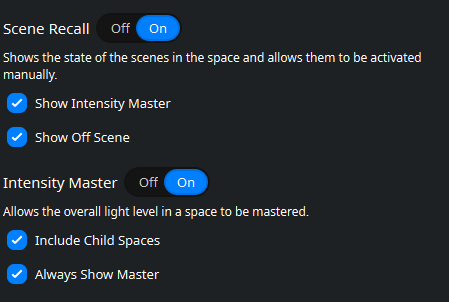
Scene Recall and Intensity Master
Scene recall allows any scenes affecting this space to be controllable from the interface.
You cannot select which scenes appear.
'Show Off Scene' adds an off button to the scene control tab, allowing a user to turn off a running scene.
Enabling the intensity master allows users to control intensity across the entire space.
Additional intensity control can be added to include child spaces.
Override Controls
Override controls allows a user to override the current running scene by affecting intensity, CCT, or Color.
Controls for each attribute can be configured individually and can include child spaces if needed.

Additional Page Options
Once individual space pages are set up, you can add project-wide pages that allow you set a home screen, show tags, and view the controller schedule.
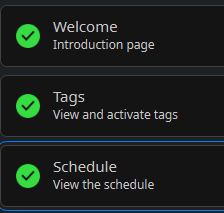
Welcome
The welcome page is the home page of the interface and will be the first page shown to an user when the interface is viewed by default (this can be changed later).
Clicking the gear wheel allows users to configure Zone A and Zone B of the welcome screen.
Zone A and B divide the interface allow for multiple data points to be added to a welcome screen.


The Welcome Page can be configured to show a number of different items in each zone.

- Nothing - nothing will be display
- Text - is free type field and automatically sized based on the amount of text present.
- Image - allows a user to import an image on the screen (.png, jpeg, .bmp).
- Scene - will show all scenes for a selected space
- Tag - will allow the selection of a single tag to be displayed.
Tags
Tags will show all project related tags.
Shown tags can be configured on a tag by tag basis by clicking the gear wheel icon.
Schedule
Schedule will show any schedule event within the space.
This is view-only calendar, new events cannot be scheduled and existing event cannot be edited.
If event editing is required, those change must be made within the Express application.
Settings
Settings allows the default page of the interface to be changed from the Welcome screen to a number of different controllable attributes.
Tags, Schedule, Welcome, Scene Recall, Intensity Master, Intensity Override, and Color Override can all be set as the default page.
Once complete click the green 'Finish' button to complete the layout.
Connecting the Touch App
Once a interface has been created, you'll need to authenticate the touch app with the running configuration on the controller.
- Connect your device to the wireless network. Your device and XPC controller must be connected to the same network for this connection to work.
- Open the Touch App
- First time users will need to pair the app with your controller. Choose "Pair with controller" to view a list discovered controllers.

- Select the controller you wish to pair to.
- The user will be prompted to authenticate. Authentication can occur is two ways:
- Method One: Controller: By pressing and holding the 'run' button on the front of the controller for 5 seconds.

- Method Two: WebUI: Authentication can also be performed via the XPC’s web interface by clicking the Pair button in the upper-right corner of the Home tab.

A secondary popup will show, requiring users to click 'Authenticate'

- Method One: Controller: By pressing and holding the 'run' button on the front of the controller for 5 seconds.
- Once authentication has completed successfully the device will download the configuration from the controller and the touch interface should be ready to use.