Replace timeclock battery in Paradigm Architectural Control Processor (P-ACP)
Issue
My Paradigm Architectural Control Processor (P-ACP) has its date and time reset upon a power cycle, and/or may be displaying an "Internal Clock Error / Low Battery" error on the display.
Explanation of Issue & Solution
This occurs because it's timeclock battery, which powers the internal timeclock on the units control card is fully drained. The battery naturally drains over time, and when it's empty resets the date/time on boot. The solution is to replace the battery, and then correct the time after the unit boots up. Timeclock batteries are considered consumable items, and thus are not covered under ETC's warranty. Typically the battery will last for many years before being drained. Units disconnected from power, such as those in a dealer's loaner inventory, will drain more quickly.
A dead timeclock battery does not result in losing any Paradigm configuration data. That information is stored on a non-volatile compact flash (CF) card.
Replacement Steps
P-ACPs use a non-standard battery that isn't commonly found at local retailers. A new battery can be ordered through an ETC Authorized Dealer and ETC's part number is BT105-F. The steps below will walk through how to replace the battery.
- Power off the DRd or ERn rack housing the P-ACP.
- Remove the P-ACP from the rack.
- Using a number #2 Phillips screwdriver, remove the two screws on the top edge of the rear of the P-ACP, allowing the top lid to slide out of place.
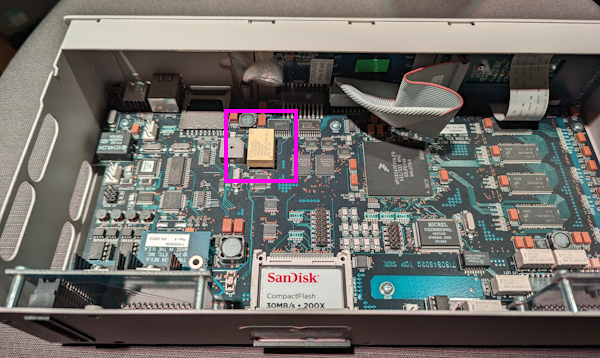
- The battery is a yellow rectangle cube-like component (outlined in magenta in the picture below). The placement of the battery may vary some from the picture depending on the P-ACP hardware vintage, but it is the only component that looks this way.
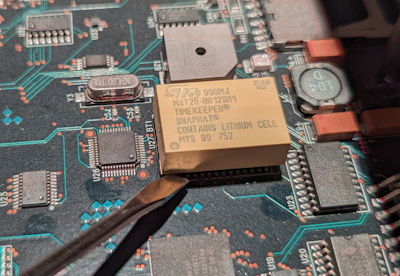
- Carefully remove the battery by lifting along the edges of the battery. The battery is firmly socketed, so a flat tool such as a small flat-blade screwdriver or spudger can be useful in prying it off. Use extreme caution to not damage any other components in the process!!!
- When the battery is removed, the small "platform" the battery was socketed into will be exposed.
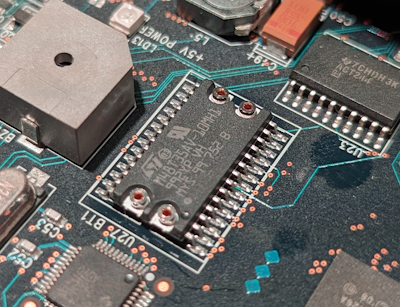
- Insert the new battery in place of the old, firmly pushing down until you feel it click into place. There are four pins on the battery that socket into the holes shown in Step 6, and small plastic tabs that help align the battery with the "platform". The battery is keyed. The dot in the corner of the battery should align with the shiny dot on the socket as shown in the image above.
- Restore the lid and screws holding it on
- Insert the P-ACP back into the rack, and power on the rack
- After it has fully booted change the date and time to the correct values.