Element Console Not Powering On
- Last updated
- Save as PDF
Symptoms/Issue
Console is not powering on.
Explanation of Issue
There are several reasons a console will not power on. Check in order to rule out easy fixes:
- Check the rocker power switch on the back of the console to be sure that it is switched to the ON position ( — ). The ON position should be pressed down.
- Check the power cable to the console. Power cable will be a standard IEC cable commonly used for computers. Replace the power cable with a known-working cable. If the console powers on with a different cable, then the original cable is likely bad.
- Check the mains power from the wall outlet. Plug in a lamp or other device to make sure there is power. If a multimeter is available, set the multimeter to AC and look for the appropriate voltage to your country's mains across hot and neutral. If power is not present, check breakers.
- If the above are good, then more involved troubleshooting is required. If you are comfortable with digging into the guts of a computer, then proceed to the next section. If not, contact an ETC Authorized Service Center for a repair or ETC Tech Services to begin the RMA process.
Testing Face Panel Power Switch
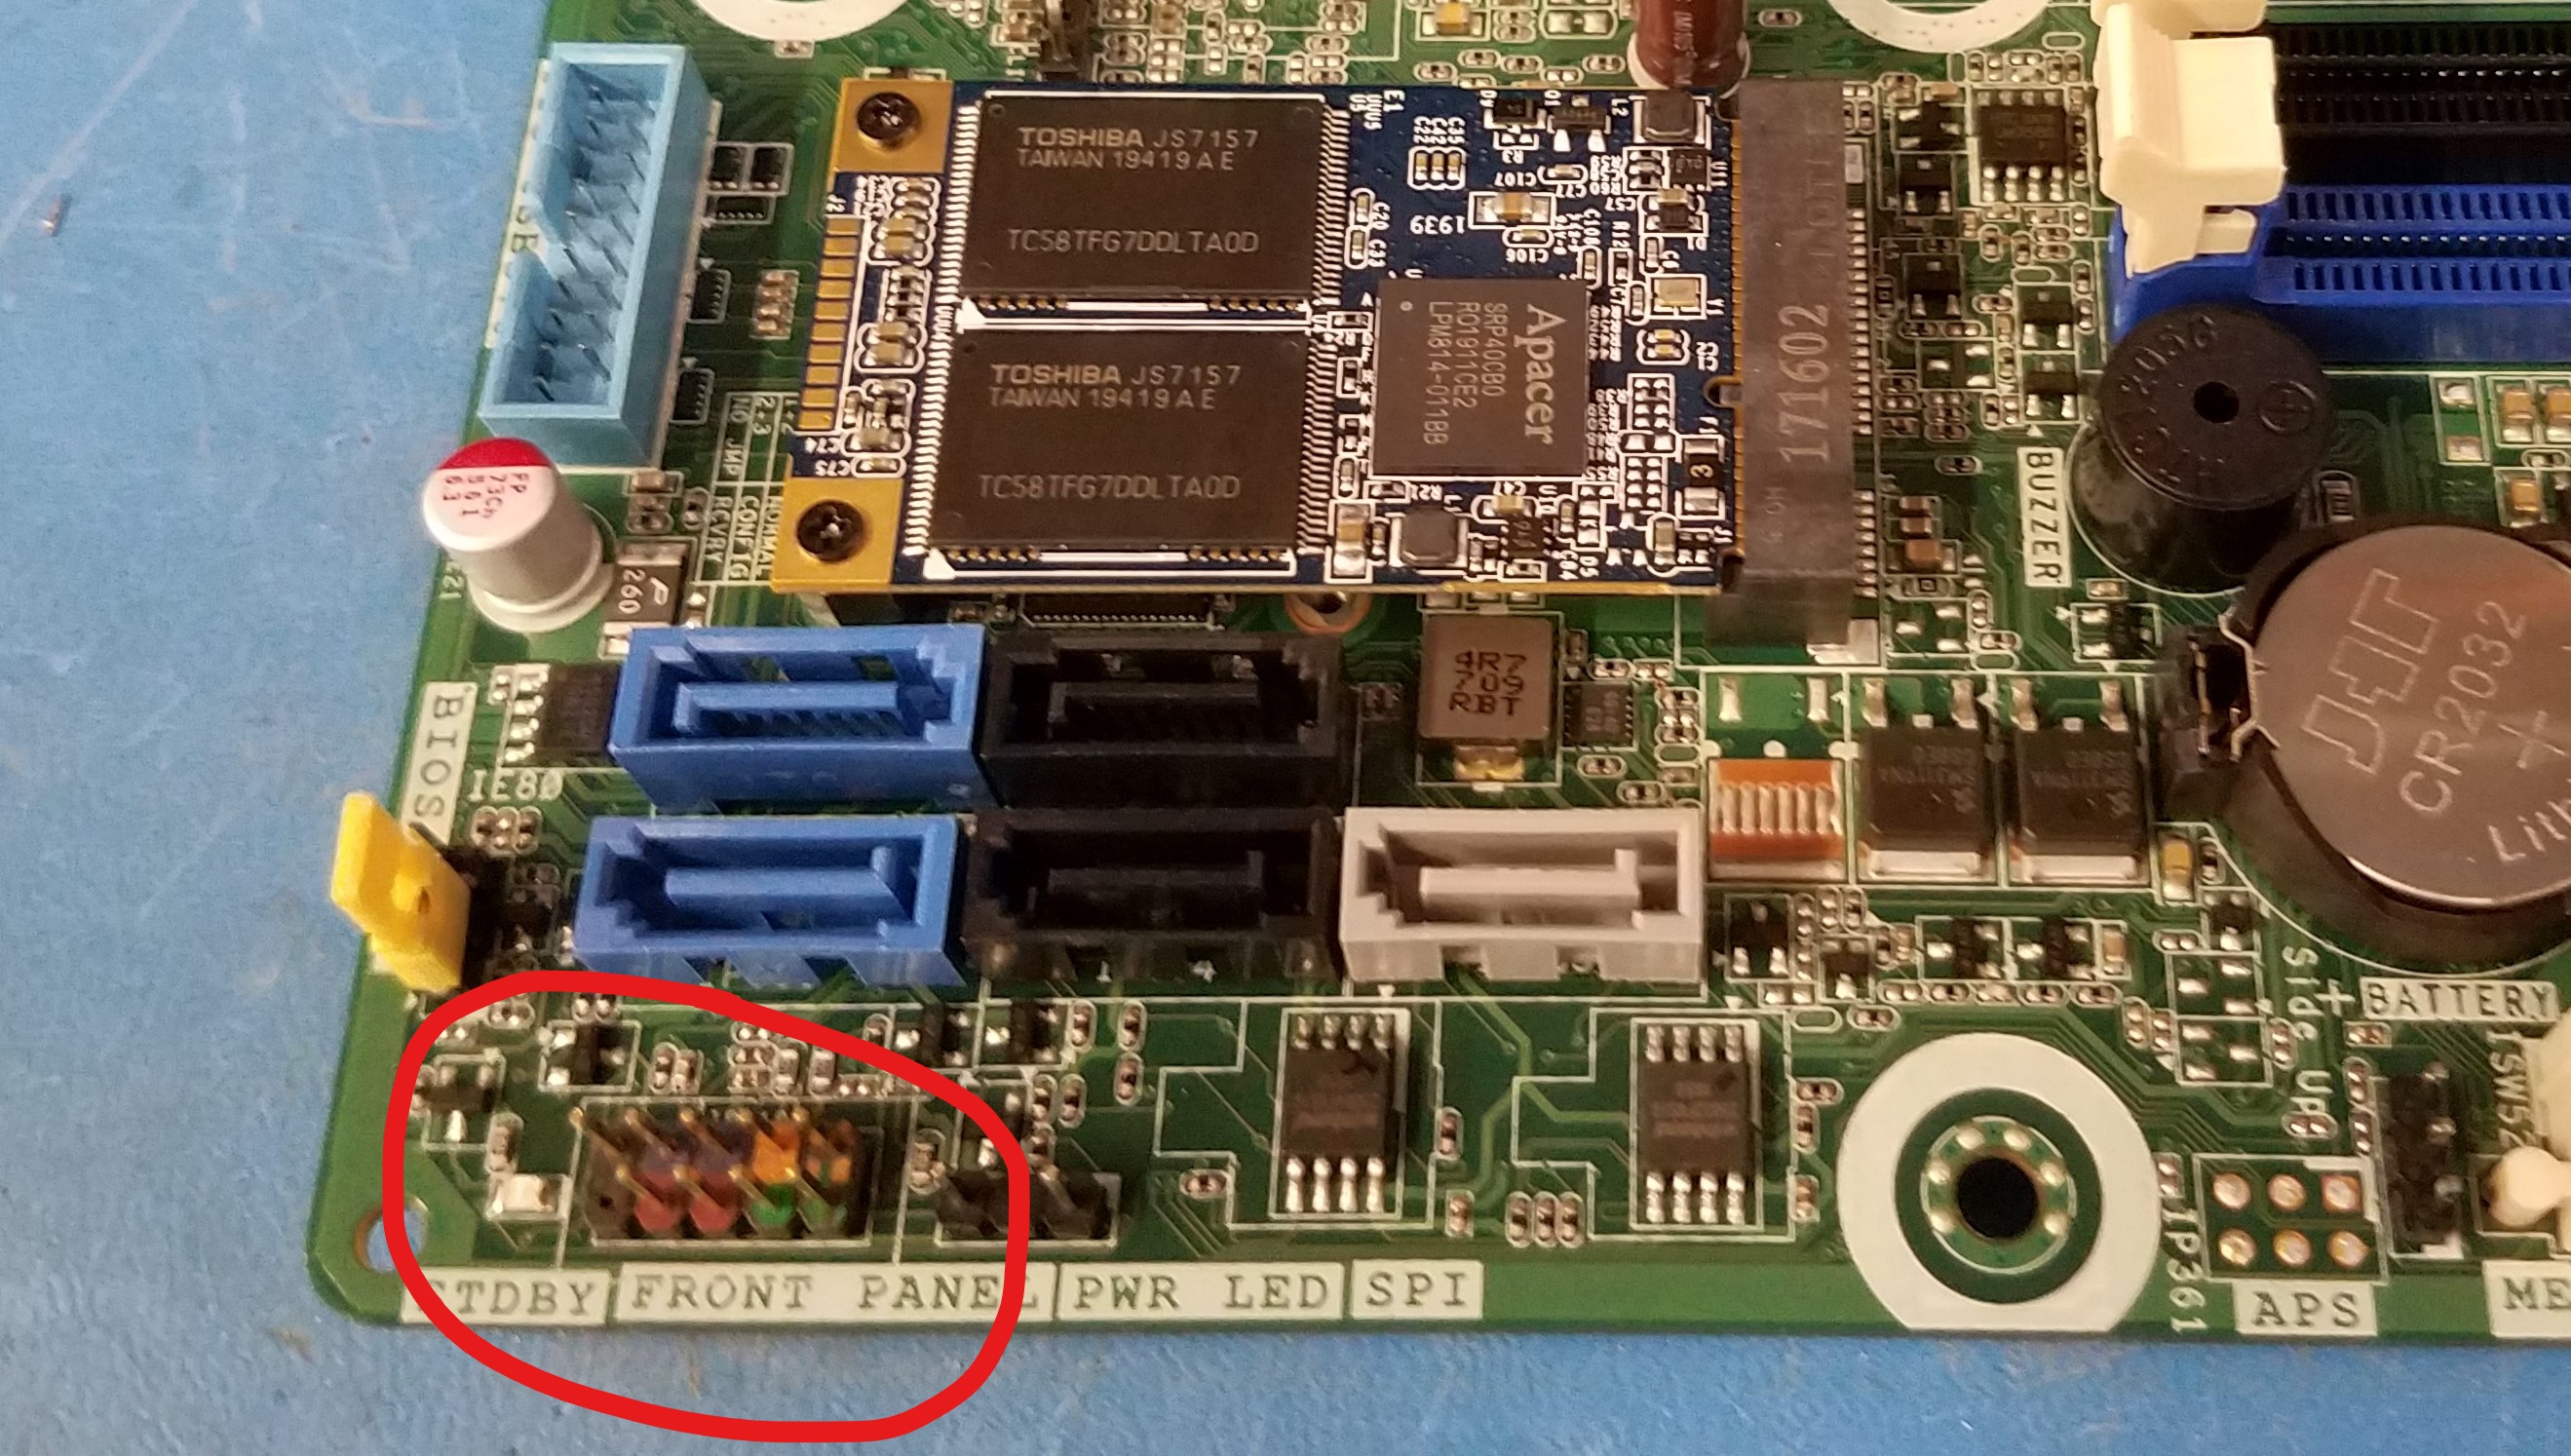
To rule out the face panel power switch, first ensure that the harness running to the power button is not disconnected. If it is connected correctly, unplug the 8-pin wire harness from the motherboard. With the power supply plugged in and the rocker switch ON, use a small flathead screwdriver or another metal object to short the two red pins located in the circled portion of the picture.

Image from an Aaeon motherboard
If the console turns on, the face panel power switch may be bad.
Using a Second Power Supply to Troubleshoot
If you have access to another functional power supply, that will allow easier troubleshooting, as the second power supply can be swapped in temporarily to see if the console powers on. If the console powers on with the known-good power supply, then the console's power supply has failed and requires replacement.
In consoles with an Aaeon motherboard (check here to see if your motherboard is a Windows7 Aaeon board), there should be a green LED on, indicating the presence of standby voltage as long as the power supply rocker switch is ON. If using a multimeter in DC mode, there will be no power on any of the individual wires coming from the power supply except the purple wire (+5V).
Press the power button on the console face panel and look at the standby LED. If the LED appears to dim slightly, or even blink several times, when pressing the power button, then the standby voltage may be drooping enough to prevent a full power-on. In some cases, the standby voltage rail takes time to "charge". If the console has been plugged in for at least a half an hour, the console may turn on. This is indicative of a failing power supply and requires replacement
Press the power button on the console face panel. Watch the CPU fan for any activity (slight jittering, turning on full, nothing, etc)
If the CPU fan jitters but does not turn on entirely, the CPU voltage supply may be bad. To check this, unplug the 4-pin (2 yellow, 2 black) CPU power cable from the motherboard. Turn the power supply rocker switch to OFF, and unplug the 24-pin power cable from the motherboard, as well as the power cables from the I/O card, the face panel, and the hard drive (if present). Make sure the power supply rocker switch is OFF. Unfold a paperclip and insert each end into the 24-pin power cable GREEN wire and a BLACK wire. Turn the power supply rocker switch to ON. The power supply should now turn on. A multimeter can now be used to check the voltages of each wire. The wires in question will be the 4-pin CPU power cable. Reading from yellow to black, the voltage should be +12VDC. If that voltage is missing, then the power rail to the CPU has failed and is preventing the console from powering on. Replace the power supply.
If +12VDC is present on the 4-pin CPU power cable, check the voltages of the 24-pin power cable. The important voltages to check will be:
- Orange: +3.3VDC (+3.25V to +3.35VDC)
- Red: +5VDC (+4.9V to +5.1VDC)
- Yellow: +12VDC (+11.85V to +12.15VDC)
If any of these voltages are low or missing, the power supply is failing. Replace the power supply.
If all voltages look good, the problem may be elsewhere. Please contact an ETC Authorized Service Center or ETC Tech Services to begin the RMA process.
